Adobe recently announced a new addition to our mobile apps - Photoshop Fix. Fix is aptly named - it's all about retouching and pixel pushing, with controls for cropping, image adjustment, healing, smoothing, painting, blurring, vignetting and even liquifying.
I've been playing around with a pre-release version of Fix on my iPad and I thought a share a series of info-torials outlining some of the aspects of Fix. In this first project, we're going to look at some of the correction tools for cleaning up and improving an image. Coming soon, two other projects, one focusing on some special functionality of the Liquify tool and the other showing a workflow between Photoshop Mix and Photoshop Fix.
My workflow here varies (and I'll be more specific in each example), but generally starts in Lightroom Mobile and then moves to PS Mix or PS Fix, or both. Chances are though, that you might find yourself accessing images from your camera roll, instead.
The release version of Fix will also be on the iPhone, where I do the majority of my mobile photography.
Image Analysis
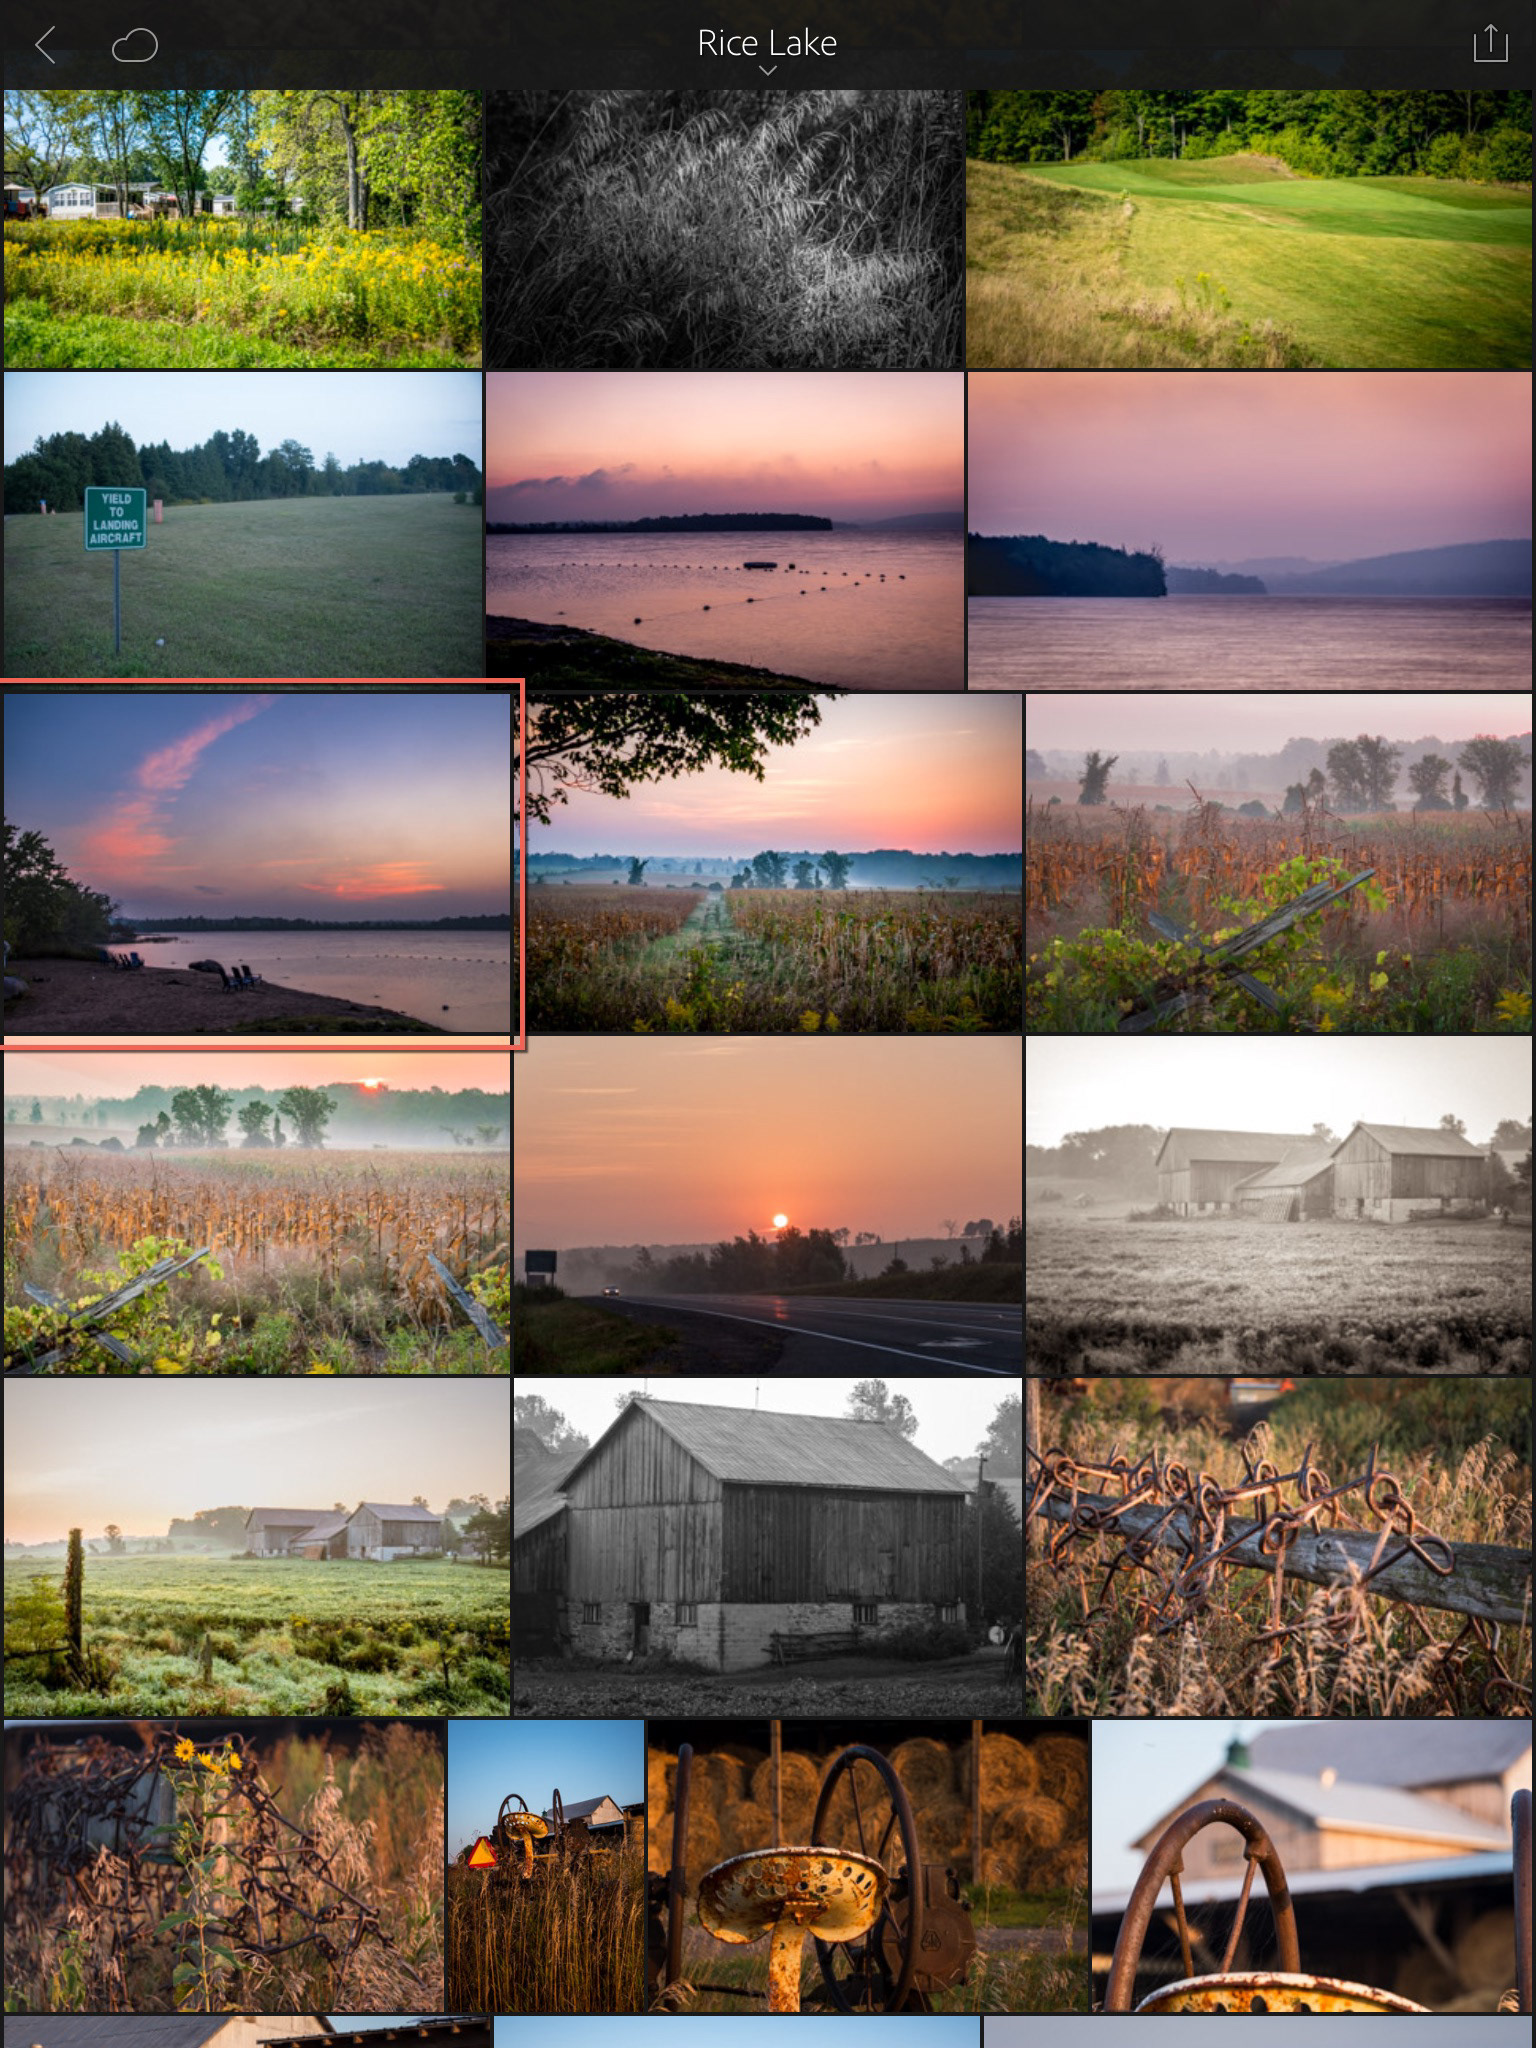
This example (highlighted in red) has already been processed in Lightroom, but on closer inspection, I noticed some litter in the scene, and thought the color of the sunrise could perhaps be more enhanced. I also decided - after the fact - that the buoy line in the water was very distracting. So, a perfect candidate to test out some of the Photoshop Fix retouching tools.
A quick tap on the image in Lightroom Mobile to open the file, then another tap on the Share icon, gets me access to Open In ... and choosing Photoshop Fix.
Add screen grab and comments about the Edit In functionality within Lightroom.

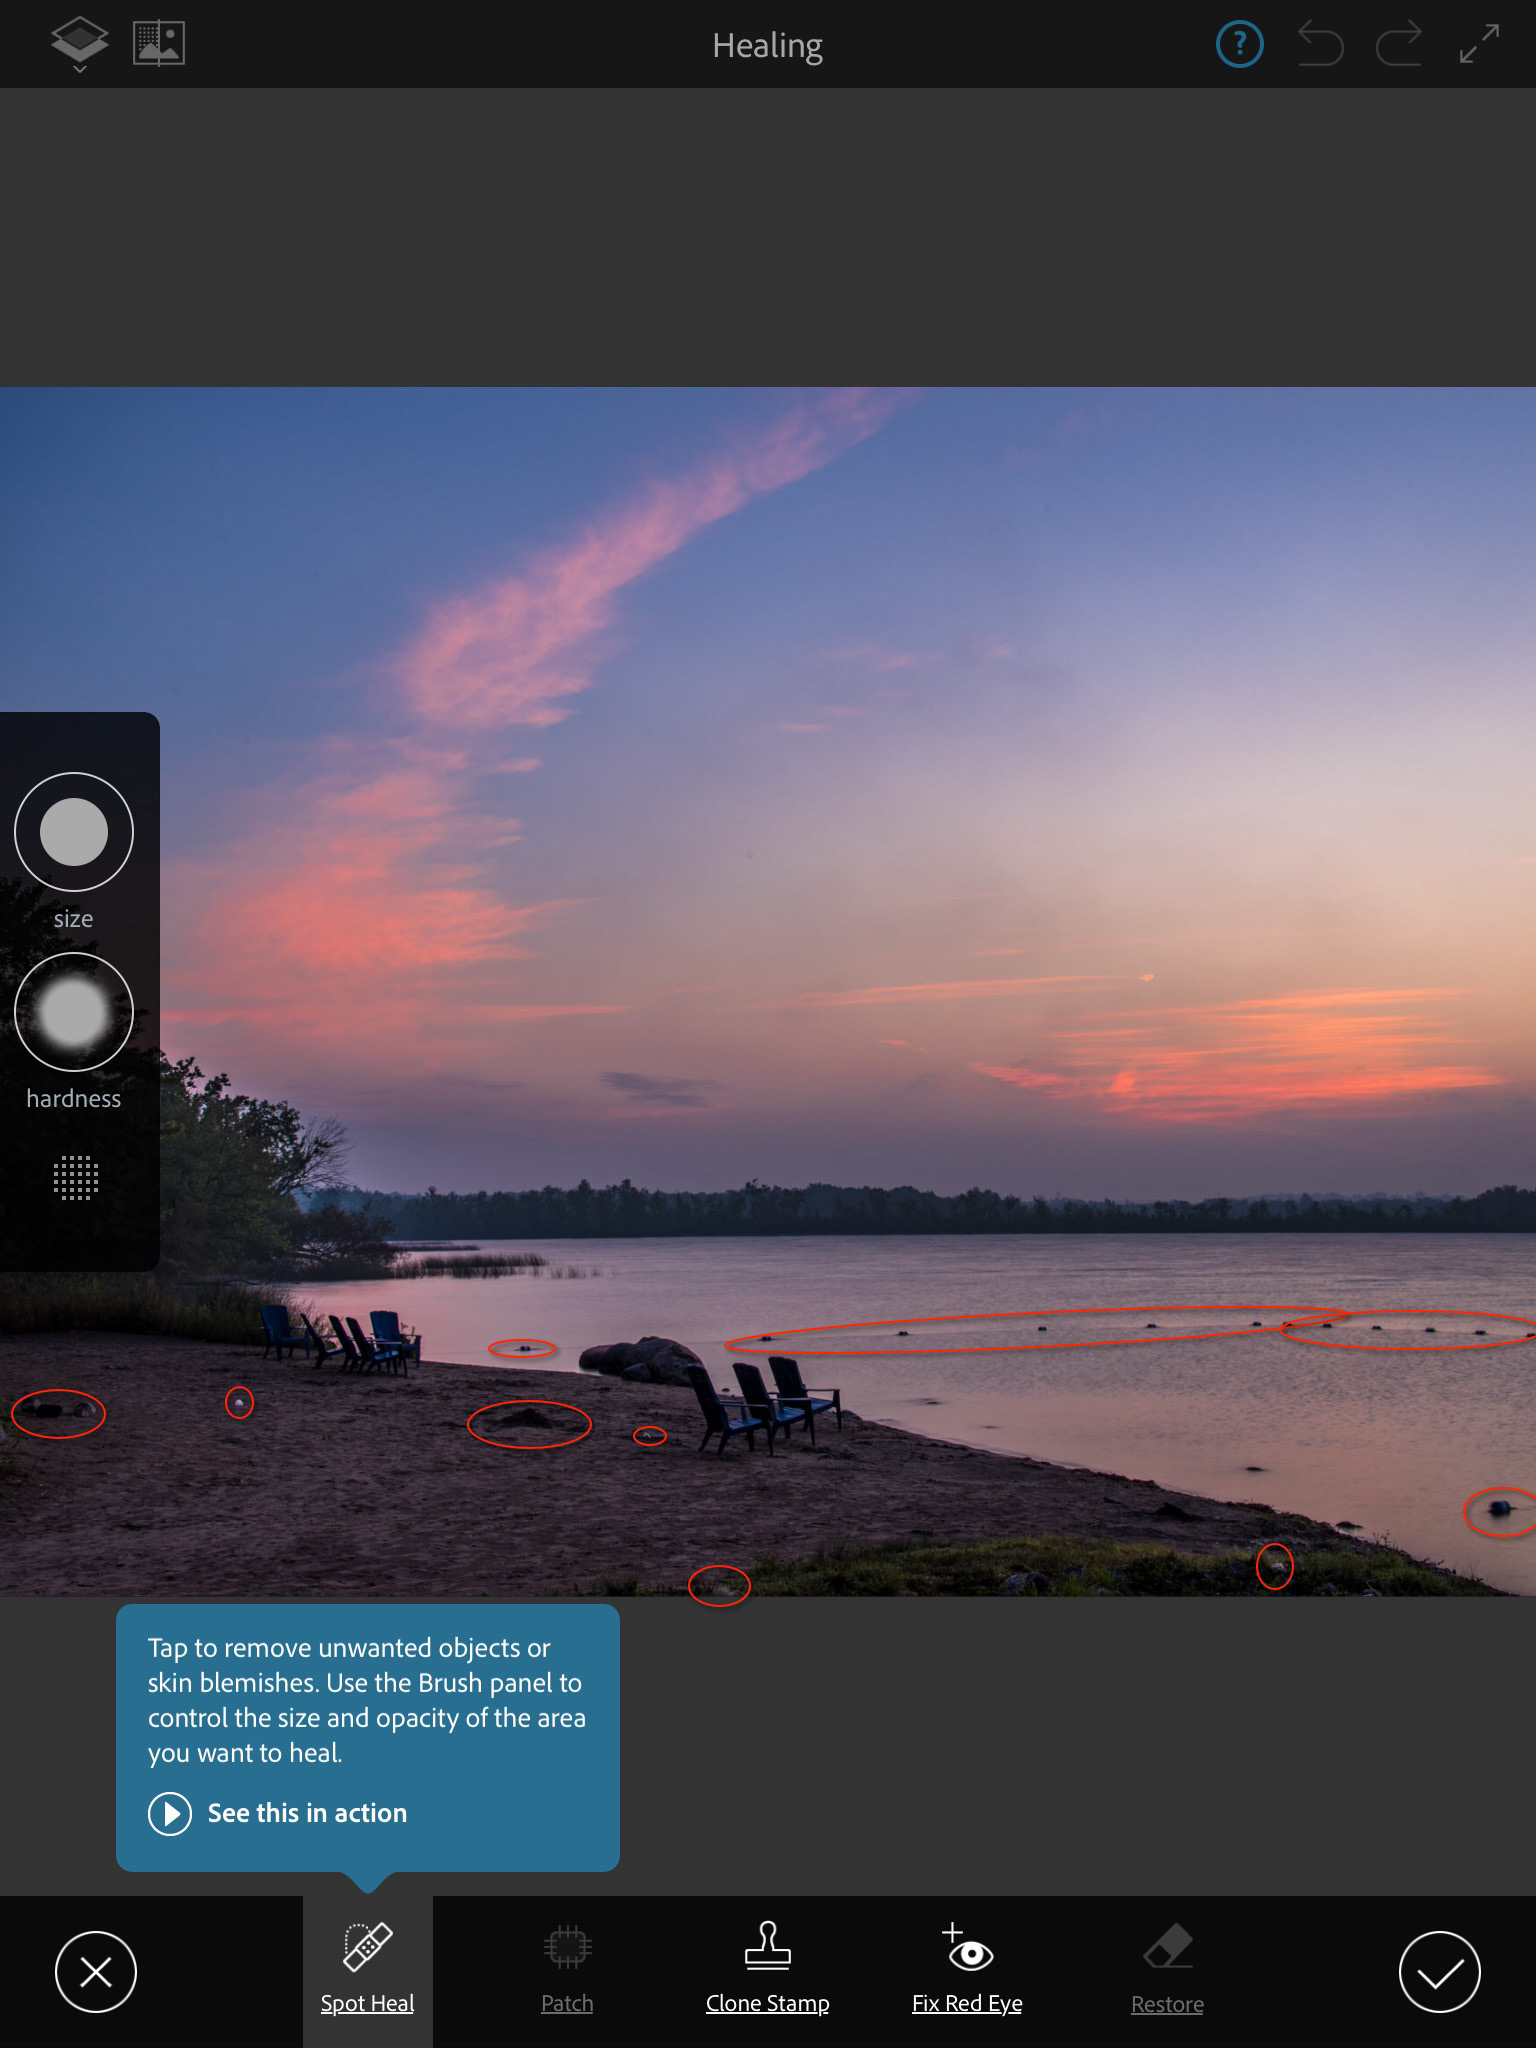
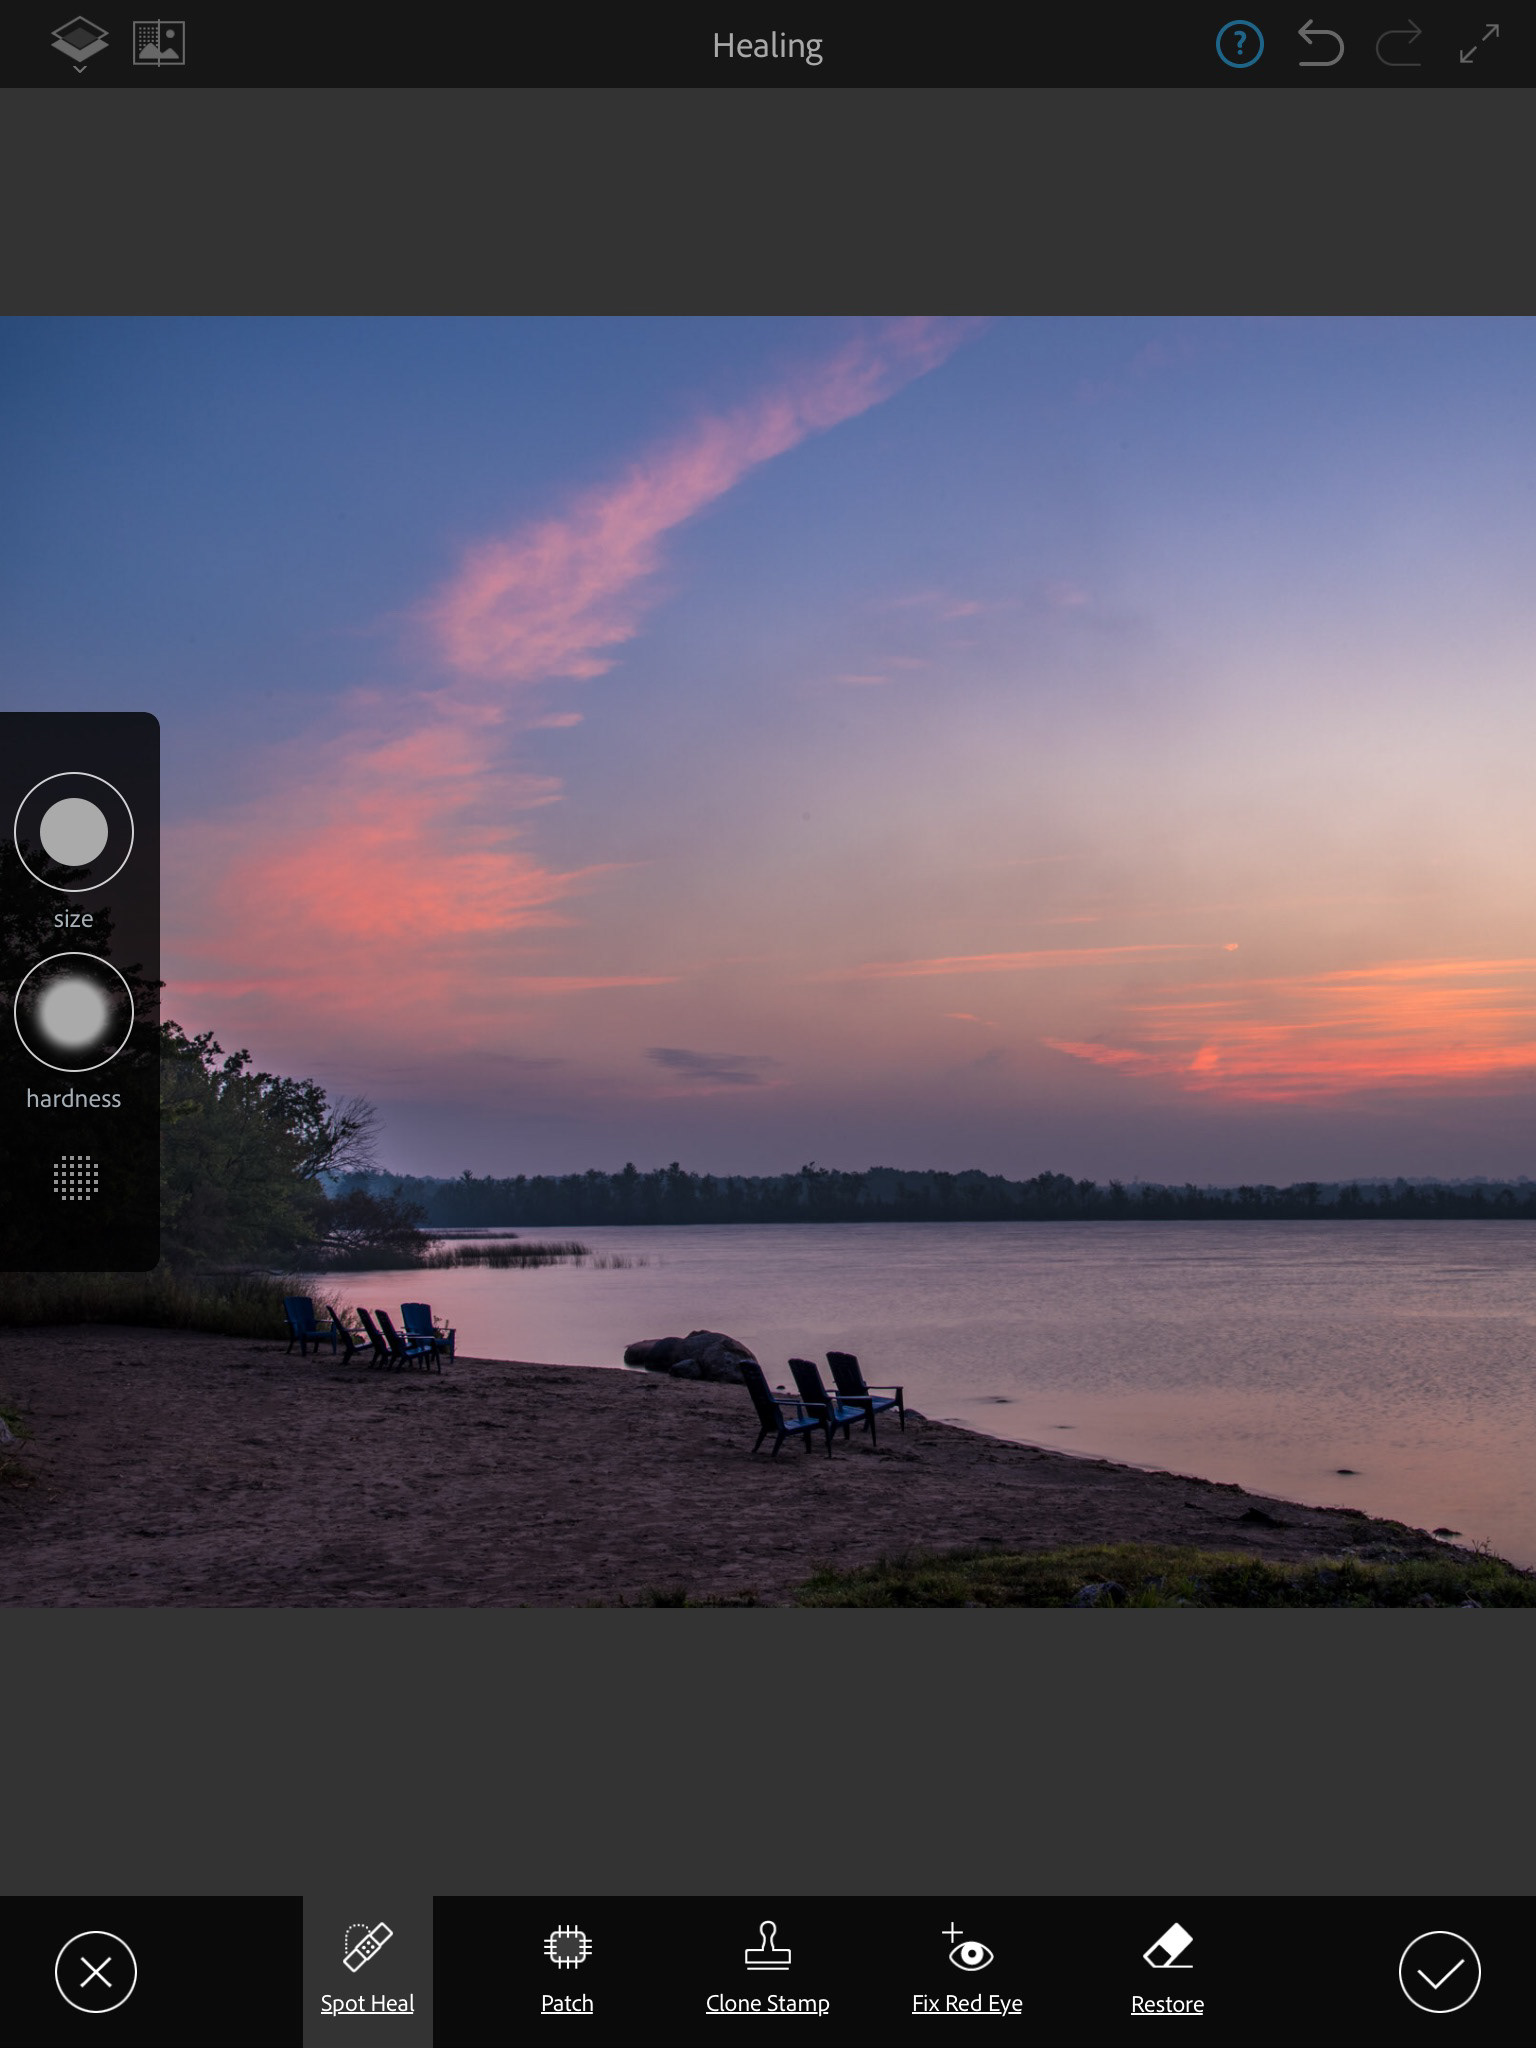
Ease of use is the mantra of all of Adobe's new mobile apps, and Fix is no different. Once the image opens in Fix, I tapped the Healing icon on the tool bar at the bottom of the app.

Non-destructive editing is also a key feature. While not immediately obvious, Photoshop Fix makes use of layers to ensure your edits can always be changed, or even removed entirely.
At the top left of the app are two icons. The first icon is actually a layer icon and it controls overall visibility and opacity of the retouching layer. The second is a quick compare option. Press and hold the icon to see the image without the spot healing, lift your finger to see the retouching again.
On the left side is the Brush panel where you can control the size and softness or the brush. When using tools like Spot Healing, you can also enable a red mask to see where you've "painted".
On the left side is the Brush panel where you can control the size and softness or the brush. When using tools like Spot Healing, you can also enable a red mask to see where you've "painted".
If you are a Photoshop user, you'll quickly recognize the options along the bottom: Spot Healing, Patch, Clone Stamp, and Fix Red Eye. The Restore option let's you paint back over an altered are, to restore that spot to its original look. Basically, you are erasing the retouching work where you paint.
The visual problems in this image can easily be corrected with Spot Healing. I've circled all the things I want to fix so you can easily see them.
Cleaning up the Beach
Just like Spot Healing in Photoshop, this process is very easy.
I adjusted the size and softness of the "brush", used a pinching motion to zoom in and then simply tapped the small areas that needed repair. For larger areas, it was just a matter of dragging my finger over the problem and letting PS Mix do the rest. And it worked very well.
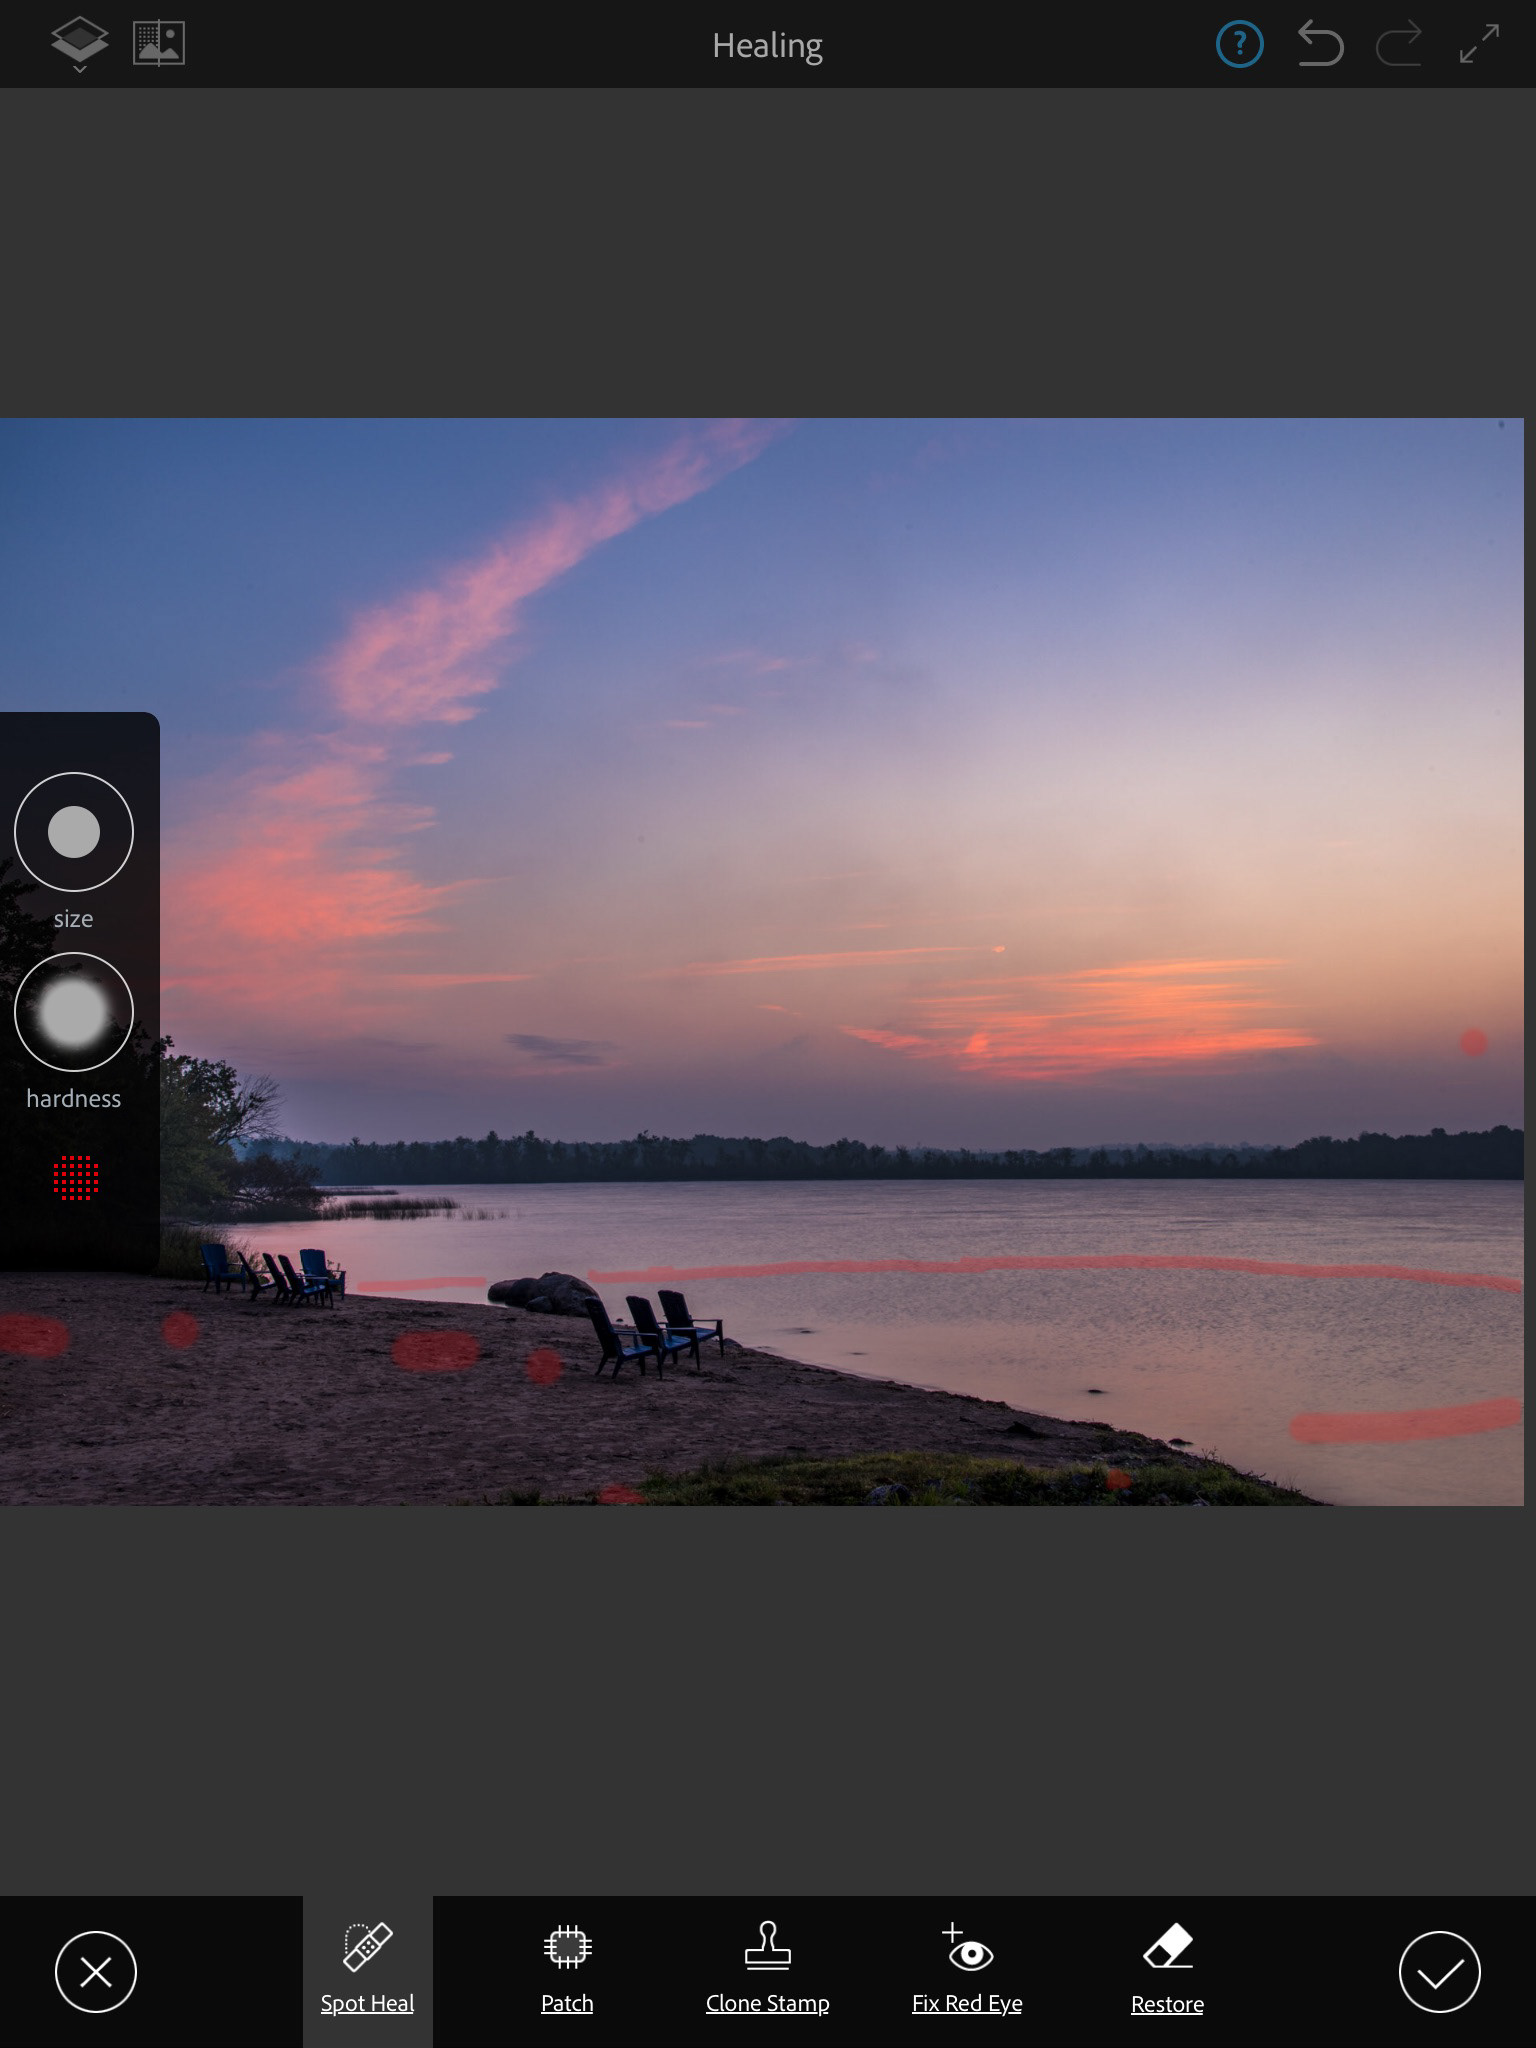
By turning on the Mask (bottom icon in the Brushes panel) I can clearly see all areas that I've worked on using the Spot Healing tool. This can be very handy if you need to return to an image at a later time.
Retouching (spotting) complete!
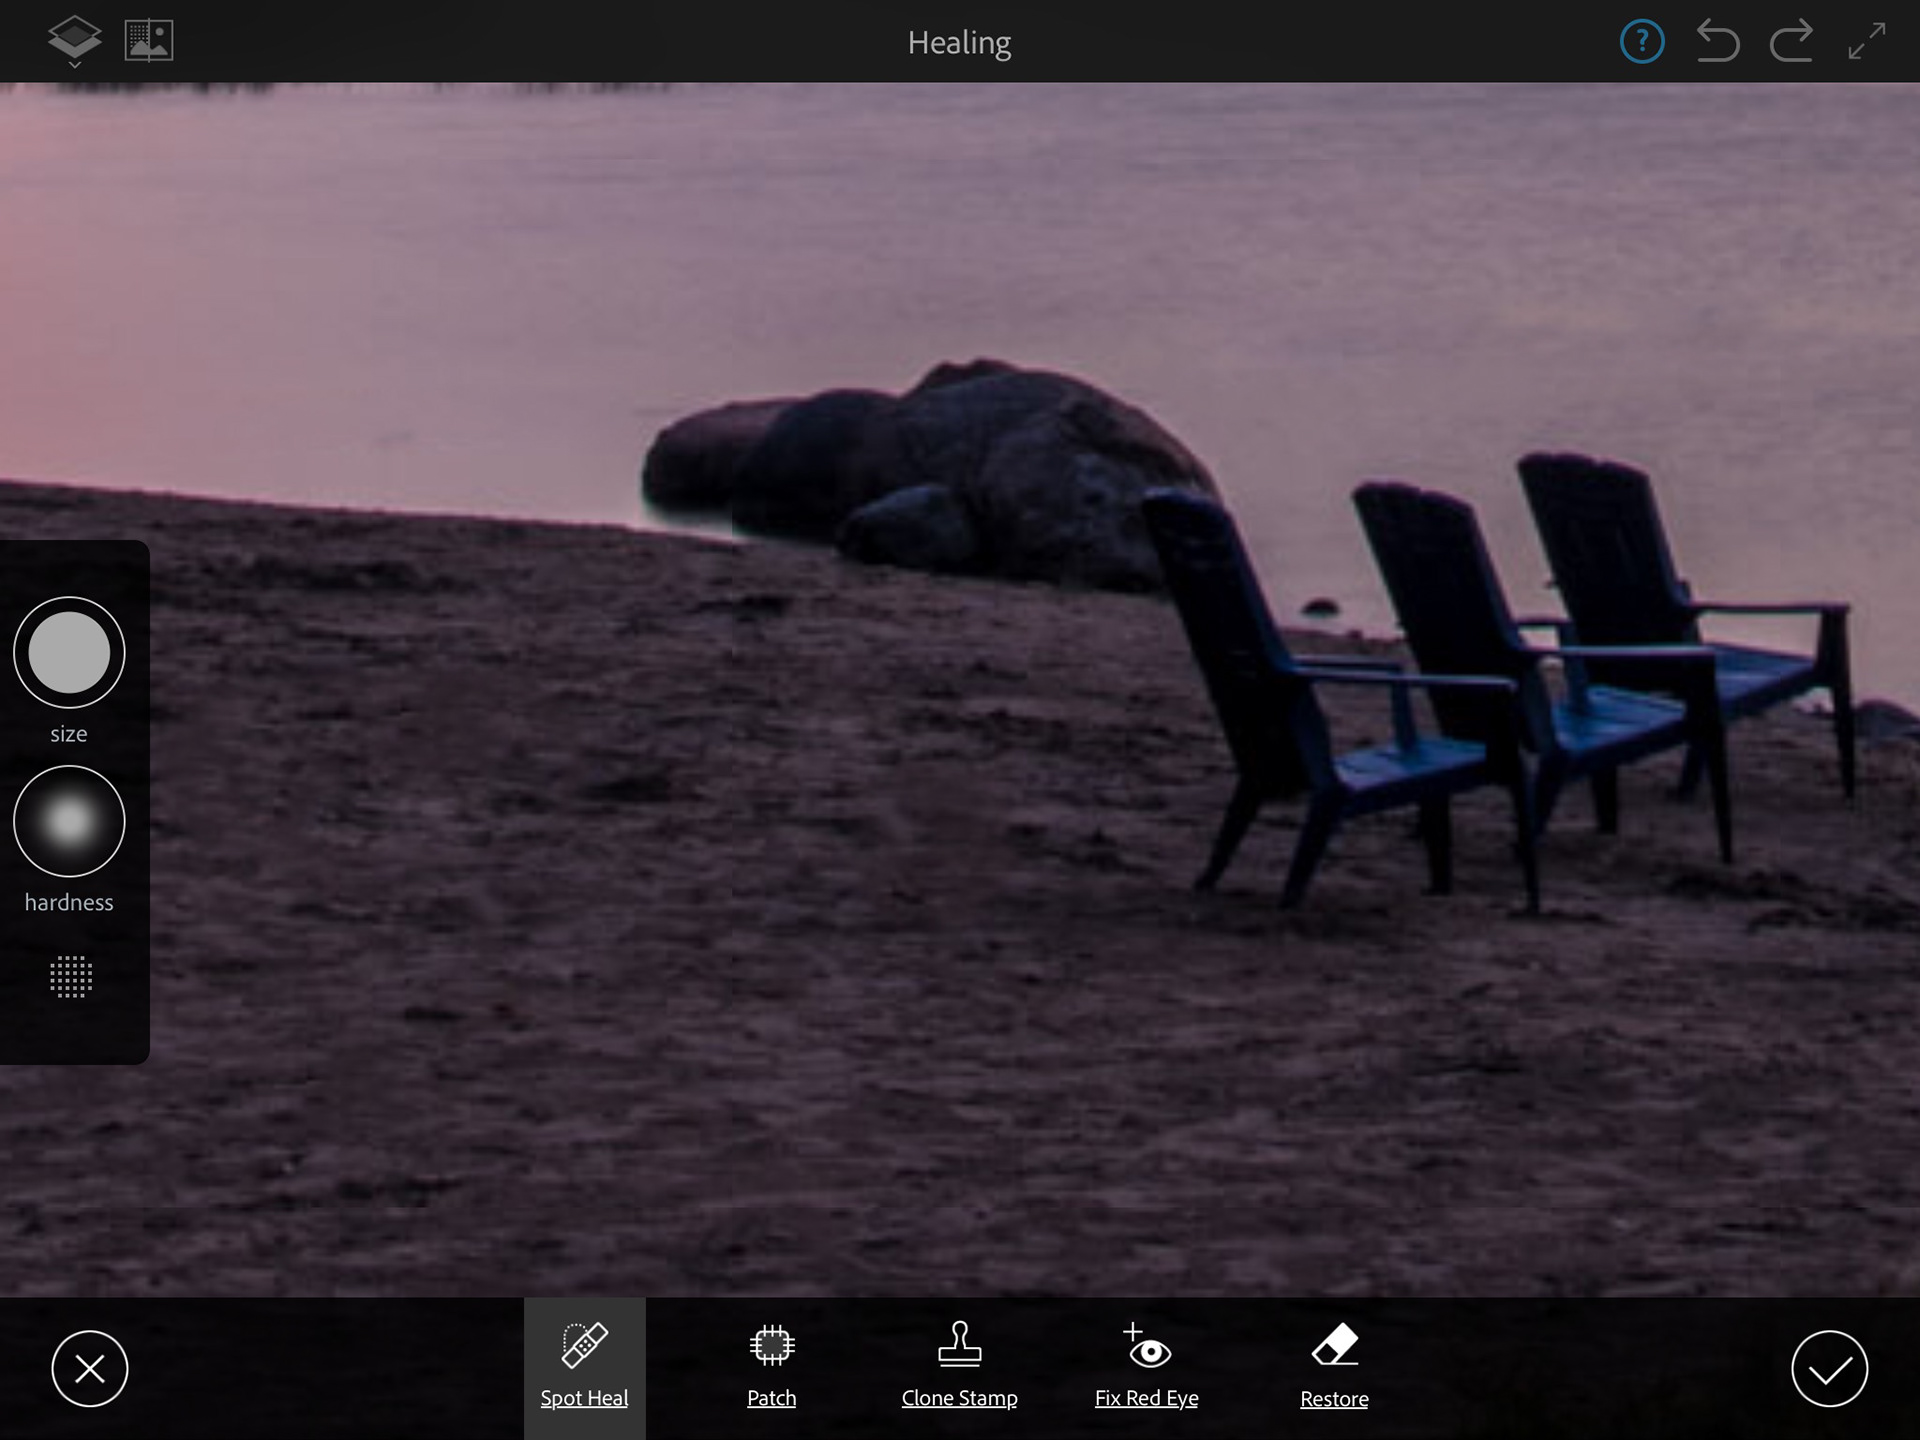
Close up view showing how cleanly the healing taps have blended with the original image.
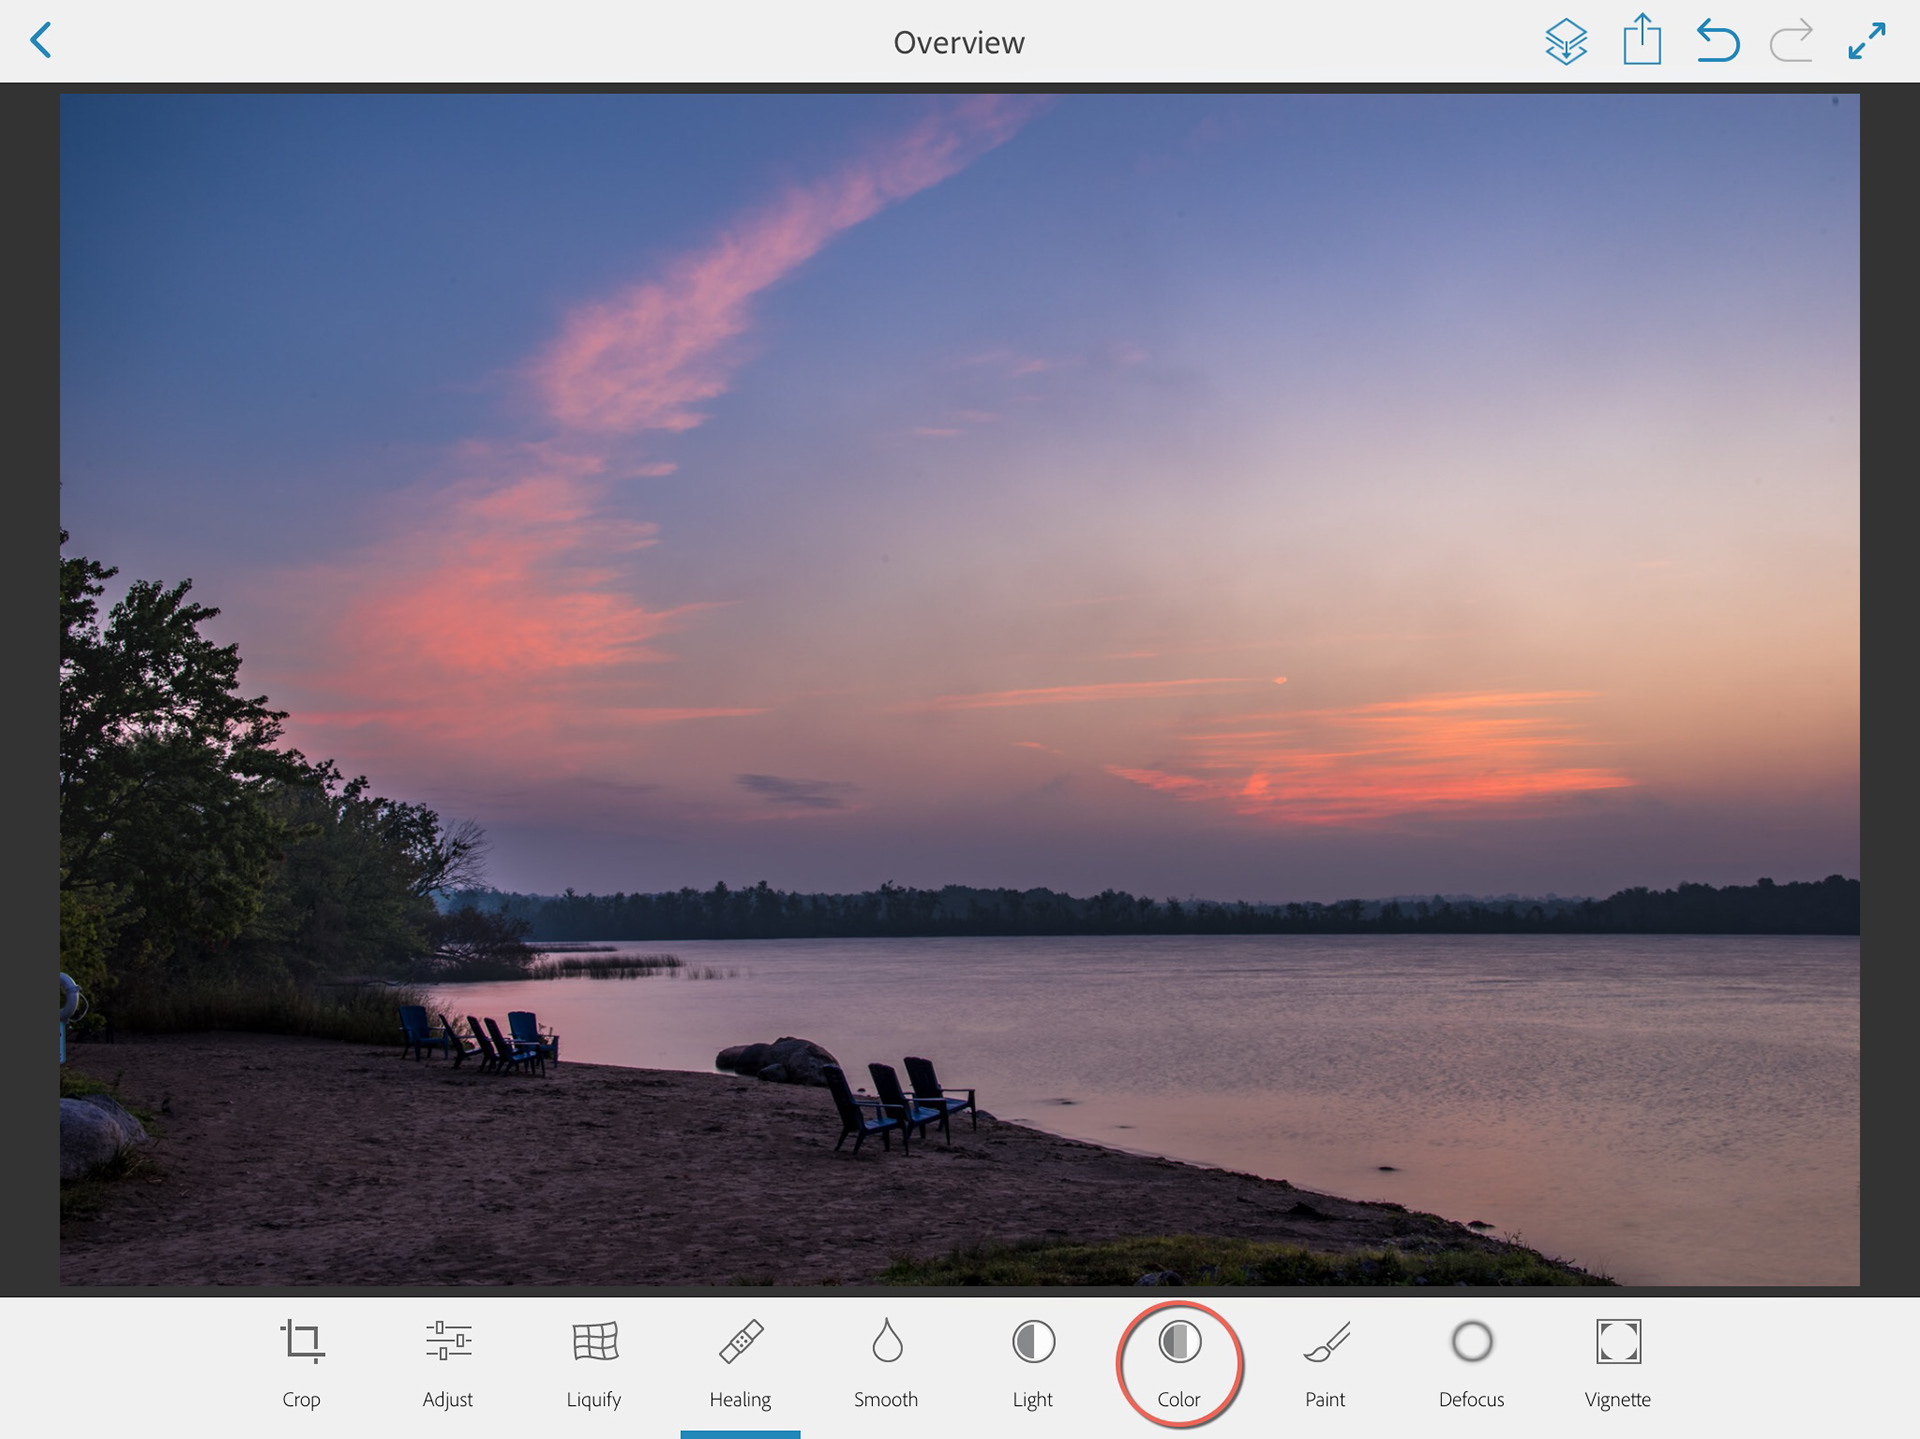
My final step with this image was to add a pop of color the the clouds. I clicked the check mark to commit my spot healing changes and return to the main Fix editing view.
Remember: even though I have committed the changes, they still remain editable, on a hidden layer of the file.
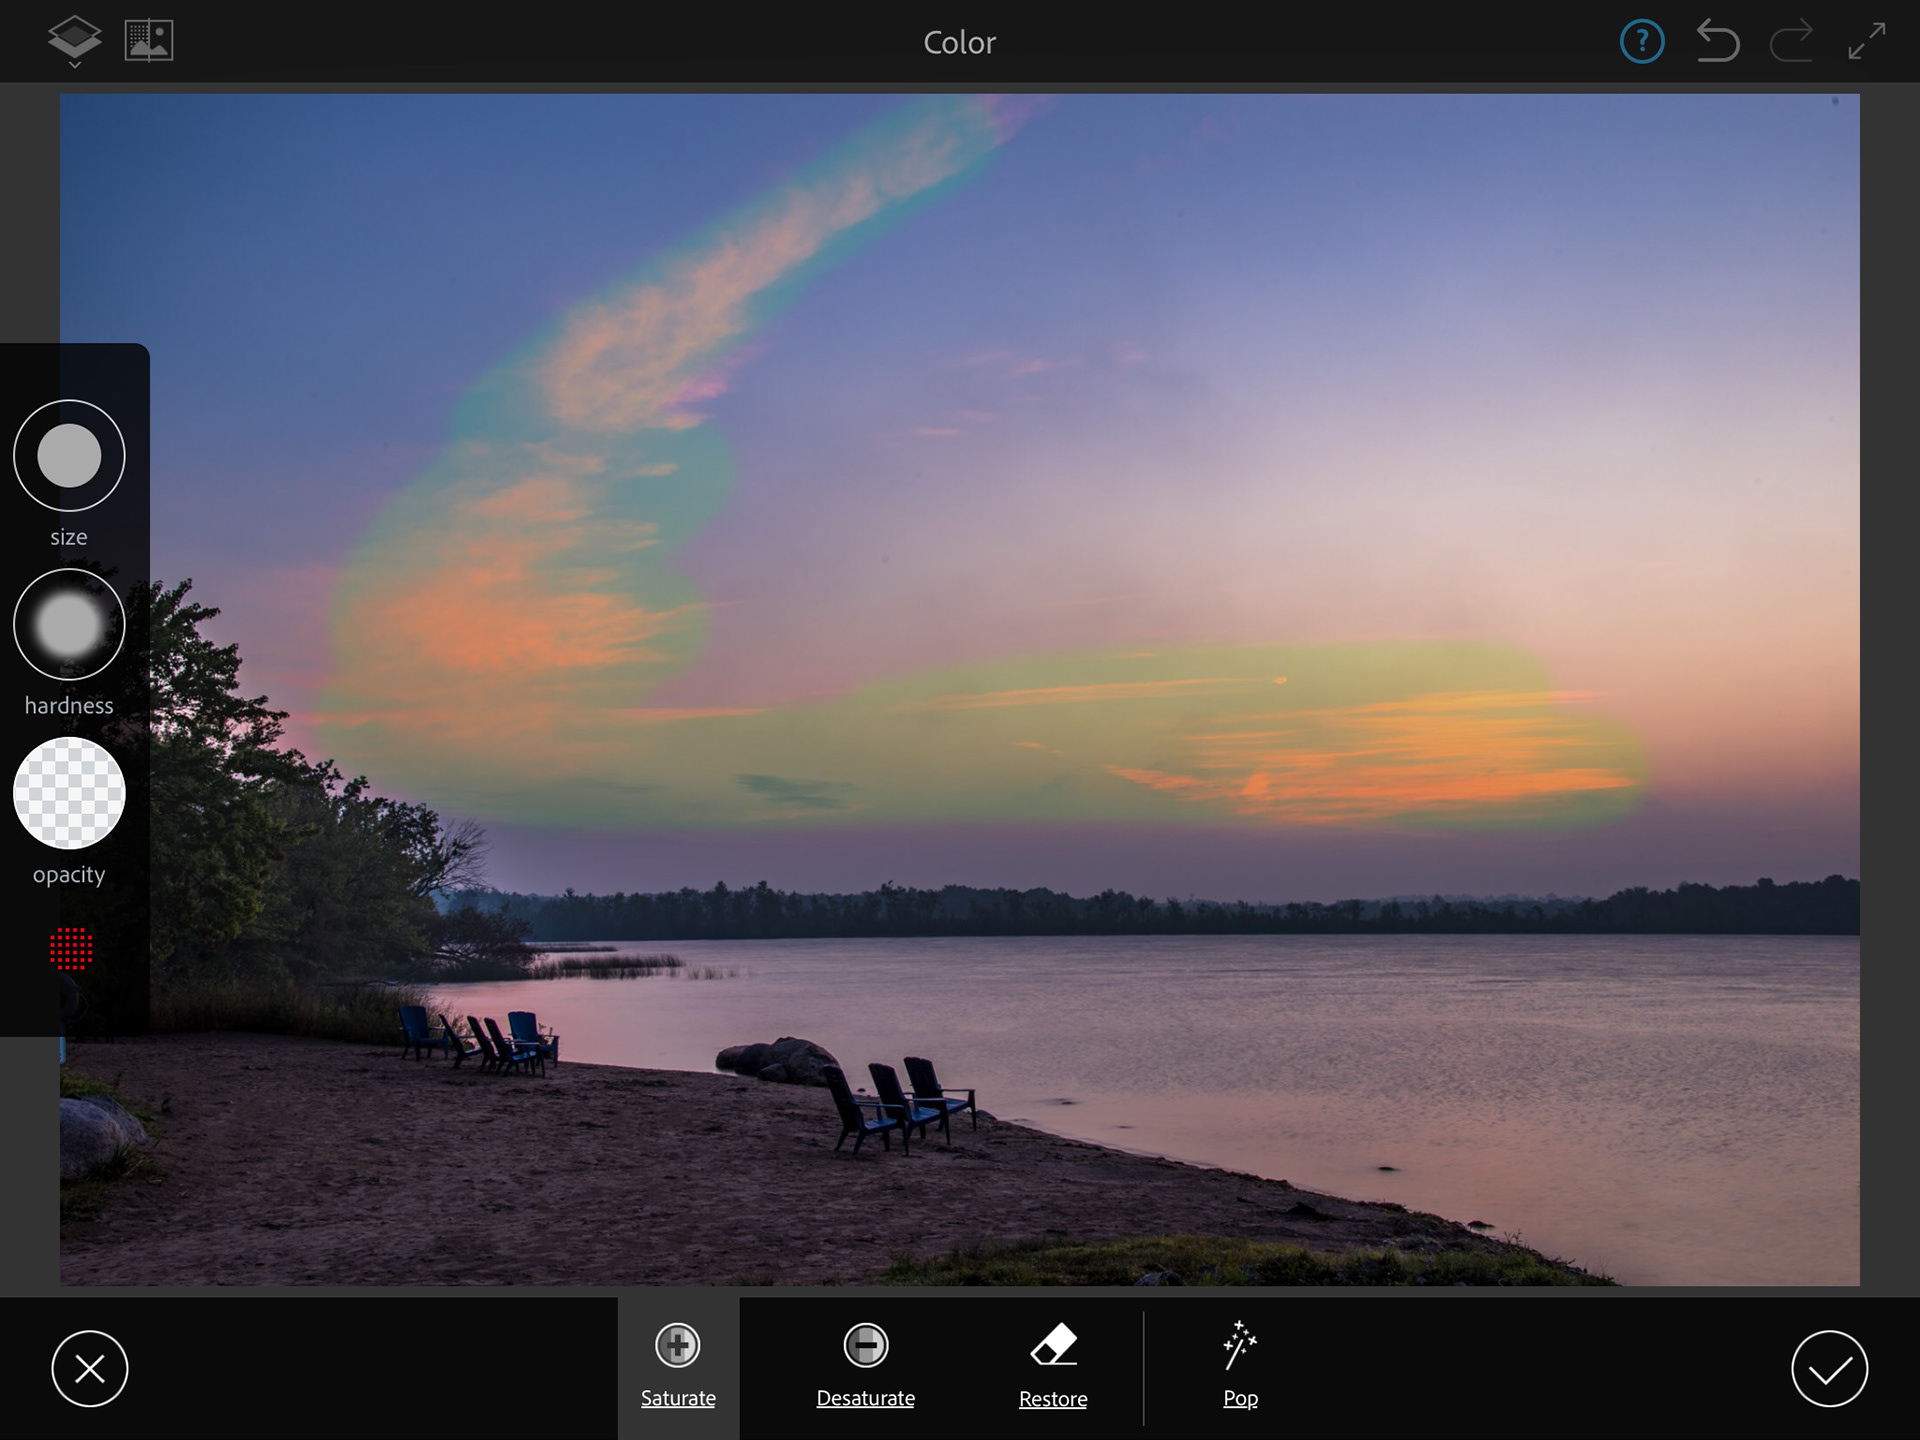
I tap the Color icon and am brought to a similar interface; brush options on the left side: Size, Hardness, Opacity and View Mask. Tool options are along the bottom: Saturate, Desaturate, Restore, and a simple one-tap option, Pop.
I tap Saturate, adjust the brush size and softness, and then just paint over the clouds, boosting the local saturation. If the result is too strong I can choose to undo, or reduce the opacity from the Layer icon at the top left.
Tip: When applying effects like this, it's a good idea to complete the painting in a single step, without lifting your finger. If you do lift your finger, and start painting again, you will end up adding density (color in this case) anytime your second attempt overlaps with the initial attempt.
Note that PS Fix gives you a visual indication (blue bar) of which tools you have already used.
I tap Saturate, adjust the brush size and softness, and then just paint over the clouds, boosting the local saturation. If the result is too strong I can choose to undo, or reduce the opacity from the Layer icon at the top left.
Tip: When applying effects like this, it's a good idea to complete the painting in a single step, without lifting your finger. If you do lift your finger, and start painting again, you will end up adding density (color in this case) anytime your second attempt overlaps with the initial attempt.
Tip: When applying effects like this, it's a good idea to complete the painting in a single step, without lifting your finger. If you do lift your finger, and start painting again, you will end up adding density (color in this case) anytime your second attempt overlaps with the initial attempt.
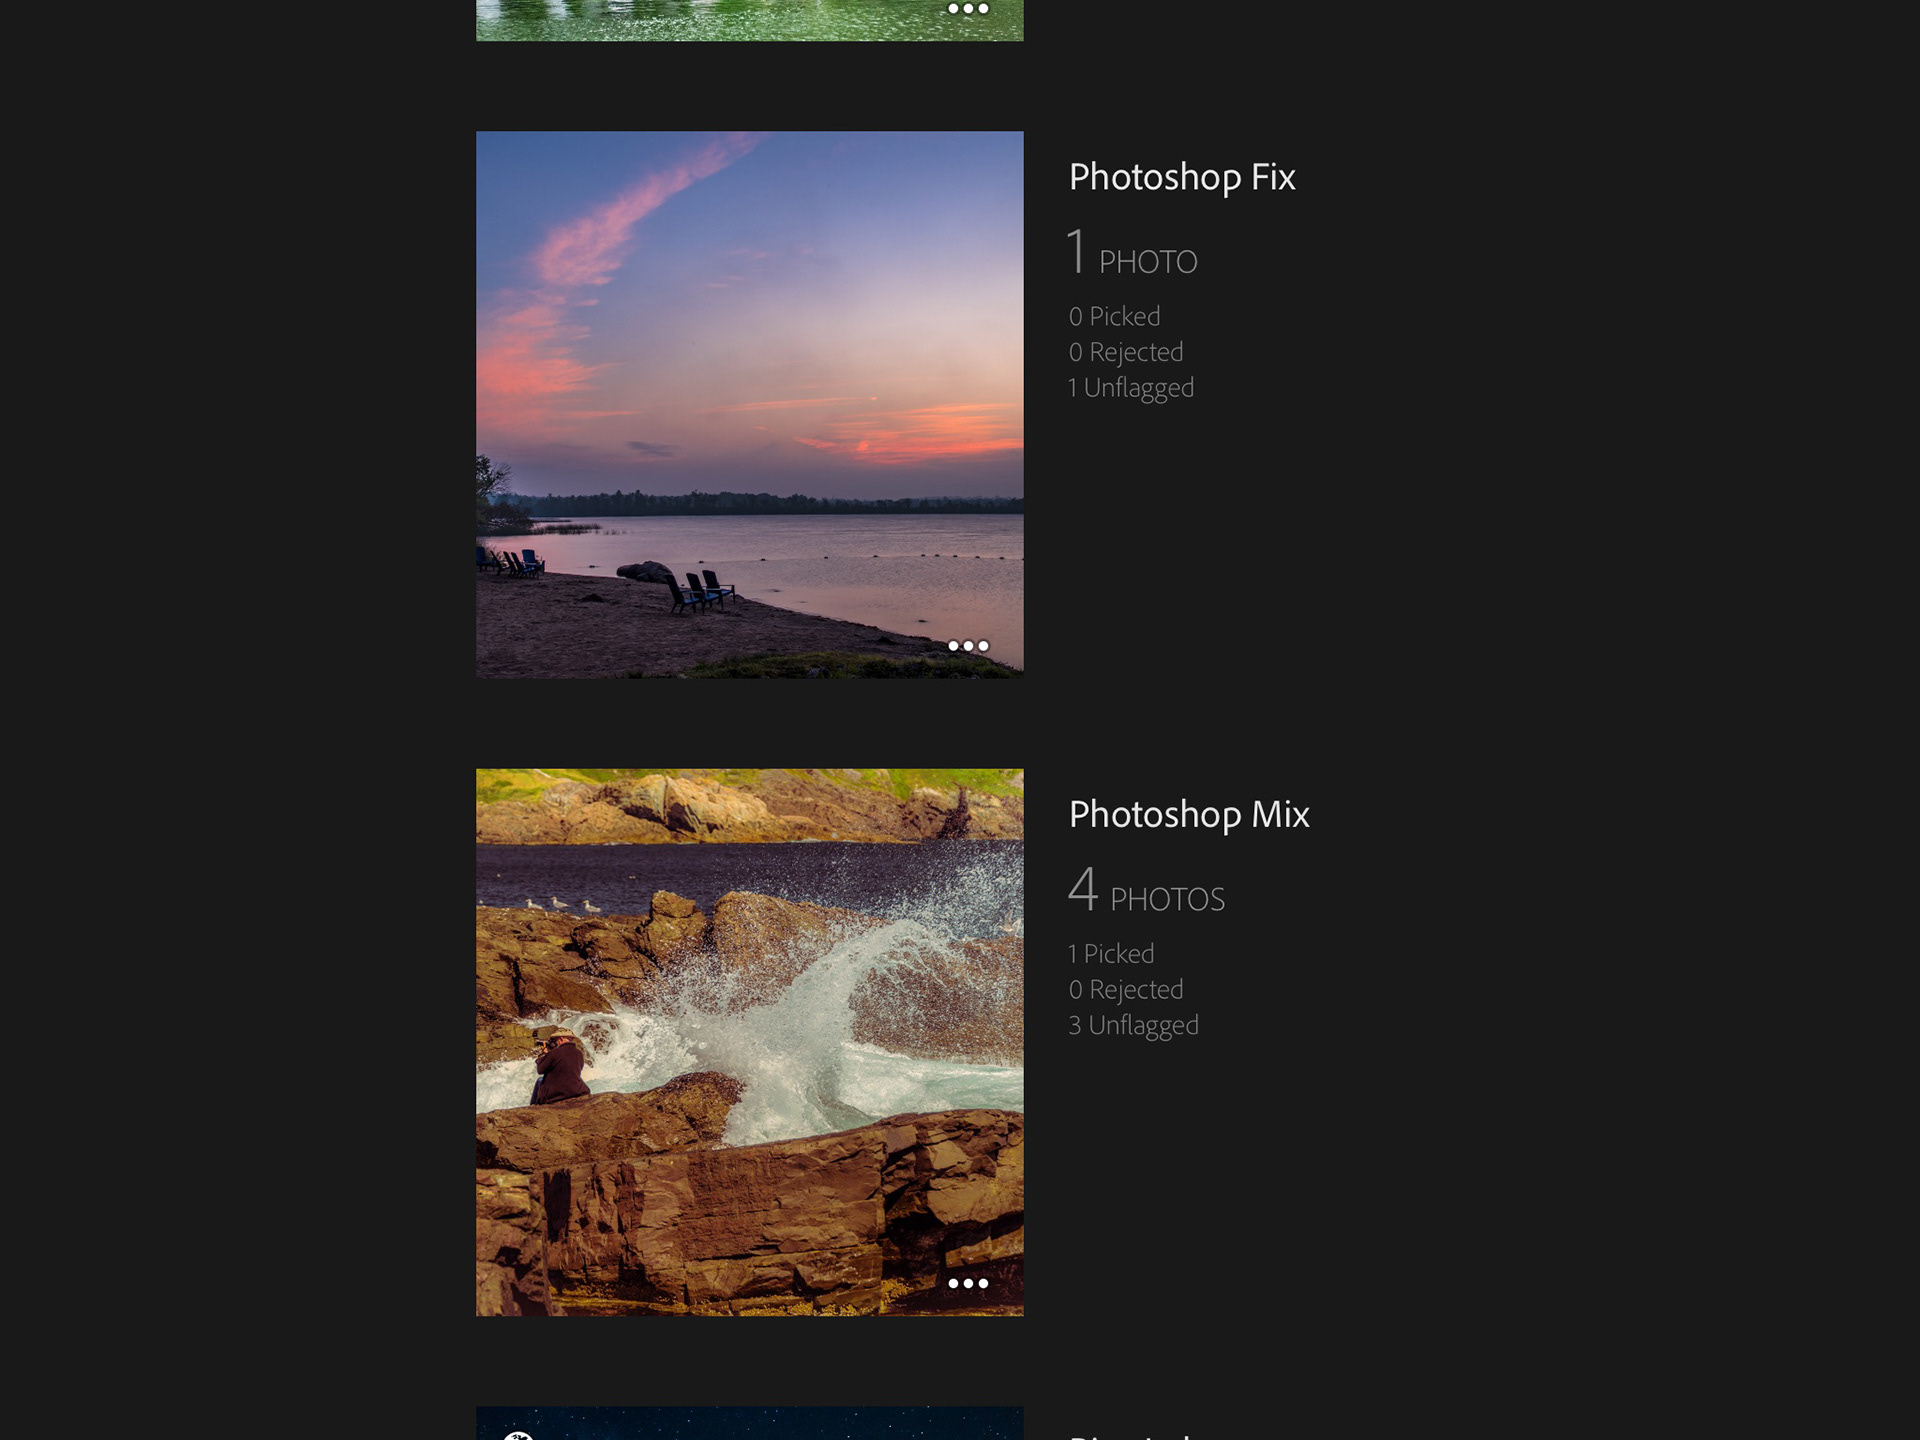
When I'm happy with the results, I have many options for getting my image out of Fix, including the ability to save the file back to Lightroom, where a new collection is automatically created, called Photoshop Fix.
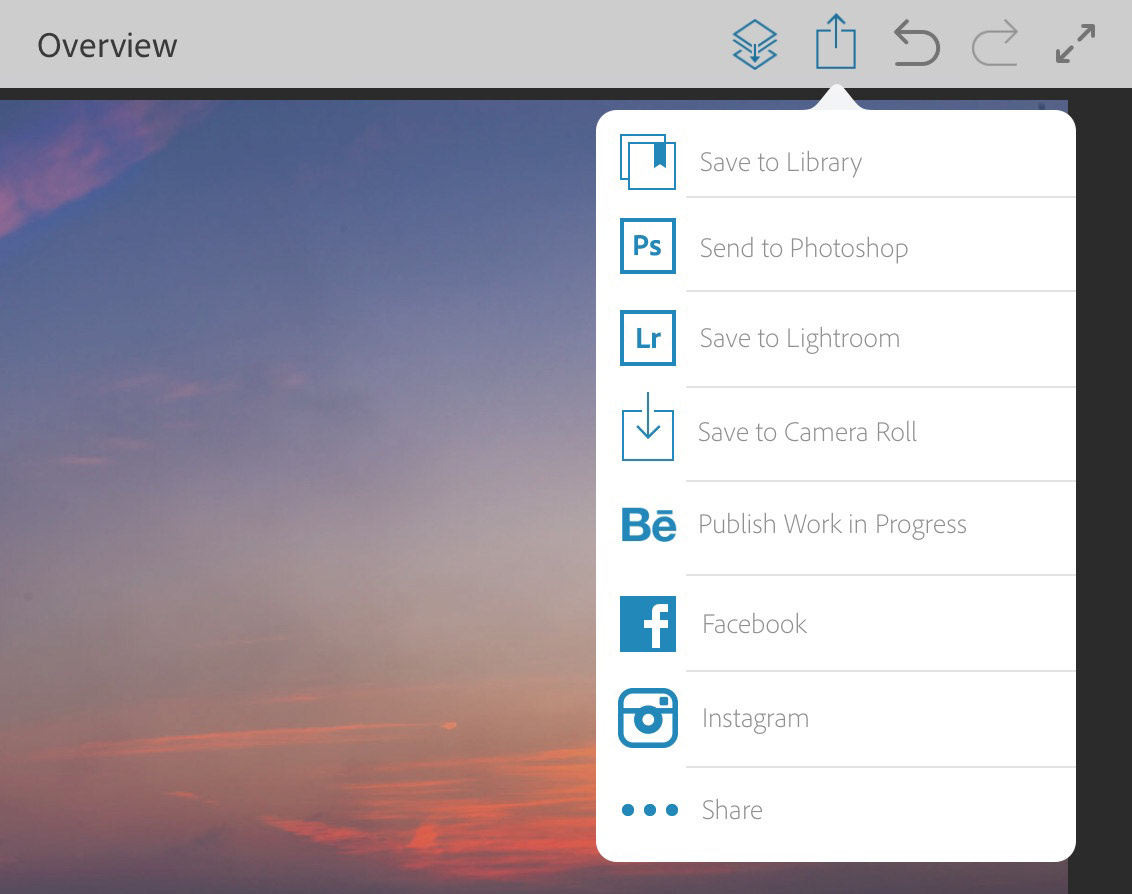
You can also send any Fix image file directly to Photoshop CC (even a trial version of PS CC!) via that same Share menu. All your edits appear as editable layers, as a PSD, in Photoshop.

These two examples are from two different Fix files. You can see that all the "fixes" remain separate and editable from the main image layer.
So that's a wrap for my first project. I hope you can see how easy Photoshop Fix is to use, and that it gets you excited to try things on your own, when the app becomes available.