I didn't do a lot of these in my film days, but here is one I've always been proud of. The final image consisted of two exposures, one in focus and one very OUT of focus. The trick here was getting the right split to the two exposures. Needless to say, this being film, there were easily 4 or more slides where I experimented with that balance in exposure.
Doing this with current technology in Photoshop, would be dead easy. Back then, you really didn't know what you had until a few days later. In some ways, I miss that. You had to REALLY try to get it right. Now . . . well, it's easy to get lazy with little tricks like this one. That said, you can do SO much more now, in the comfort of your own home, on your own time. It's hard to miss those "good old days" for very long.
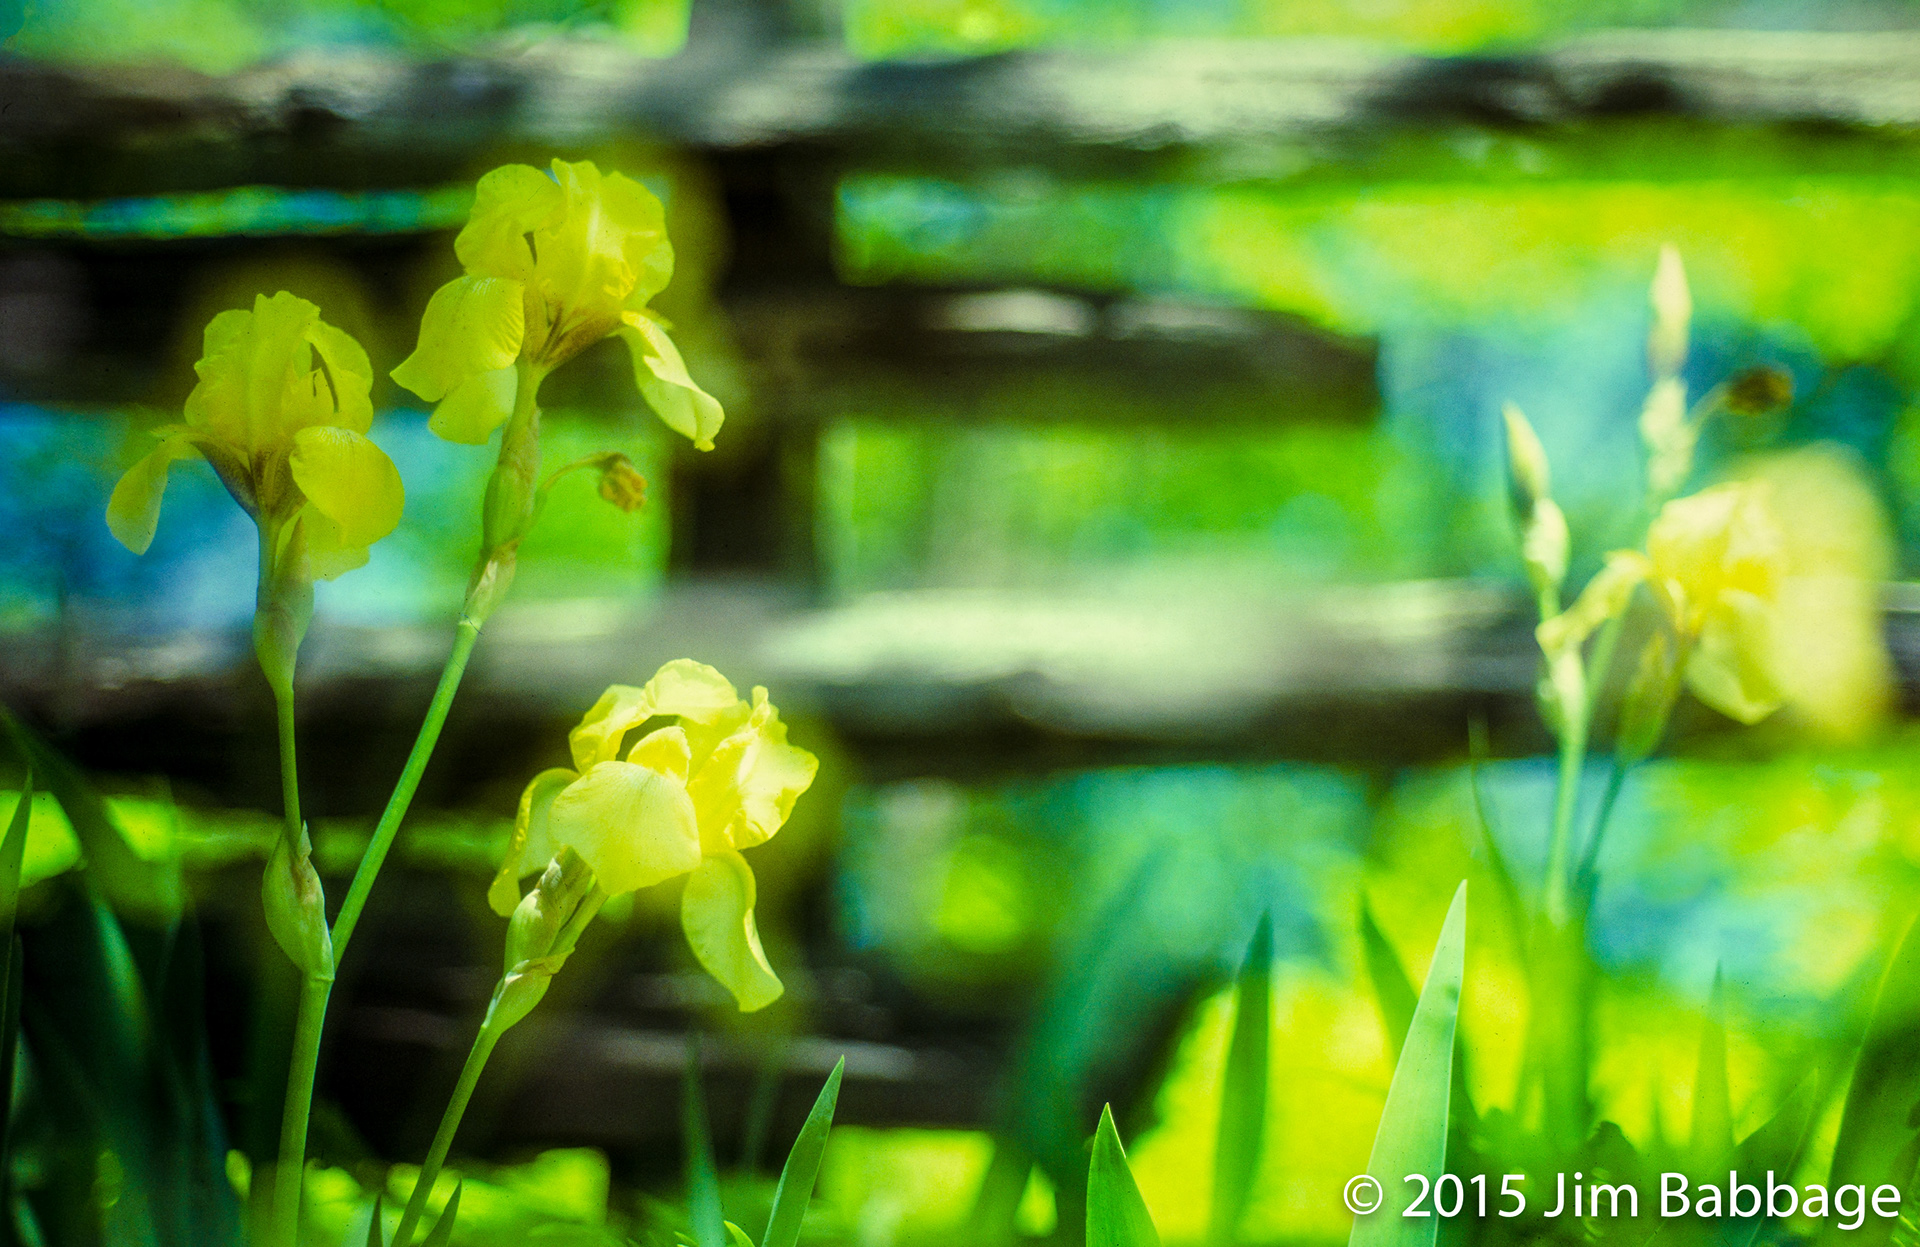
This image is a recent analog to digital conversion (this process is turning into my new life's work lol) and I must say, the amount of crud on this slide was almost overwhelming. I did significant spot removal in Lightroom first, but finally buckled under the pressure and brought the image into Photoshop. There, I used the Quick Select tool and the Dust and Scratches filter to save me a minimum of 20 minutes in spot removal. Then it was back to Lighroom for some final exposure and Vibrance tweaking.