While not nearly as dramatic an example as my other two HDR projects, I want to share this one for the following reasons:
1 - Handheld exposures
2 - Realistic HDR effect
3 - Use of Lightroom's Upright function
4 - Use of Content Aware FIll after perspective correction
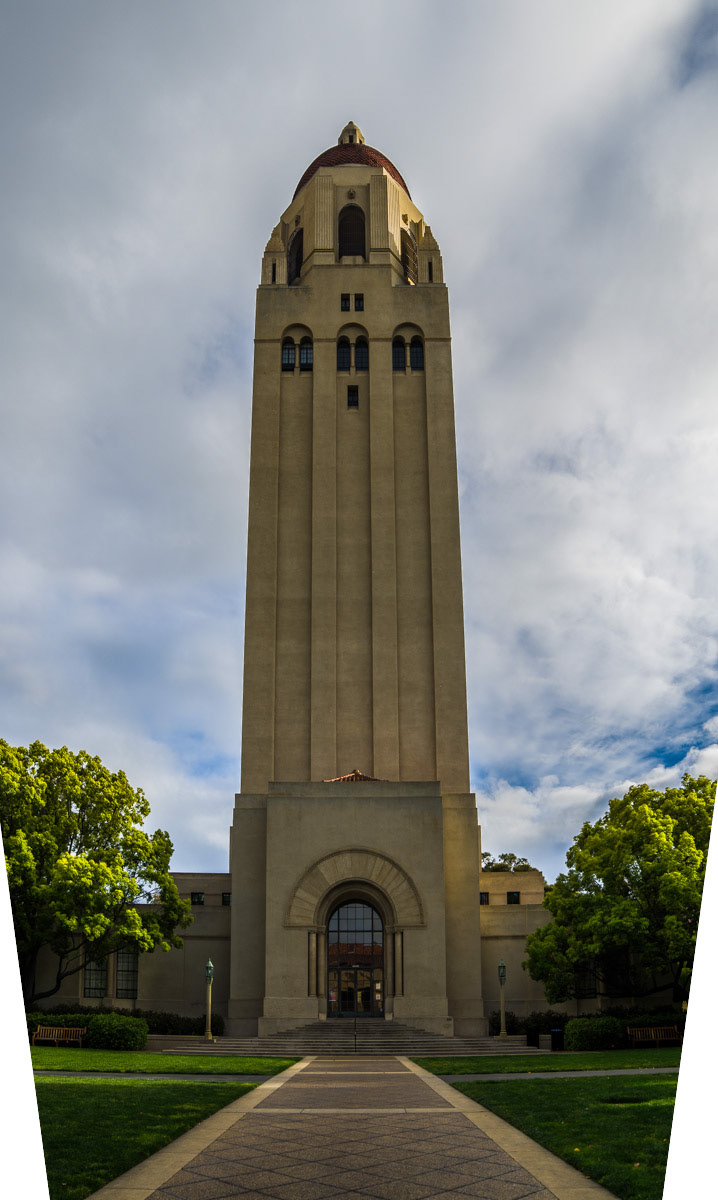
Directly below is the final image. While there is still a slight amount of linear perspective distortion, it is significantly improved when compared to the original exposures (seen lower down in this project. I wanted to maintain a bit of this perspective in order to retain a sense of size and scale.
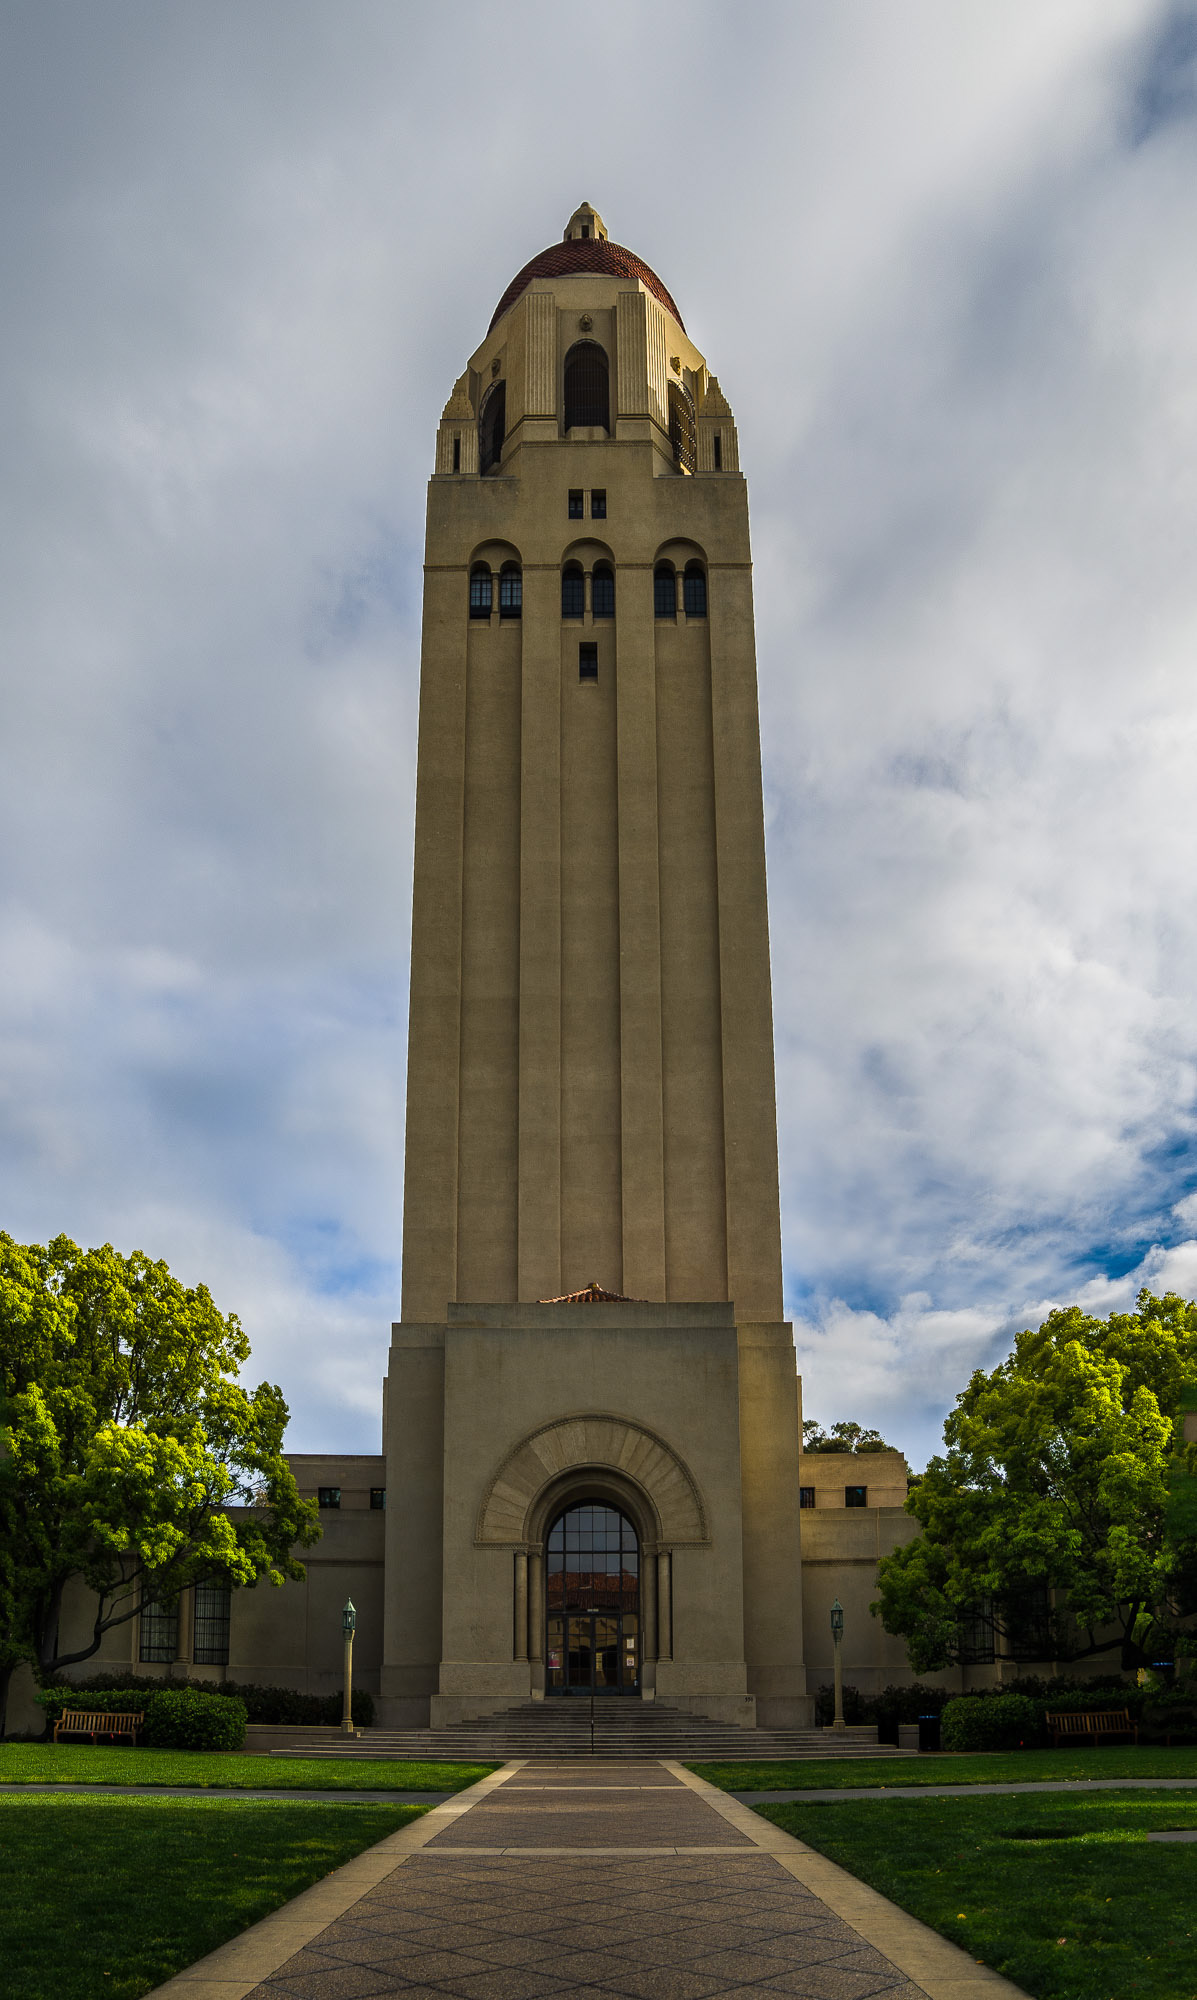
The final image, with perspective and exposure corrected.
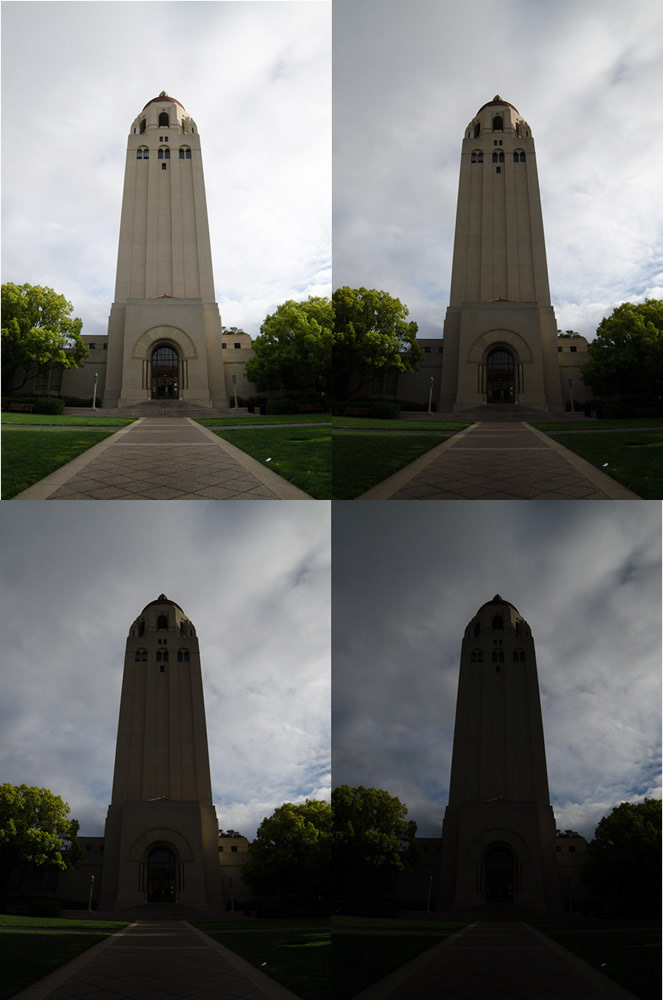
Below are the four exposures I made, handheld with my new Samyang 14mm f 2.8 lens. FYI, I LOVE this lens. I was very concerned about retaining detail in the clouds, hence the under exposed images. In hindsight, I should have added one more, brighter image to ensure shadow detail.
As per my other HDR shots, I opened these images in Photoshop's HDR Pro tool, letting PS do a very good job of aligning the four images. I saved the image out as a 32-bit file.
Once saved, I went directly to Lightroom to develop the image and correct the perspective.
After the HDR merge, I went back to Lightroom and performed several global adjustments, such as significant reductions to the Whites and Highlights to retain cloud detail, and heavy increases to Exposure, Clarity, Vibrance and Saturation.
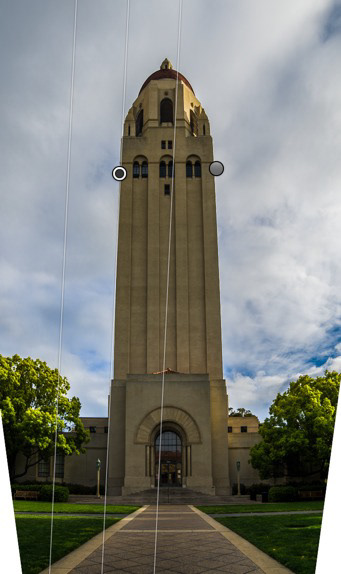
The next step was to correct the perspective. Lightroom (and Camera RAW) have a new and very useful feature called Upright, that helps to level images and correct perspective. In order to use it you must first enable Lens Profiling. Then you can choose from Automatic, Level, Vertical or Full. I first went through all these presets, but none of them did what I wanted. Either the result was too cropped, or too weird. However, all was not lost, because I also had the option to go fully manual in my correction efforts.
>> I should state that I have used this feature quite often with just the presets, and have been VERY pleased with the result. In this particular case, I think the Samyang lens, height of the tower and low camera viewpoint all conspired to make Lightroom a tad confused. <<
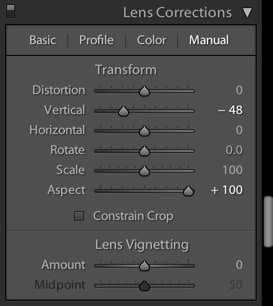
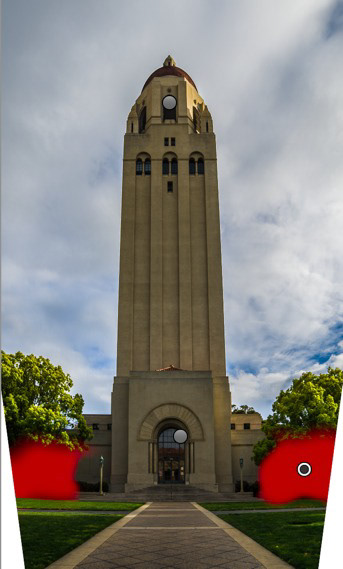
My final settings for manual Lens Correction are above. Changing the vertical axis literally clears up keystoning, much like tilting the back on a view camera or using a PC shift lens would do. It also did a real number on the overall shape of the image. Note how the bottom corners are now at an angle. This didn't worry me though as I figured I could either crop or use Content Aware Fill in Photoshop to fix things.
Altering the Aspect to the positive compresses the image side to side, making the tower thinner. I admit to taking some poetic license with this correction. I adjusted it until I felt right about the scene. An architect might cringe at the result.
Even with all the exposure correction to the Highlights and Whites, I still didn't have enough detail in the clouds, so I used two graduated filters, paralling the building on either side, to add a bit more detail and drama to the sky. I knocked the highlights back to -100, and boosted both Clarity and Saturation. The subtle effect of the grad filter made the result pretty realistic.
Next were some basic local adjustments to the shadow areas of the trees. I increased the Exposure to bring out more detail. What I love about using the Adjustment brush is you can apply the changes anyway you like, and then simply alter the setting after the fact. I also made local adjustments to the exposure of the front doors and top centre window.
The corrected image including most of the global and local exposure adjustments. Notice the bottom corners though.
The last major step was to fill in the background areas at the bottom corners. Manually adjusting the perspective is great, but it did leave me with a couple gaping holes on either side of the photo. I did try cropping first, but I was losing too much of the building. Instead, back I went to Photoshop (Edit in > Edit in Photoshop CC)

Choosing this first option means all my development edits are reflected in the newly generated TIFF image. Once in Photoshop, I used the Magic Wand to select the transparent areas (one at a time), then went to Select > Modify > Expand Selection to make sure PS had some clue as to the surrounding detail. Then I simply chose Edit > Fill and used Content Aware as the fill option. I still had some clean up to do after the fact, but in my opinion, if Content Aware Fill gets you 80% of the way there, you've saved a lot of time in which you can be picky and finesse the work.
Tip: If you don't like the result from Content Aware Fill, don't give up right away; simply reapply the Fill command. Photoshop will resample and create a new, random fill for you.
The Final Work
Below (again) is the final result of my efforts. And I'm pretty happy with it. I love how Lightroom and Photoshop together helped me to realize the vision I had when I captured the image.

For those of you wondering, "How does he remember specific settings like "-80 to Saturation or +100 to Aspect?!?! He must have an amazing memory!" Well, trust me, it's not that I have a good memory. Lightroom keeps a running tally of everything I do in the History panel (below) so at any time, I can go back to a specific change and see exactly what I did.

So that's it for this project. I hope you've gleaned some ideas or techniques that help you better realize your vision after you click the shutter.