You’ve all seen them – maybe in a Facebook timeline, or on Instagram. Heck, I’ve even got smart phone apps I’ve bought to do this quickly and easily. I’m talking about image collages.
Well, I was recently viewing someone’s work on Behance, and noticed they had the same thing. And I thought to myself – this is pretty cool and a great way to summarize your work for a Behance project. And while there are lots of apps out there that can create these collages, I wanted to see how I could do this using Adobe Lightroom and the Print module.

The Print Module in Lightroom is designed to, well, help you make prints from your work, including picture packages, an item I think we all remember from school portraits. The portrait company takes the best shot (or the one your parents chose) and reproduces the image in multiple sizes, usually from wallet-size up to 4x6 prints, on a single sheet of photographic paper. Then your parents had the joy of cutting them all out to distribute to family.
Well, the Print module helps to automate this process, and aids you in building your own picture package for printing. But that doesn’t mean you can’t use it for other things.
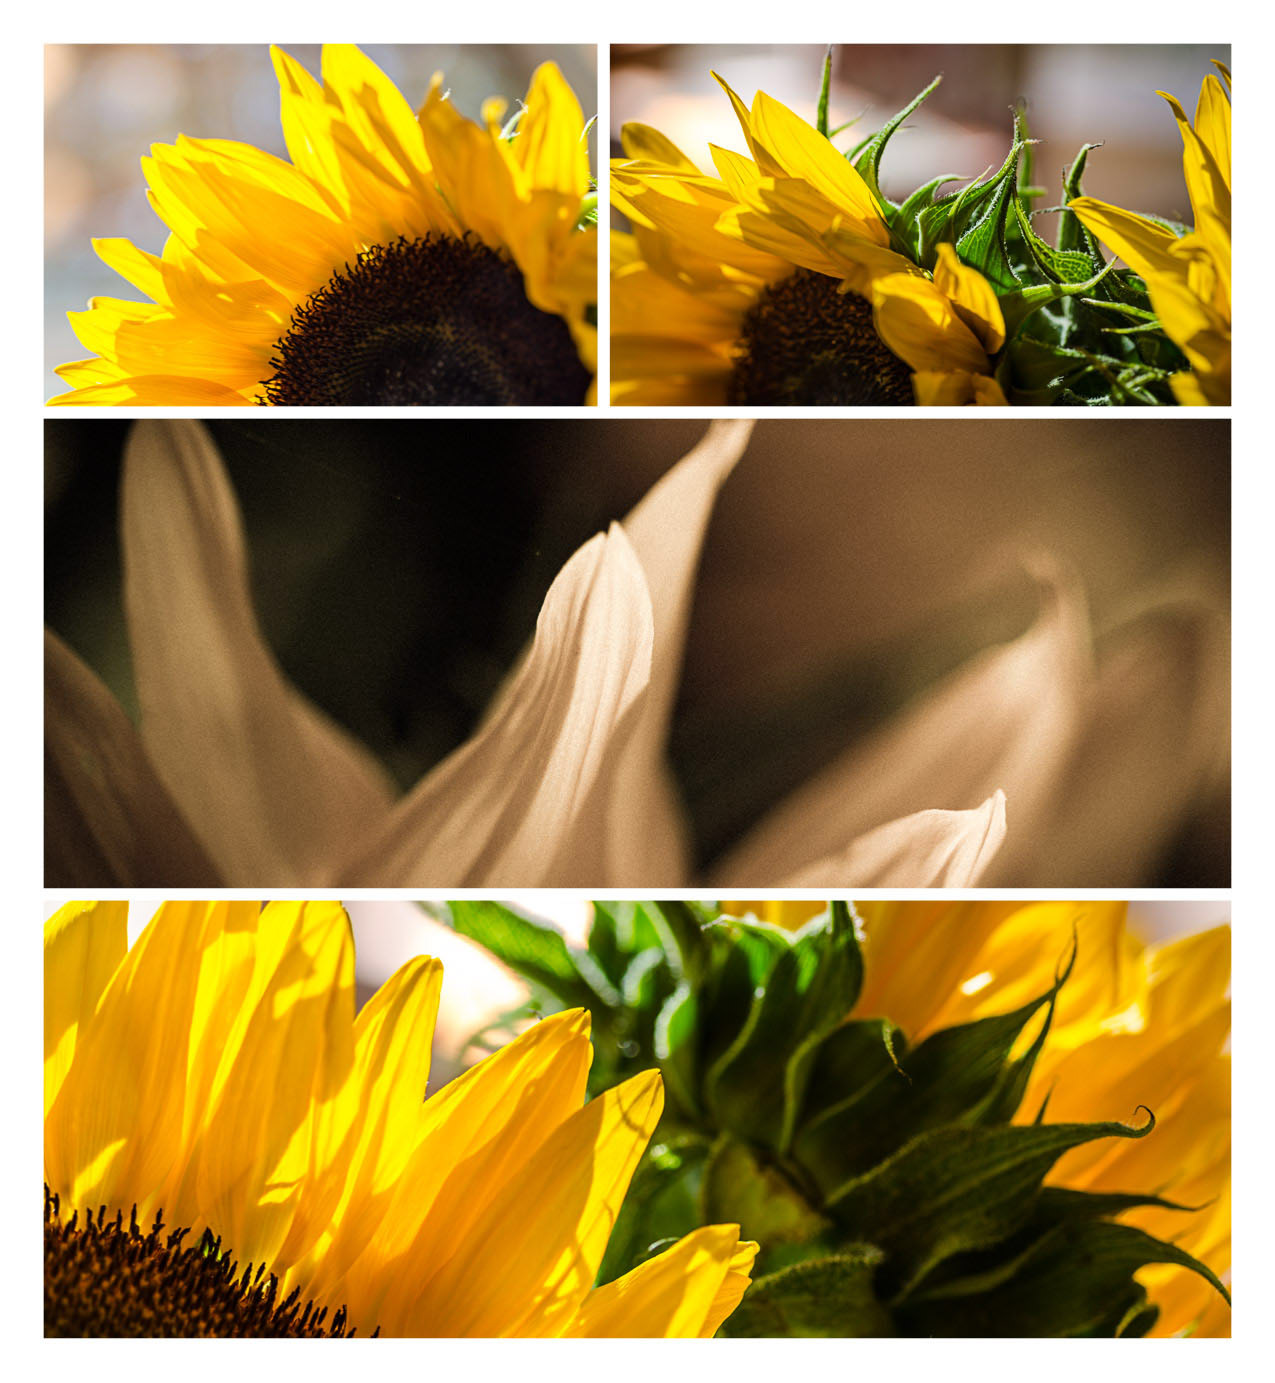
Hence, this little tutorial; I’ll guide you through the steps I took to build the collage you see below. This is my workflow and there may well be other ways to accomplish what I’ve done using Lightroom.

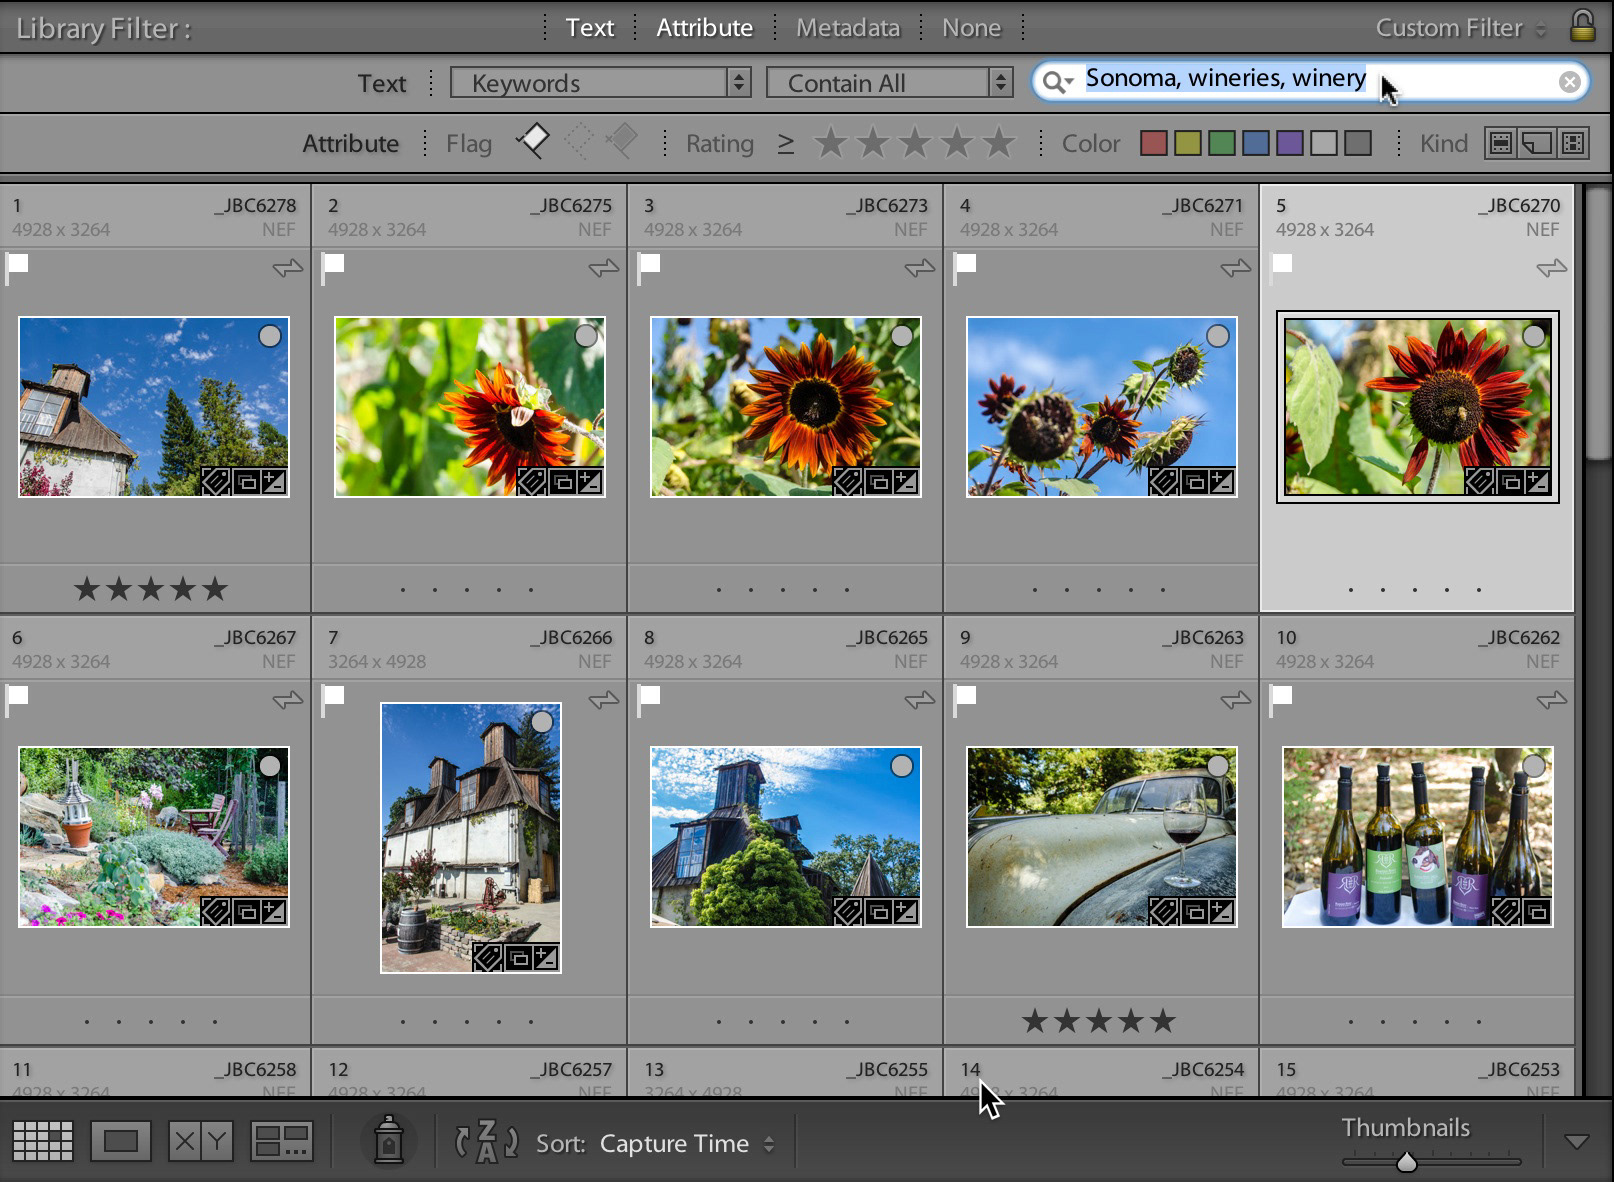
Start in the Library module and filter your images down to a few choices. Between my use of the Pick Flag for my selects, and a keyword filter for the winery images from Sonoma I recently shot, I was able to cull the choices down to about 27 images. I won't use nearly that many, though.
Note: If you haven’t already, you should process the images you think you’re going to use.
Now move to the Print Module.
The very first option in the Print panel group, Layout Style, gives you three main choices. The logical one, you might think, is the Picture Package. Indeed, selecting this option gives you ability to choose multiple image sizes (cells, as they are called in Lightroom), but you can only add a SINGLE image to fill all the cells. Very much like those school portraits I talked about earlier.
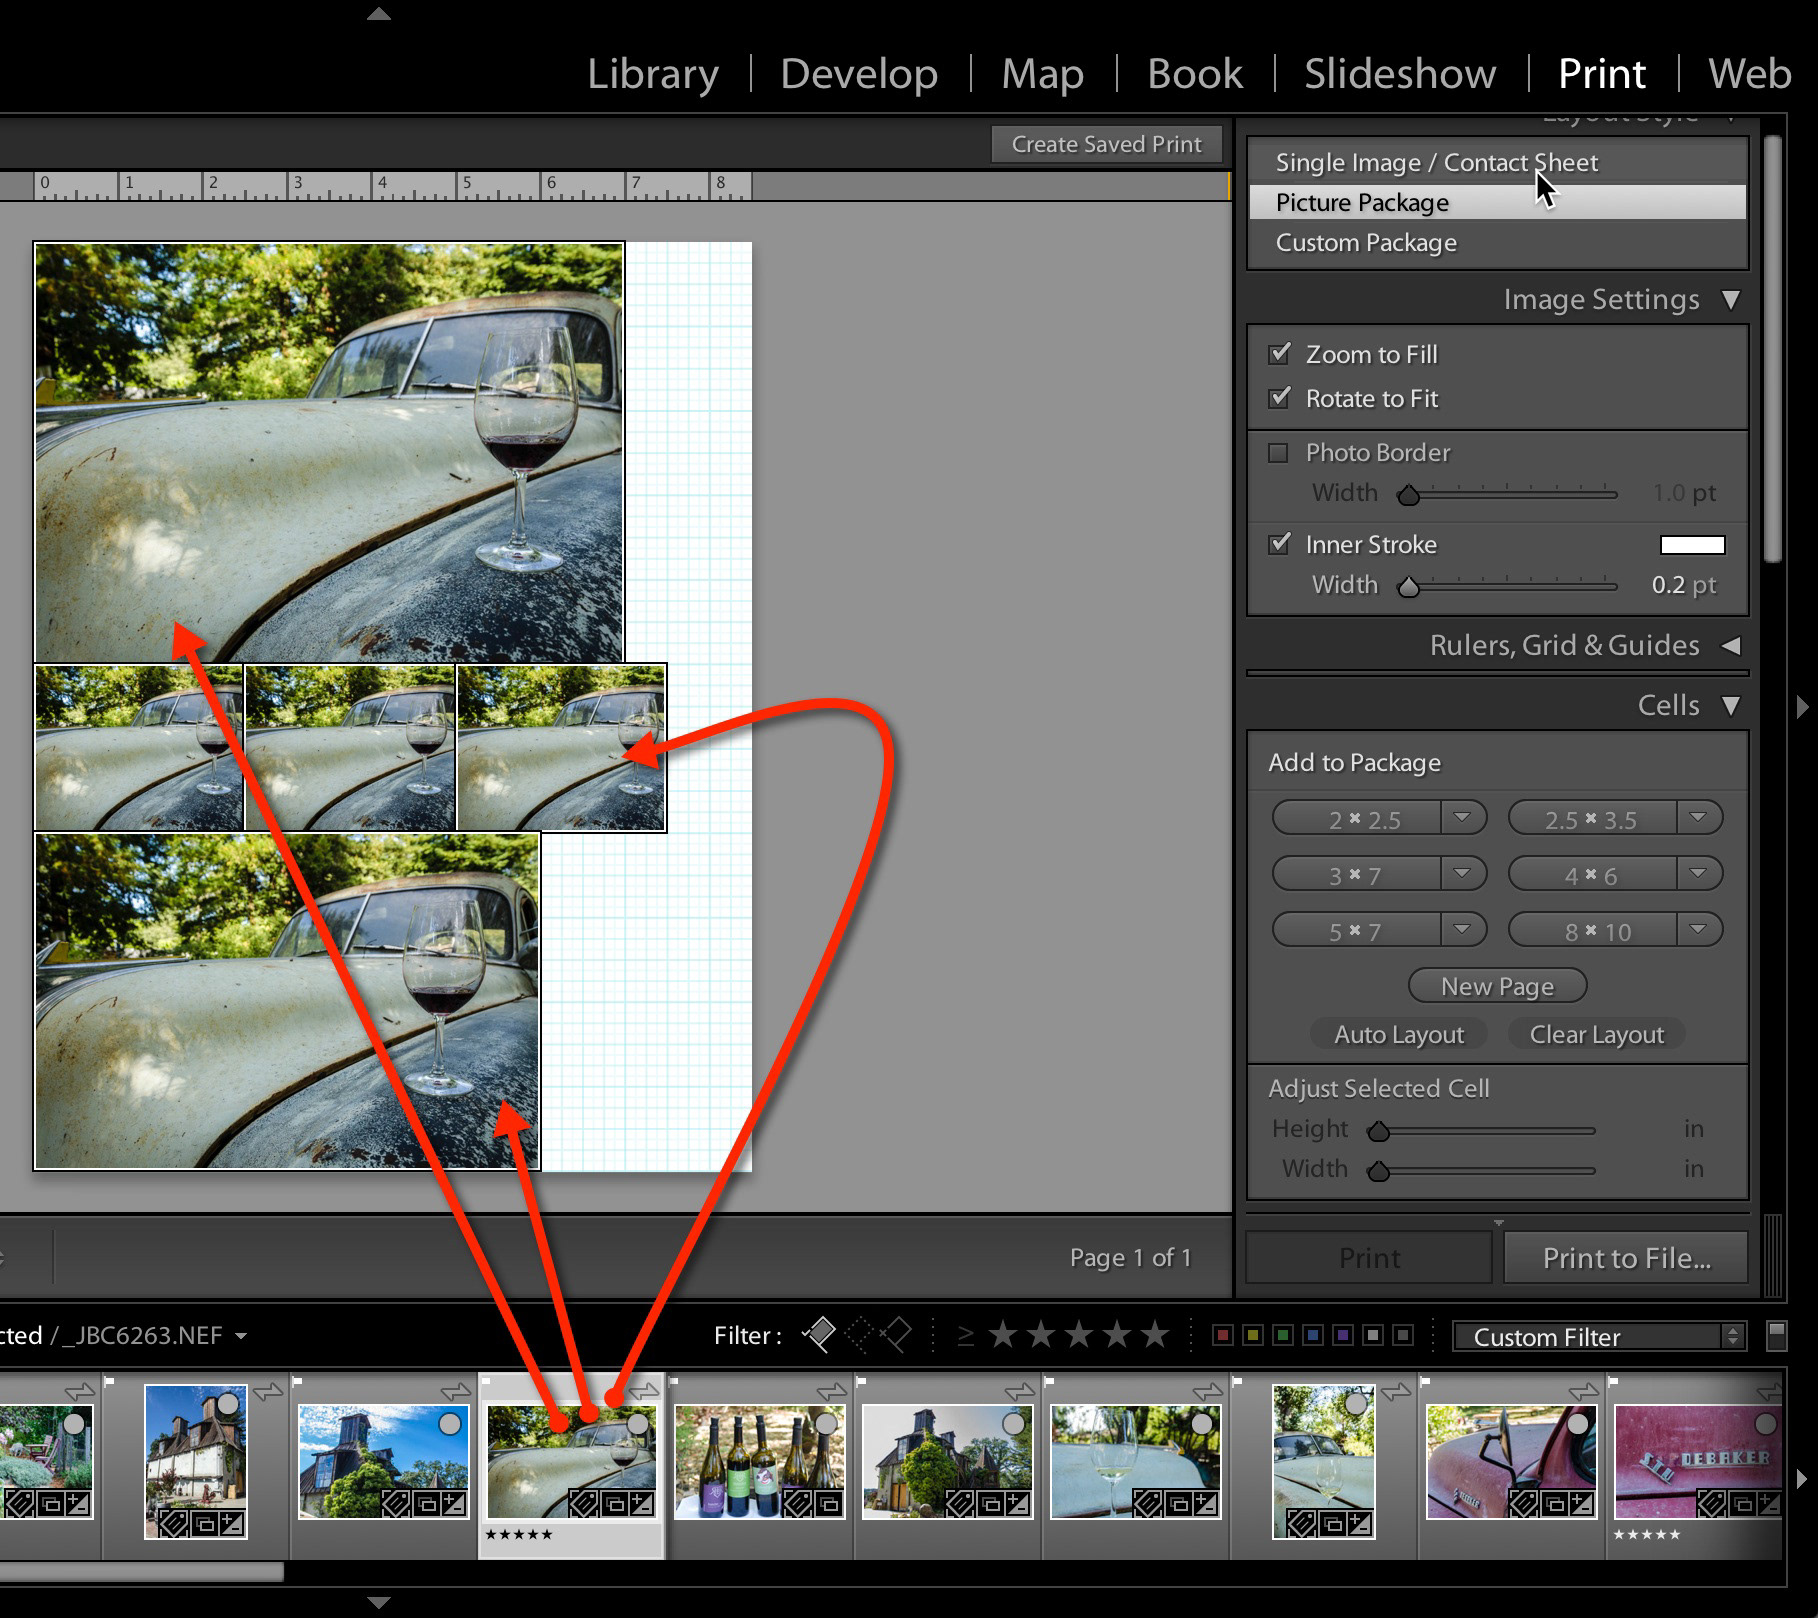
Select the Custom Package style, instead.
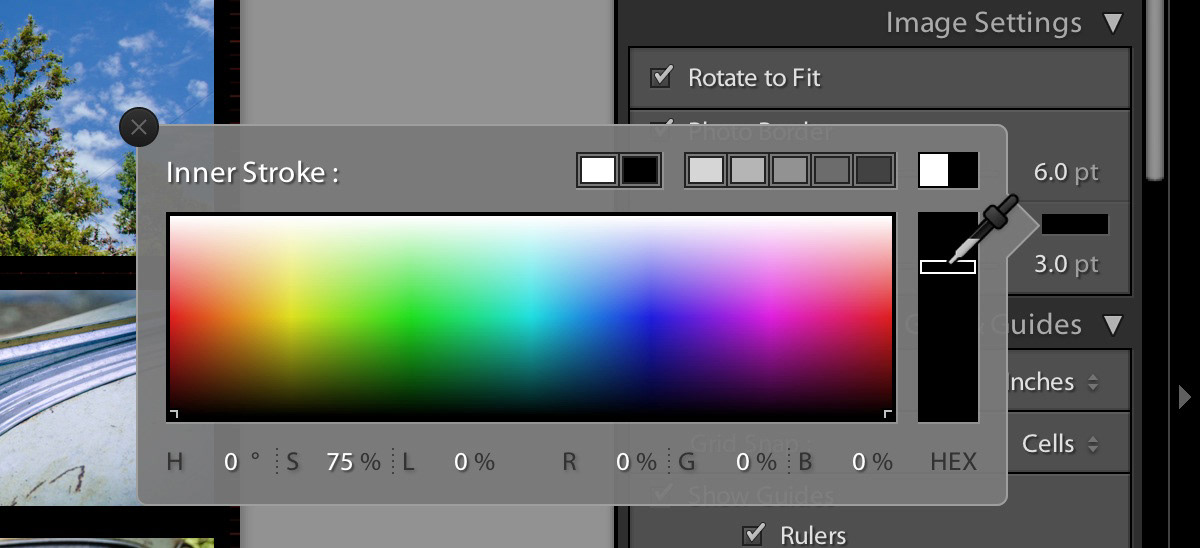
In the Image Settings panel, enable the Photo Border if you would like to have a grid-like division between images. The border takes on the color of the page background. You could choose Inner Stroke if you want the border to be a different color than the page background, but a word of caution; I found that changing this color resulted in pale outlines around each image, unless the images are perfectly aligned. Not sure if this is a bug, or just me, or it may just come down to the fact that the Print module wasn’t designed for this level of accuracy.
I went with a border of 6 points. File Resolution means NOTHING unless you're printing this. The file size when saved as a jpeg is the same, whether you pick 150 PPI or 300PPI.
The default page dimensions are 8.5 x 11. A square format seems to be very popular with these collages so let’s change this before we start adding cells.
1. Scroll down the Panel group to Print Job.
2. If necessary, enable the Custom File Dimensions.
3. Click on the long measurement and change it from 11 to 8.5. Now you have a square format for your collage

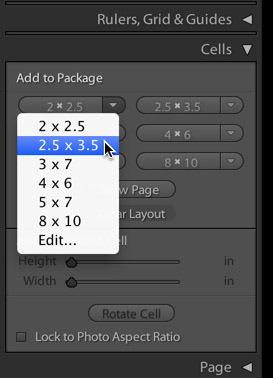
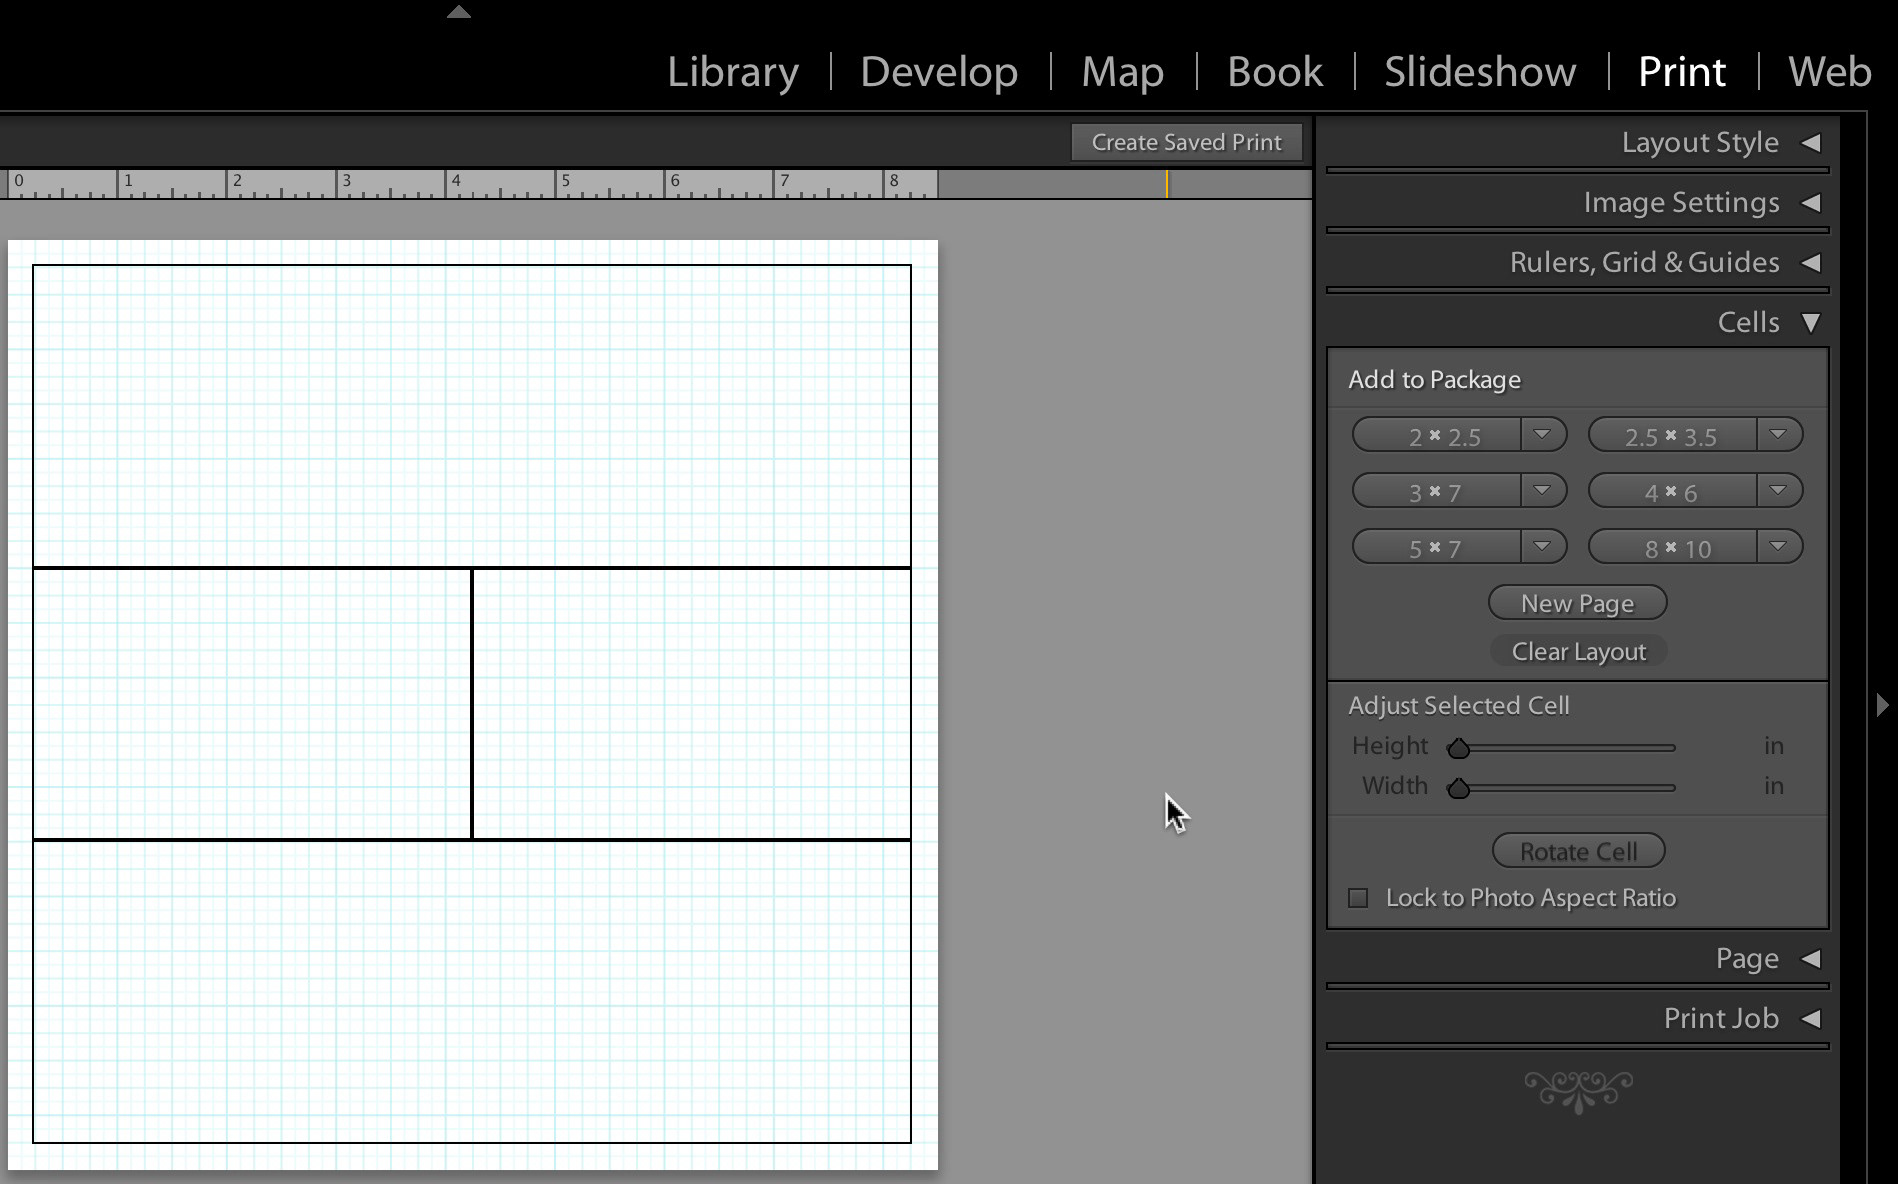
Now the fun begins! Scroll back up the Cells panel. There are several preset cell sizes you can work with, and we’ll start with those, but customize each one before we’re done. You can choose any cell presets you want, but I’m going to use the ones from my sample.
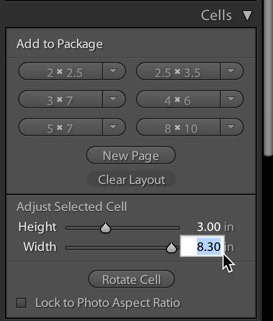
1. Click on the 3x7 cell and you get a short/wide image cell. Cool. You’ll also see that once the cell is added, you can manually adjust the dimensions of the selected cell within the Cell panel (you can also use the cursor to drag the cell itself, but I found using the panel controls to be more accurate and less fuss).
2. Click on the Width box (not the slider) and change the value from 7.00 in to 8.30 in.
3. With your mouse, click and drag the cell itself so it is centered vertically (side to side) in the layout.
4. Drag the cell downwards as well, until it snaps to the first inner gridline.
5. Click on the 2x2.5 cell button. Change the width to 4.15 and the height to 2.28. Odd numbers yes, but you’ll see why a bit later.
6. In the Guides panel, change the Snag Grid option to Cells. This will make it easier to align your cells to each other.
7. Use your cursor to align the new cell with the left edge of the top cell.
8. Hold down the Alt/Option key and drag this cell to the right. This is just easier to do than creating a new custom cell.
9. Align it with the right edge of the top cell.
10. Lastly, either use the Option/Alt key and drag the top cell to the bottom, or create a new 3x7 cell and manually adjust the dimensions to match the top cell.
Selection time
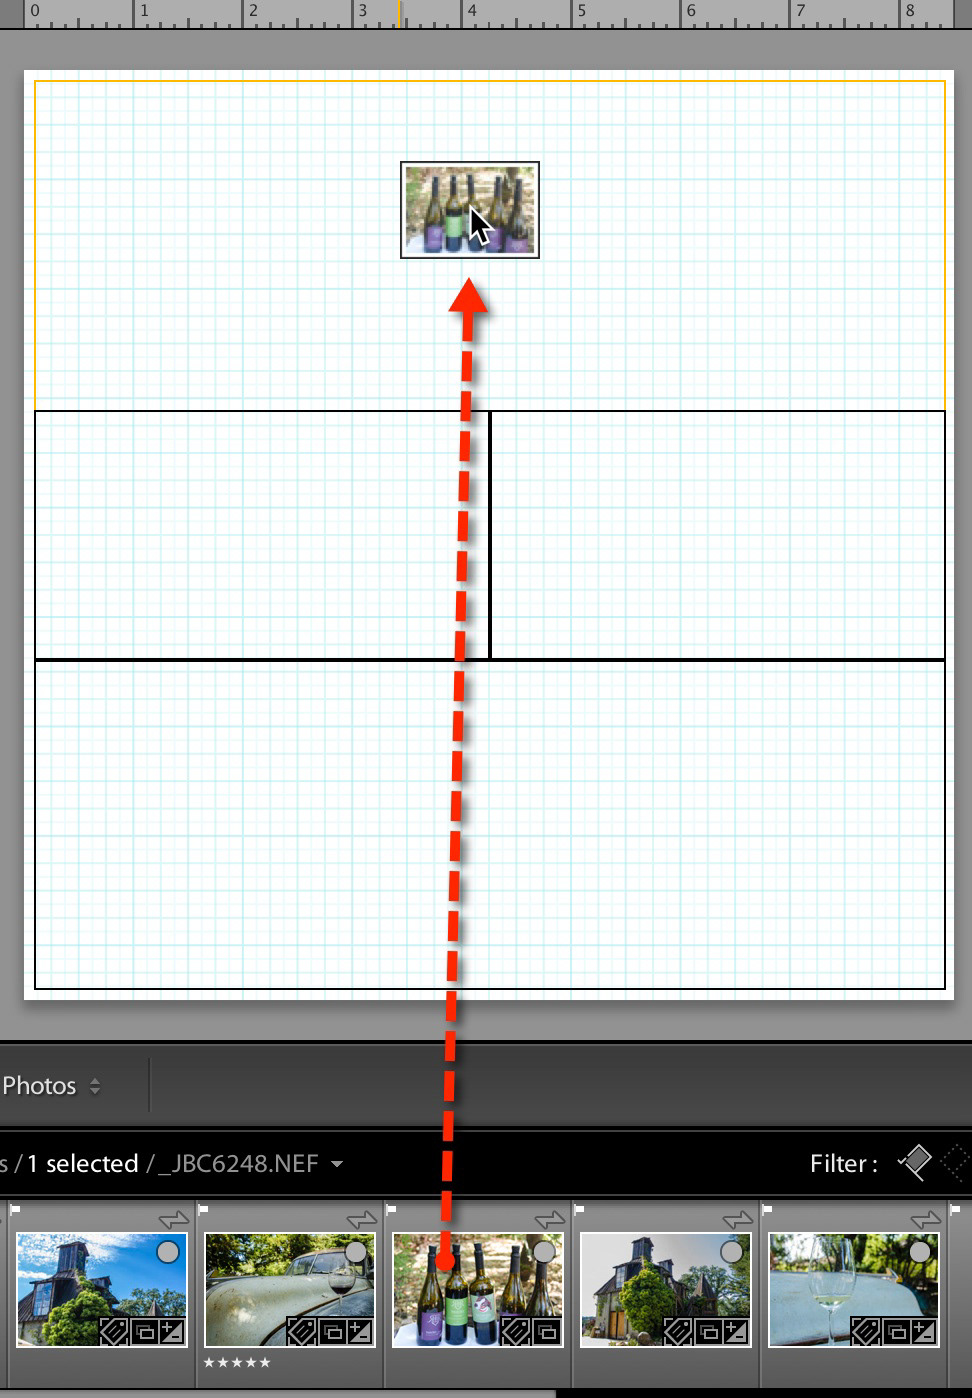
Now it’s time to add the artwork. From your selected images, in the thumbnail panel, click and drag your first image until you see the placeholder image appear on top of the desired cell.Release the mouse.
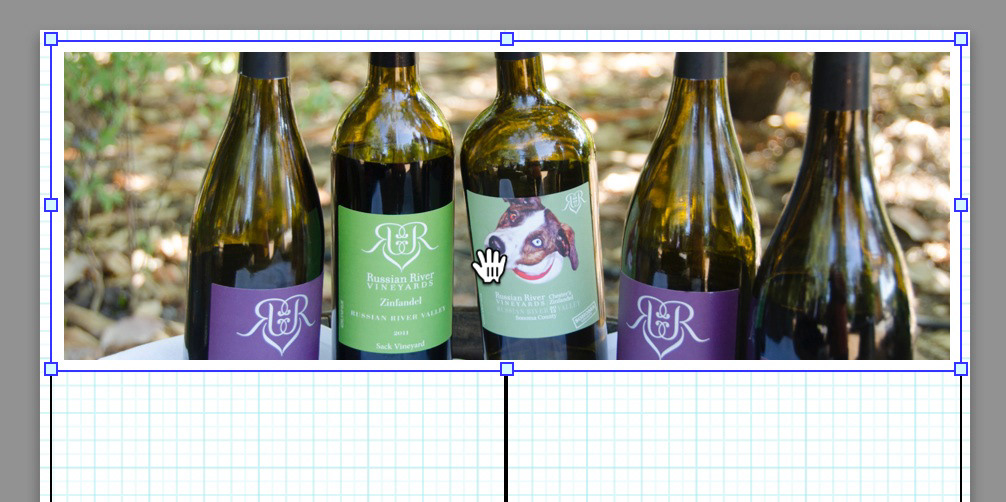
Your image is doubtless a different aspect ratio than the cell, and by default Lightroom horizontally centers the image within the cell. To change the position of the image, hold down the ctrl key (Windows) or the Command key (Mac) and drag the image up and down until you get a view that you like.
Repeat this process with the other cells, using a unique image for each cell.
Note: if you want to experiment with other images, simply select a new image and drag it onto the desired cell. The new image will replace the old one.
Once you have your images in place, the final step is to choose the Print File button, found at the bottom of the Panel Group. You'll be prompted to save the file to your hard drive. Then all you have to do is upload it to Behance, Flickr, Facebook, Instagram or even your own web site or blog.

Border and Stroke TIPS
If you want to create that two-toned effect, by adding and changing the color of the inside stroke, here's how to change the color. In the Image Settings panel, enable the Inner Stroke option. Set the thickness of the stroke and then click on the color swatch at the right edge of the panel. A color picker pops up. Select the one of the preset colors (or shades of grey), or choose an entirely new color.
You can pick any color you want by dragging the color slider in the vertical color ramp within the color picker.
You can use the same steps to change the border color. The border color is really just empty space around each image, with the page background color showing through. So, to change the border color, go to the Page panel and click on the color swatch for the Page Background Color.
Layout Tips
In terms of layout, I'd recommend keeping things simple. Keep the quantity of images low (4 - 8). Remember, the more images, the smaller each cell will need to be.Don't be afraid to experiment with different configurations, BUT if you find a layout (not necessarily the images, but the layout) you like, be sure to save it as a template, so you can reuse it with other collections of images.
To save a page layout as a Template layout, press (Windows) or Command+N (Mac). This brings up a save dialog box for the template layout. Name it accordingly. For example I've called this tempate 4 image grid. Remember, this is about the layout, not the content. Save the template into the User Templates folder. Now you can call up this layout anytime, without having to rebuild it.


To save the actual collage, press the Create Saved Print button, or press ctrl+S or command+S. This will save the entire collage within Lightroom, as a new collection, within the collection of your choice.


And finally, if - after reading all this - you're thinking, "C'mon, there's GOT to be an easier way..." Well, there is.
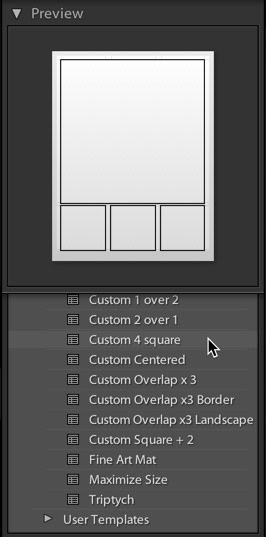
You can give yourself a headstart by choosing an existing Lightroom Template. Open the Lightroom Templates folder from the Template Browser panel on the left, and scroll down until you see templates starting with the word custom. Those templates all use the Custom Package layout style we've been working with. You will even see a preview of the layout, to help you decide.
Wrap up
Well, that's it for this tutorial. It may seem like a lot of work, but it really isn't, once you've crated a template a couple times.I hope you enjoyed this tutorial and learned something new about Lightroom. And if you make any collages, please drop me a line and let me know.