One of the hands-on activities at Adobe Max this past October was helping attendees create a Social Media Silhouette. It was a fun little project that gave attendees direct experience in using Lightroom Mobile, Photoshop Fix and Photoshop Mix. The Make It booth was stocked with iPads, computers and staffed with Adobe employees from across the organization.
The flow was as follows:
1)Staffer took a funny photo of an attendee in front of a back-lit white scrim, using Lightroom Mobile.
2)Attendee was then guided by the staffer to correct the image in Lightroom Mobile to make it a true sillhouette.
3)Attendee guided to correct image problems using Photoshop Fix.
4)Attendee guided to create an image-filled composite of the silhouette, using Photoshop Mix and Adobe Stock images.
5)Staffer sent the composite to Photoshop using PS Mix.
6)An action was applied in Photoshop, to add a logo and hashtag.
7)Final flattened image sent to a printer.
8)Attendee also used a preset email account to send a copy of hte image to themselves.
It was great fun, overall, and really demonstrated how effective the mobile apps can be in a real-world scenario.


Printed social silhouettes, awaiting pick up by attendees.
At a recent tech education conference in Calgary, Alberta, I wanted to generate activity at our booth and show off the apps by recreating what was done at MAX, but on a smaller scale.
I had the scrim material (photographers don't throw things away, we store them, even years after we stop shooting commercially), and I was counting on using one of the flood lights from our booth backdrop to act as the illumination. Of course, I also had my iPad.
What I didn't have was a fleet of wireless printers, or remotely decent wifi. And those things just weren't going to change.
So I decided that I would create the logo/banner image in advance and store it in Creative Cloud, in order to avoid pushing files through the wifi and Creative Cloud and then back down to Photoshop. And rather than having attendees print their souveniers, I would simply create a dedicated email account and let them email the final photo to themselves.
While I didn't have a line up of people wanting to participate, I did get a couple dozen who were game. They had some fun and learned a little about Adobe's mobile apps in the process. At least one teacher liked the idea so much, he was going to try it with his class!
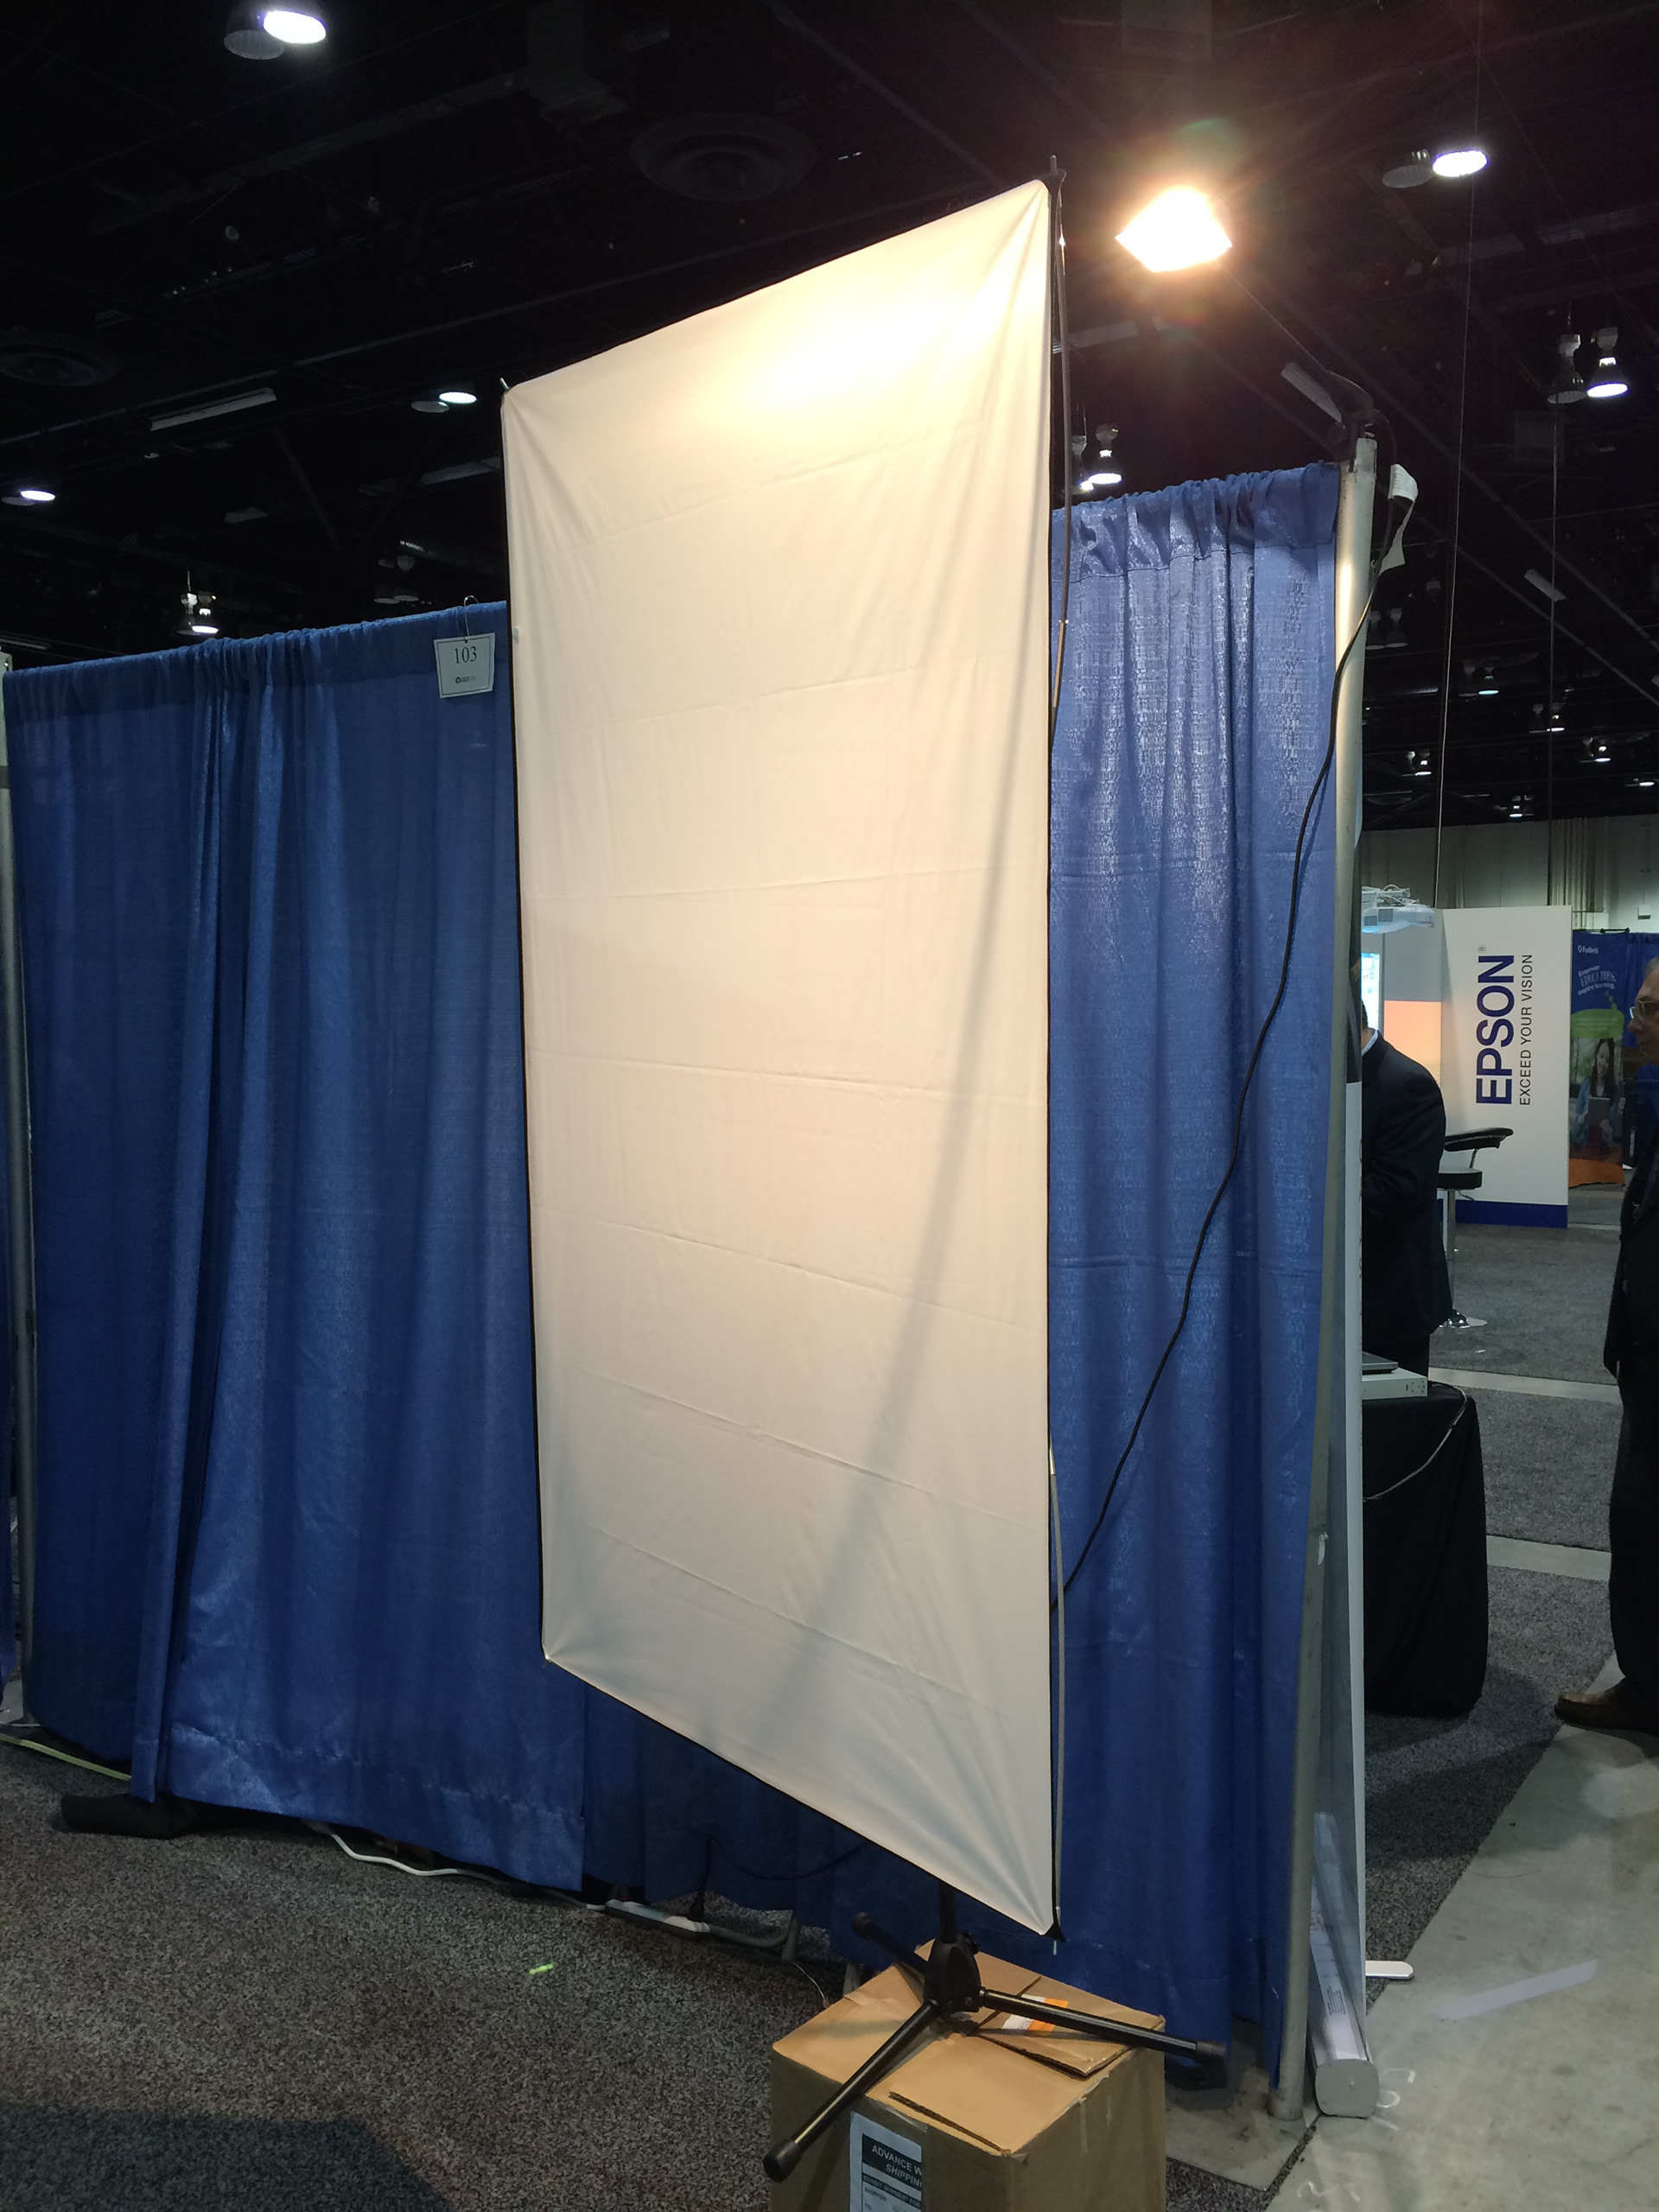
My very simple set up.
My set up, by necessity, was far less elaborate - almost improvised; I had to transport equipment on my own and as a result needed to keep that inventory to a minimum. I packed a specialized stand and tension-supported scrim in my suitcase, which all collapsed down to a manageble size (and weight).
Once at the conference, I first had to set up the booth and figure out if the lighting it came with would work. I really did not want to pack any lights. While not ideal, I managed to jury rig a set up that did a passable job of illuminating about 3/4 of the scrim. Based on the size of my back light scrim, I knew that my silhouettes would be limited to head and shoulders only. By contrast, at MAX, the backdrop was so large people were doing nearly full length shots or even photos with more than one person!
How to make a silhouette, in camera
For those of you who haven't shot silhouettes before, let me explain the ideal scenario, photographically.
The background needs to be brighter than the subject you are photographing, by at least 1 f/stop or more.
The subject should be far enough away from your backdrop that they are not contaminated by the backlighting.
The backdrop should be neutral in color, with minimal to no detail.
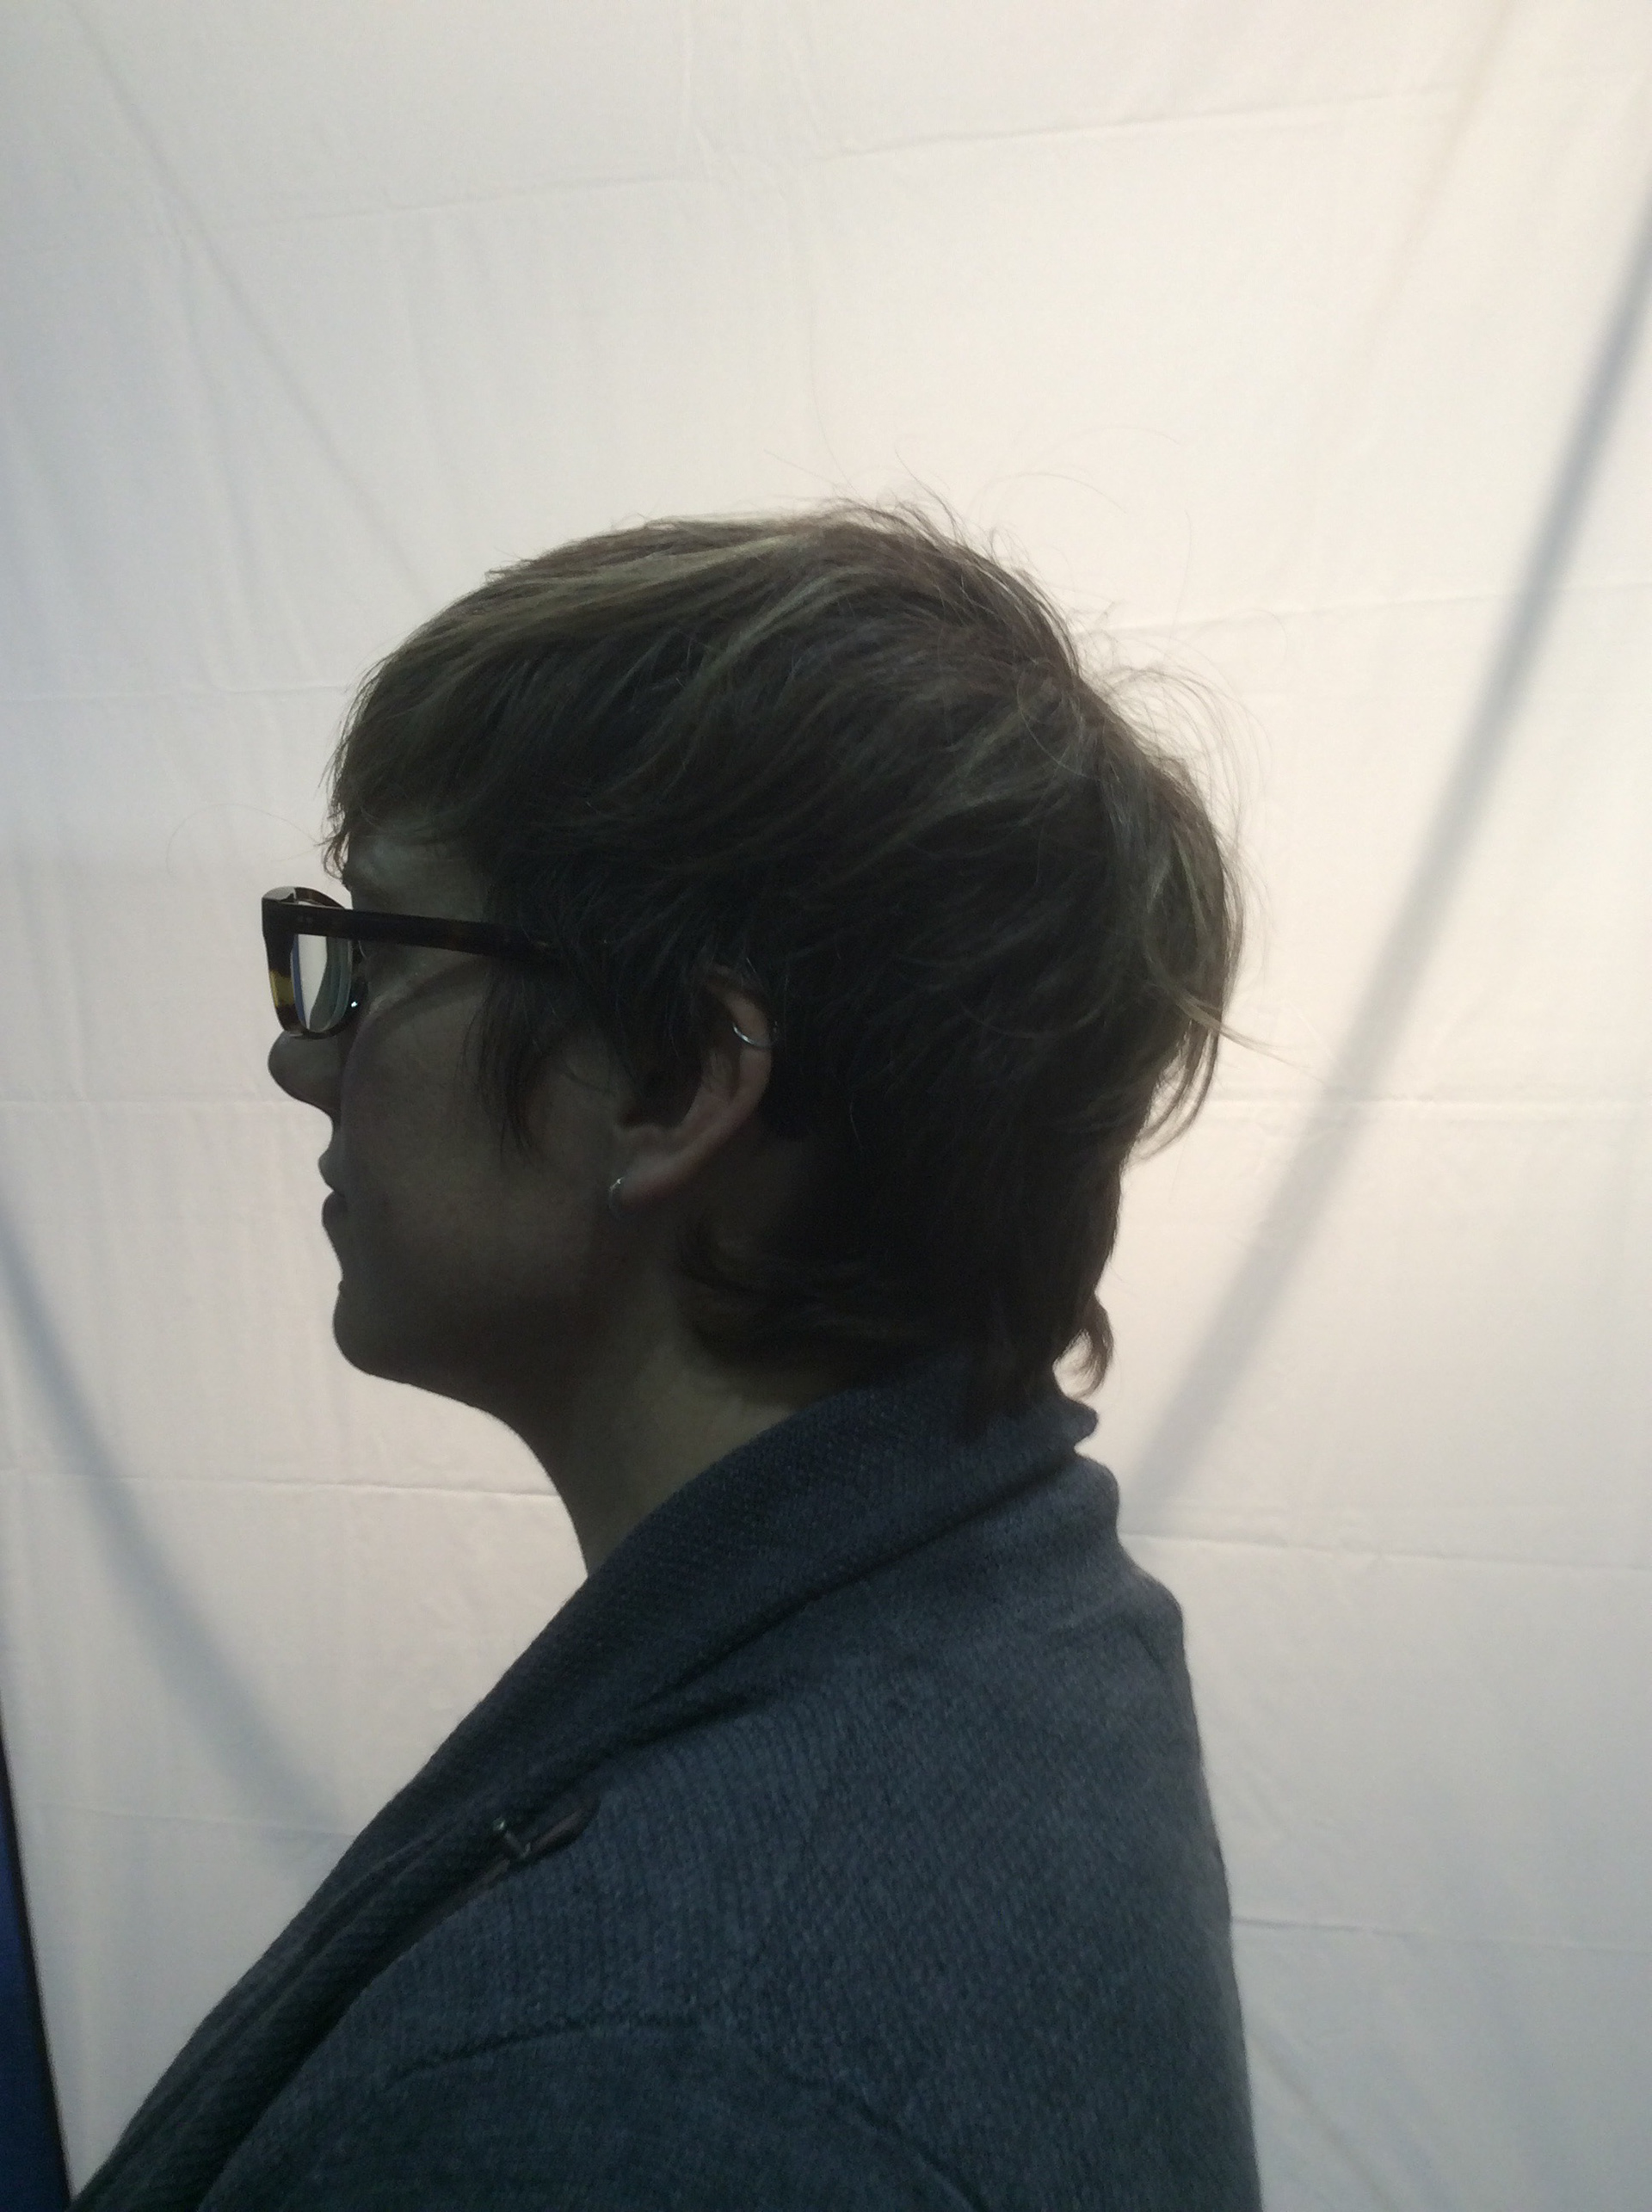
For my setup, I came close to achieving 2 out of the 3 of these points. The one that I missed on (due to the size of my backdrop, relative to the subject) was the 2nd point. As you can see from the intial shot below (Thank you, @laurafeeney, for being my volunteer), I was not only battling with light contamination from the backdrop, I also had to fight the existing ambient exposure of the show floor. And then of course, the tension rods for my backdrop provided an extra challenge.
However, I wasn't going to let this stop me. And I had some great tools to work with.
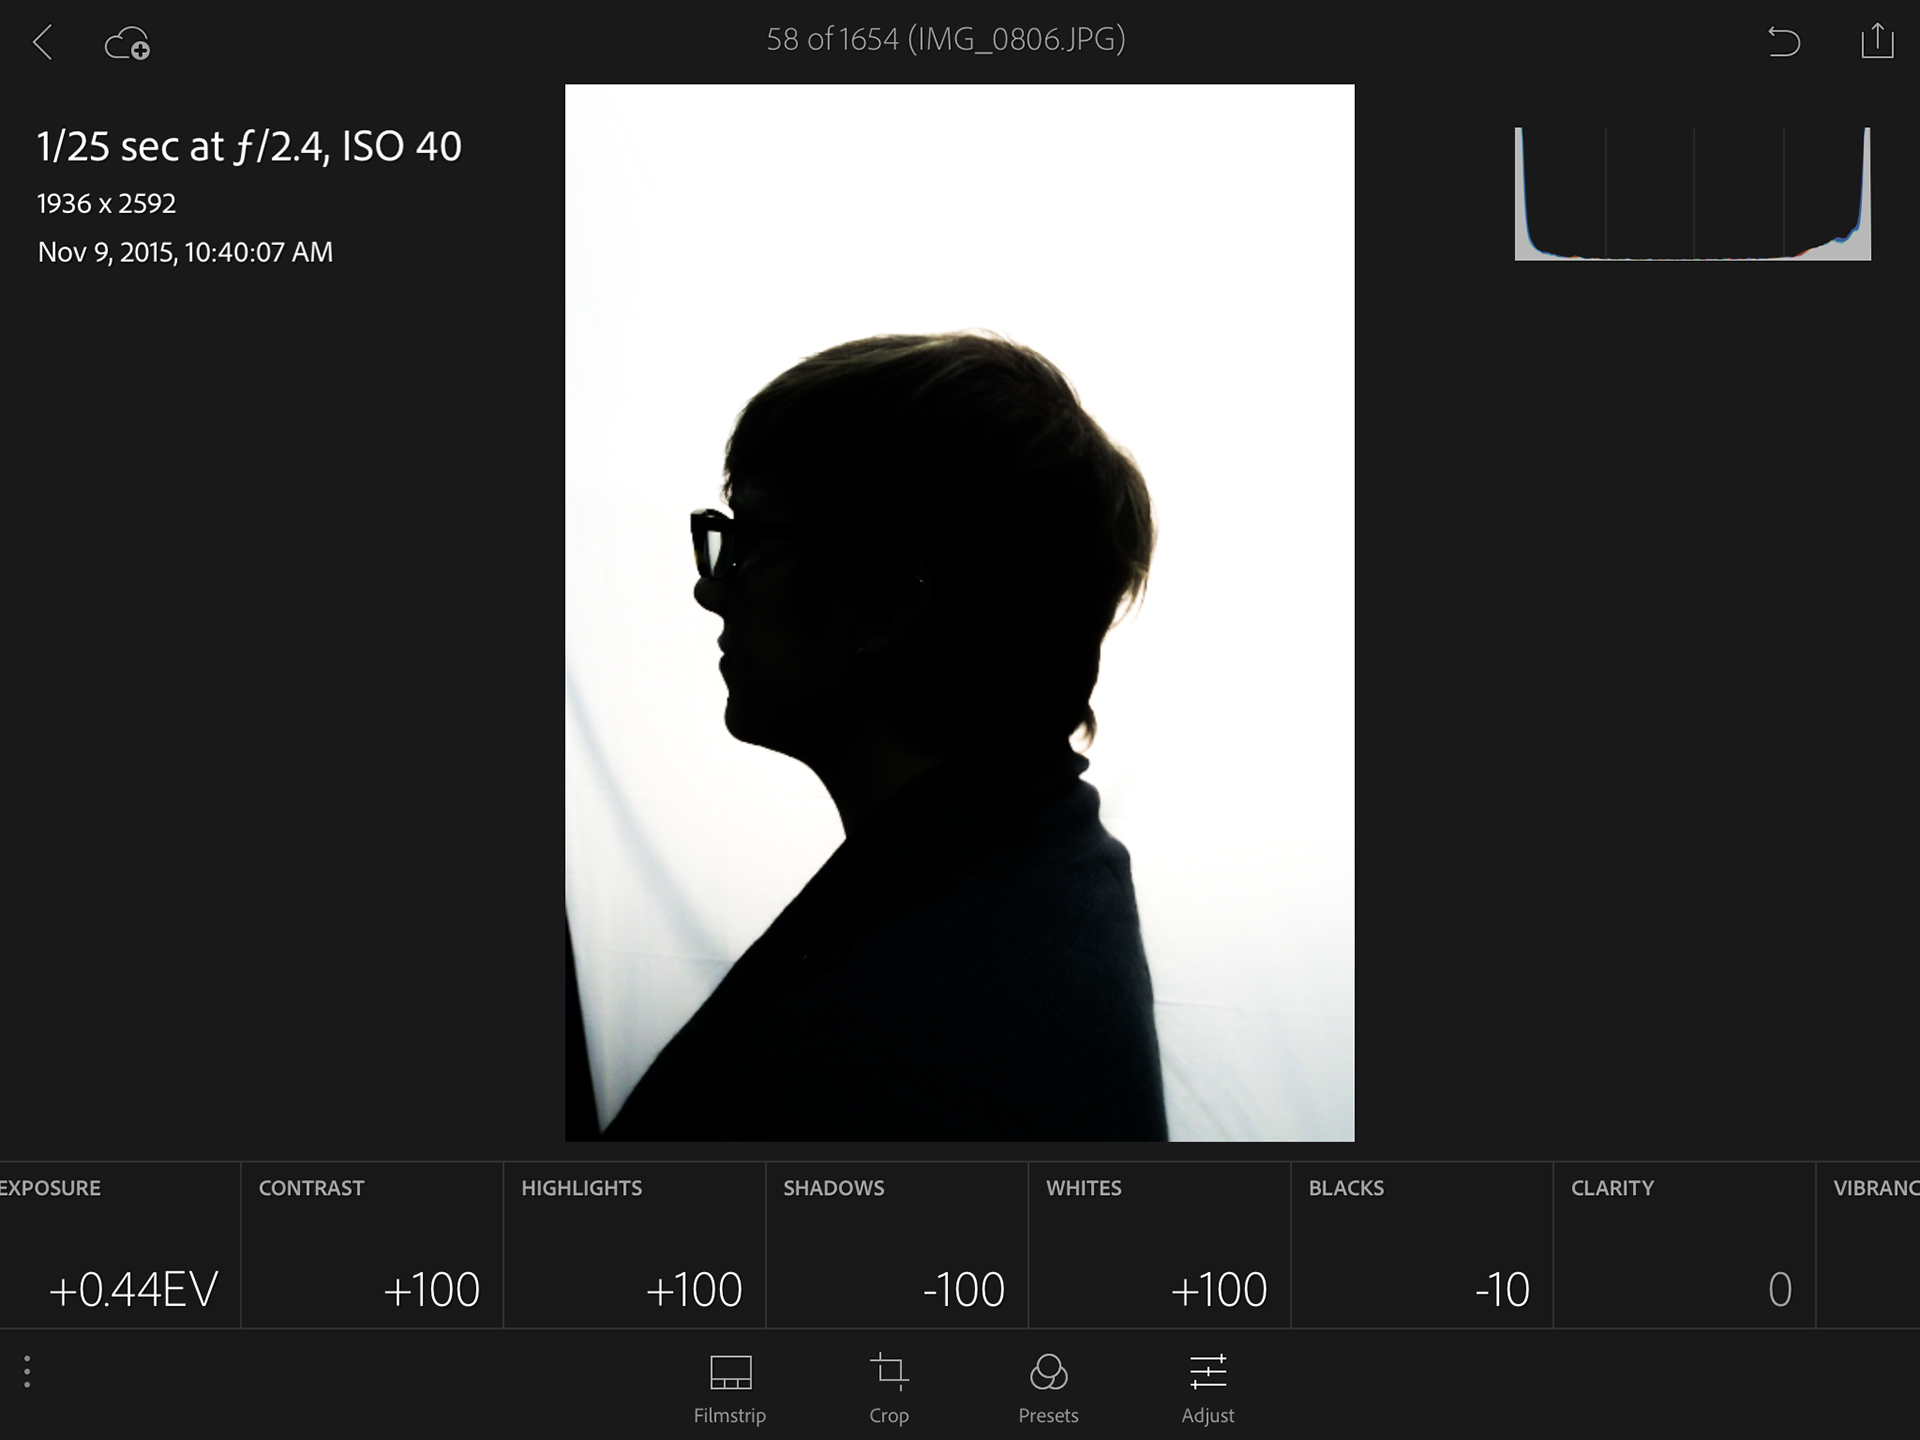
Once the photo was captured through Lightroom Mobile, I had Laura open the image in the same app and she made several adjustments to create more of a true silhouette. She increased the Contrast, Highlights and Whites to +100, reduced the Shadows to -100 and we tweaked the genral Exposure (+44) and Blacks (-10) to give the result seen below. While each subject was a little different, I found that I was consistently setting the Contrast, Highlights and Whites as indicated. Exposure and Shadows varied image to image. If I had a more even lightsource and a little more control over the environment, it's likely those settings would also have been consistent.
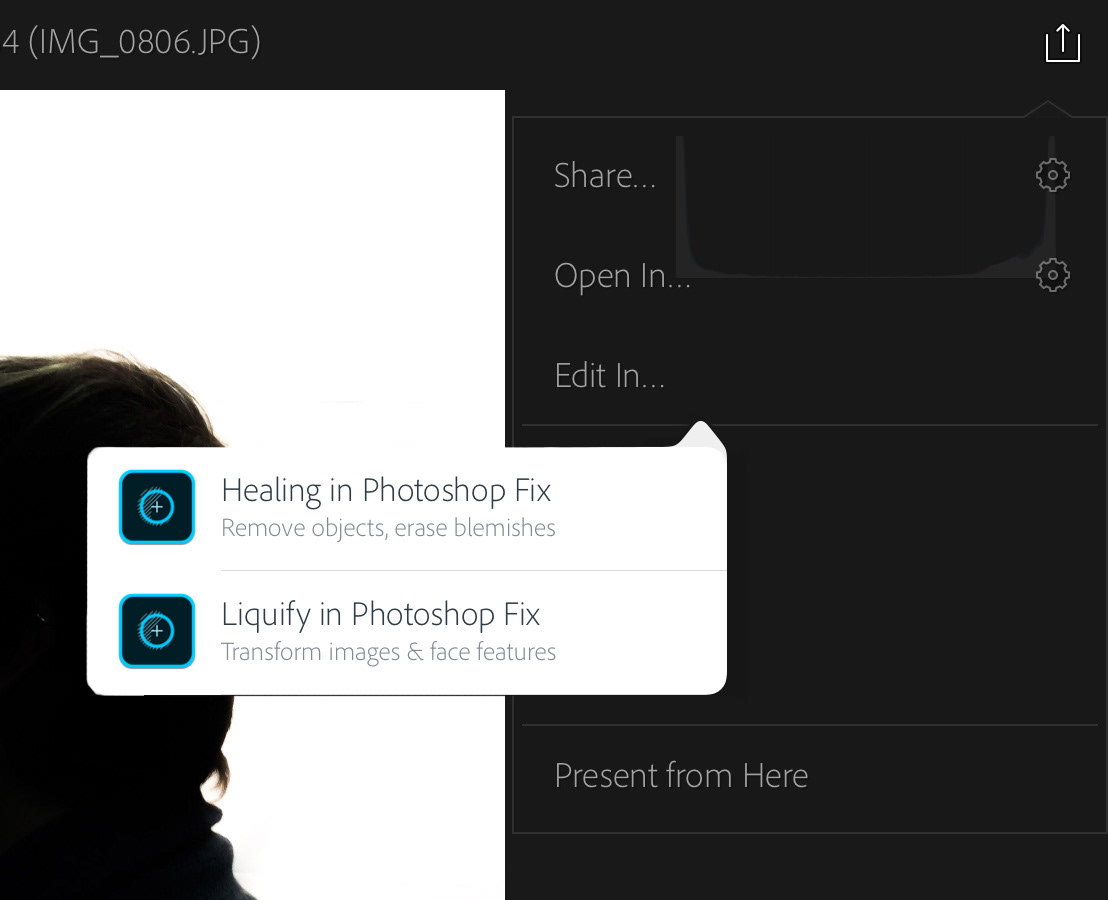
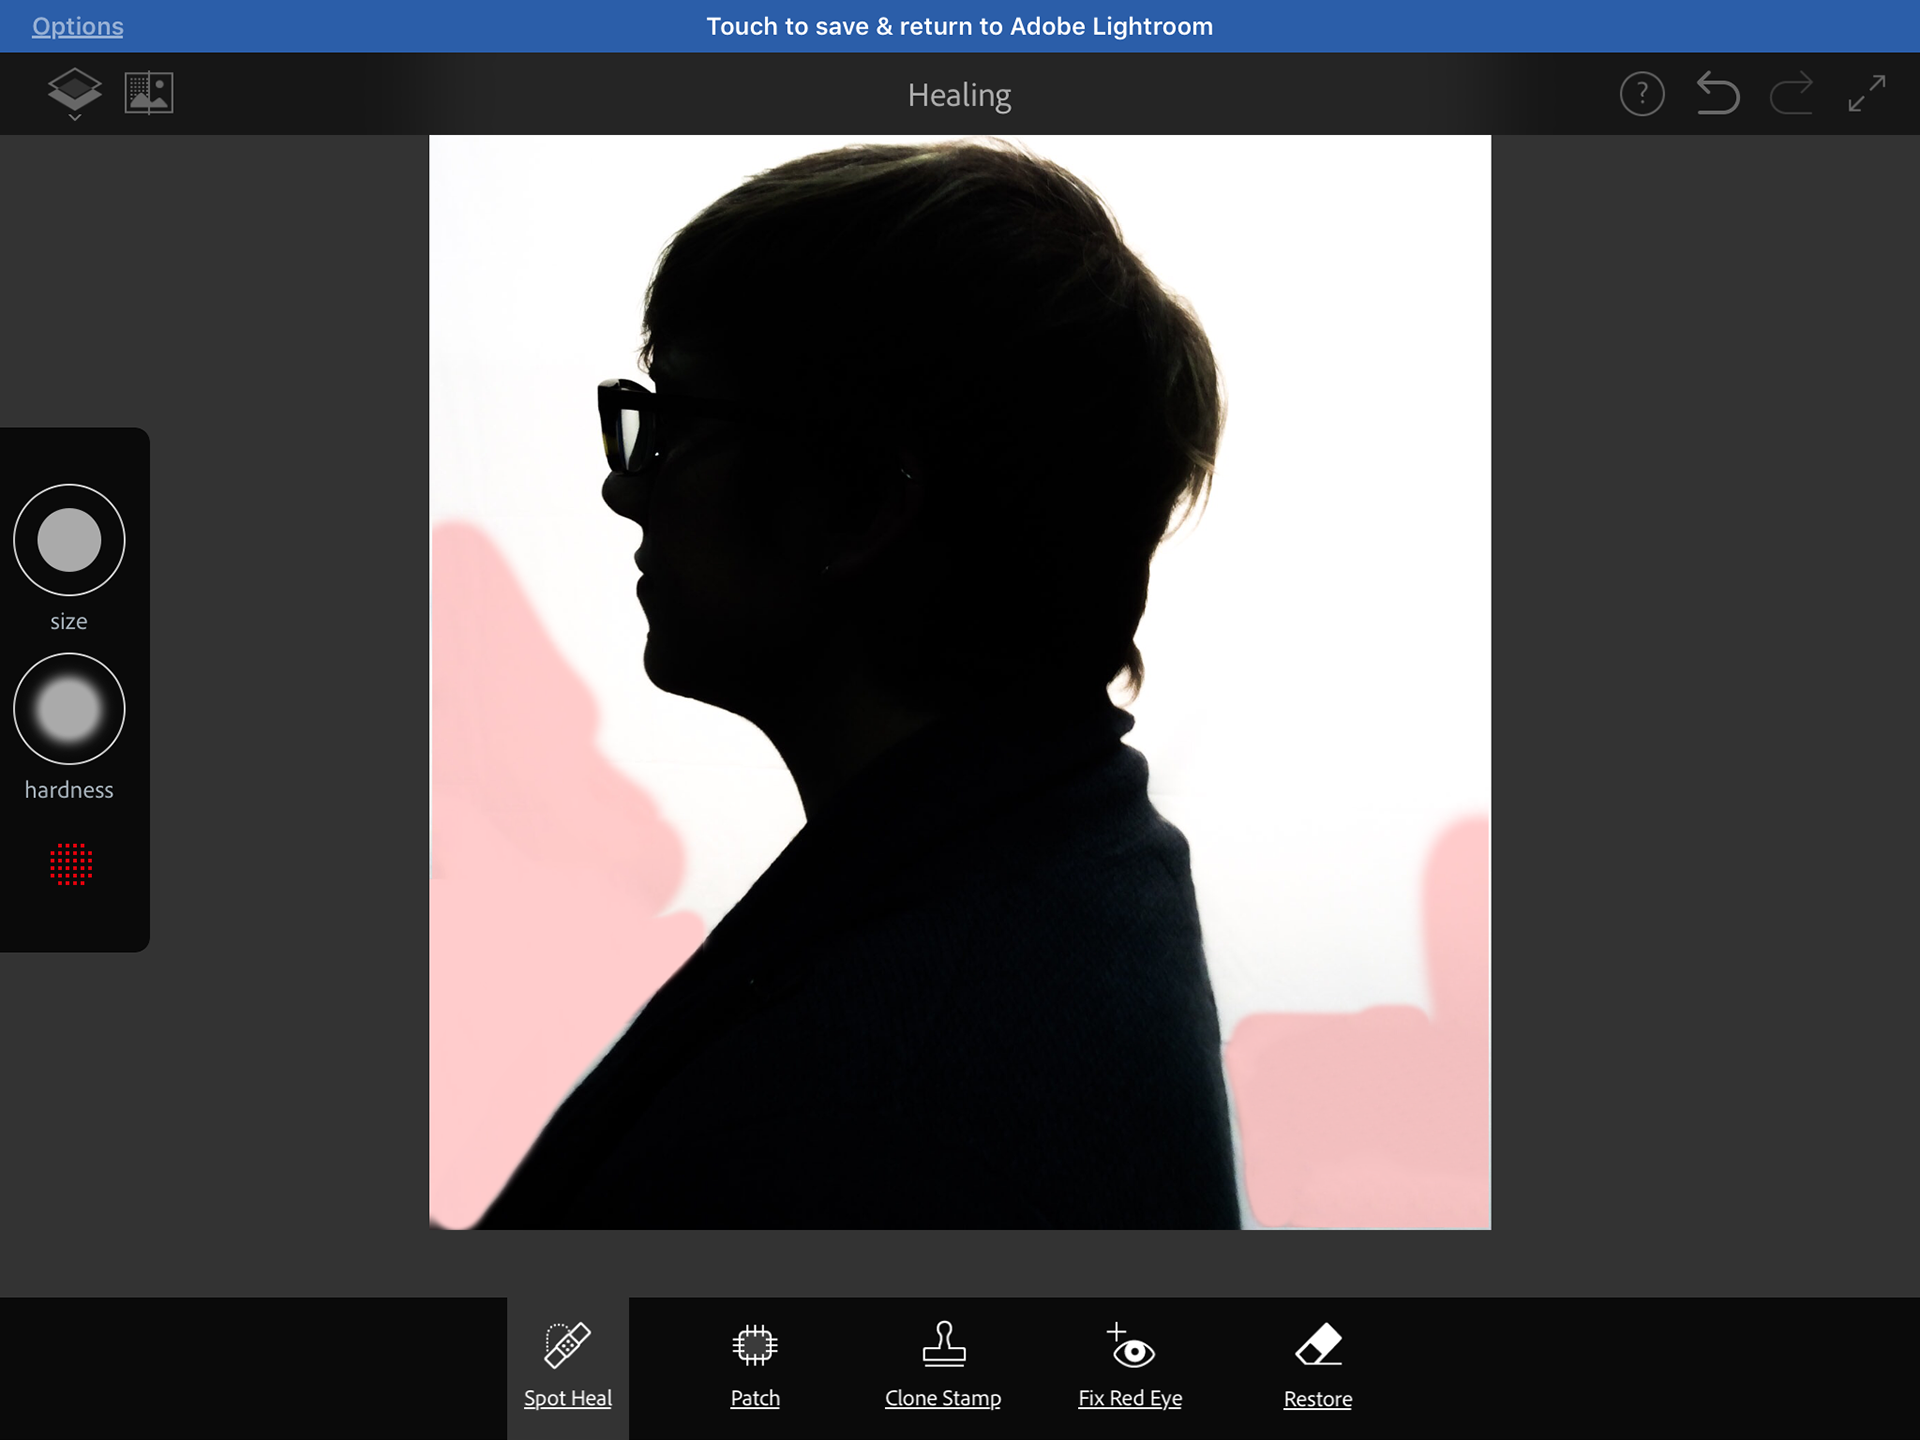
Despite our best efforts, there was still some work to be done, so while the file was open in Lightroom, Laura tapped the Share icon in the upper right and chose Edit In. She then tapped Healing in Photoshop Fix. Lightroom generated a copy of the image and opened it in PS Fix, with the Spot Healing tool already selected.
Using a combination of the Spot Healing and Clone Stamp tools (and her finger), Laura cleaned up various trouble spots like the shadow from the tension rod. The image below shows the areas worked on (by enabling the mask view in PS Fix). When Laura was happy with the clean up, she tapped the blue bar at the top of the app to return to Lightroom Mobile, where a copy of the image was saved.
Back in Lightroom, Laura opened the new image and then chose the Share icon again to save a version to the Camera Roll. The last steps would take place in Photoshop Mix, and unfortunately, at this time, there is no direct way to open images in PS Mix from Lightroom Mobile.

Laura launched Photshop Mix and then tapped the "+" icon on the left of the app to start a new project. PS Mix automatically prompted her to find an image to work on. In our case, she chose the Camera Roll and opened her newly retouched silhouette. No further were adjustments were needed to the image, but if necessary, there are adjustment controls available in PS Mix, too.
Instead, her goal here was to add a new image to fill the black shape. She tapped the New Layer icon on the left of the app, and then browsed for a new image from the Camera Roll (tip: to speed things up, add a special folder with a dozen or so scenic images to pick from).
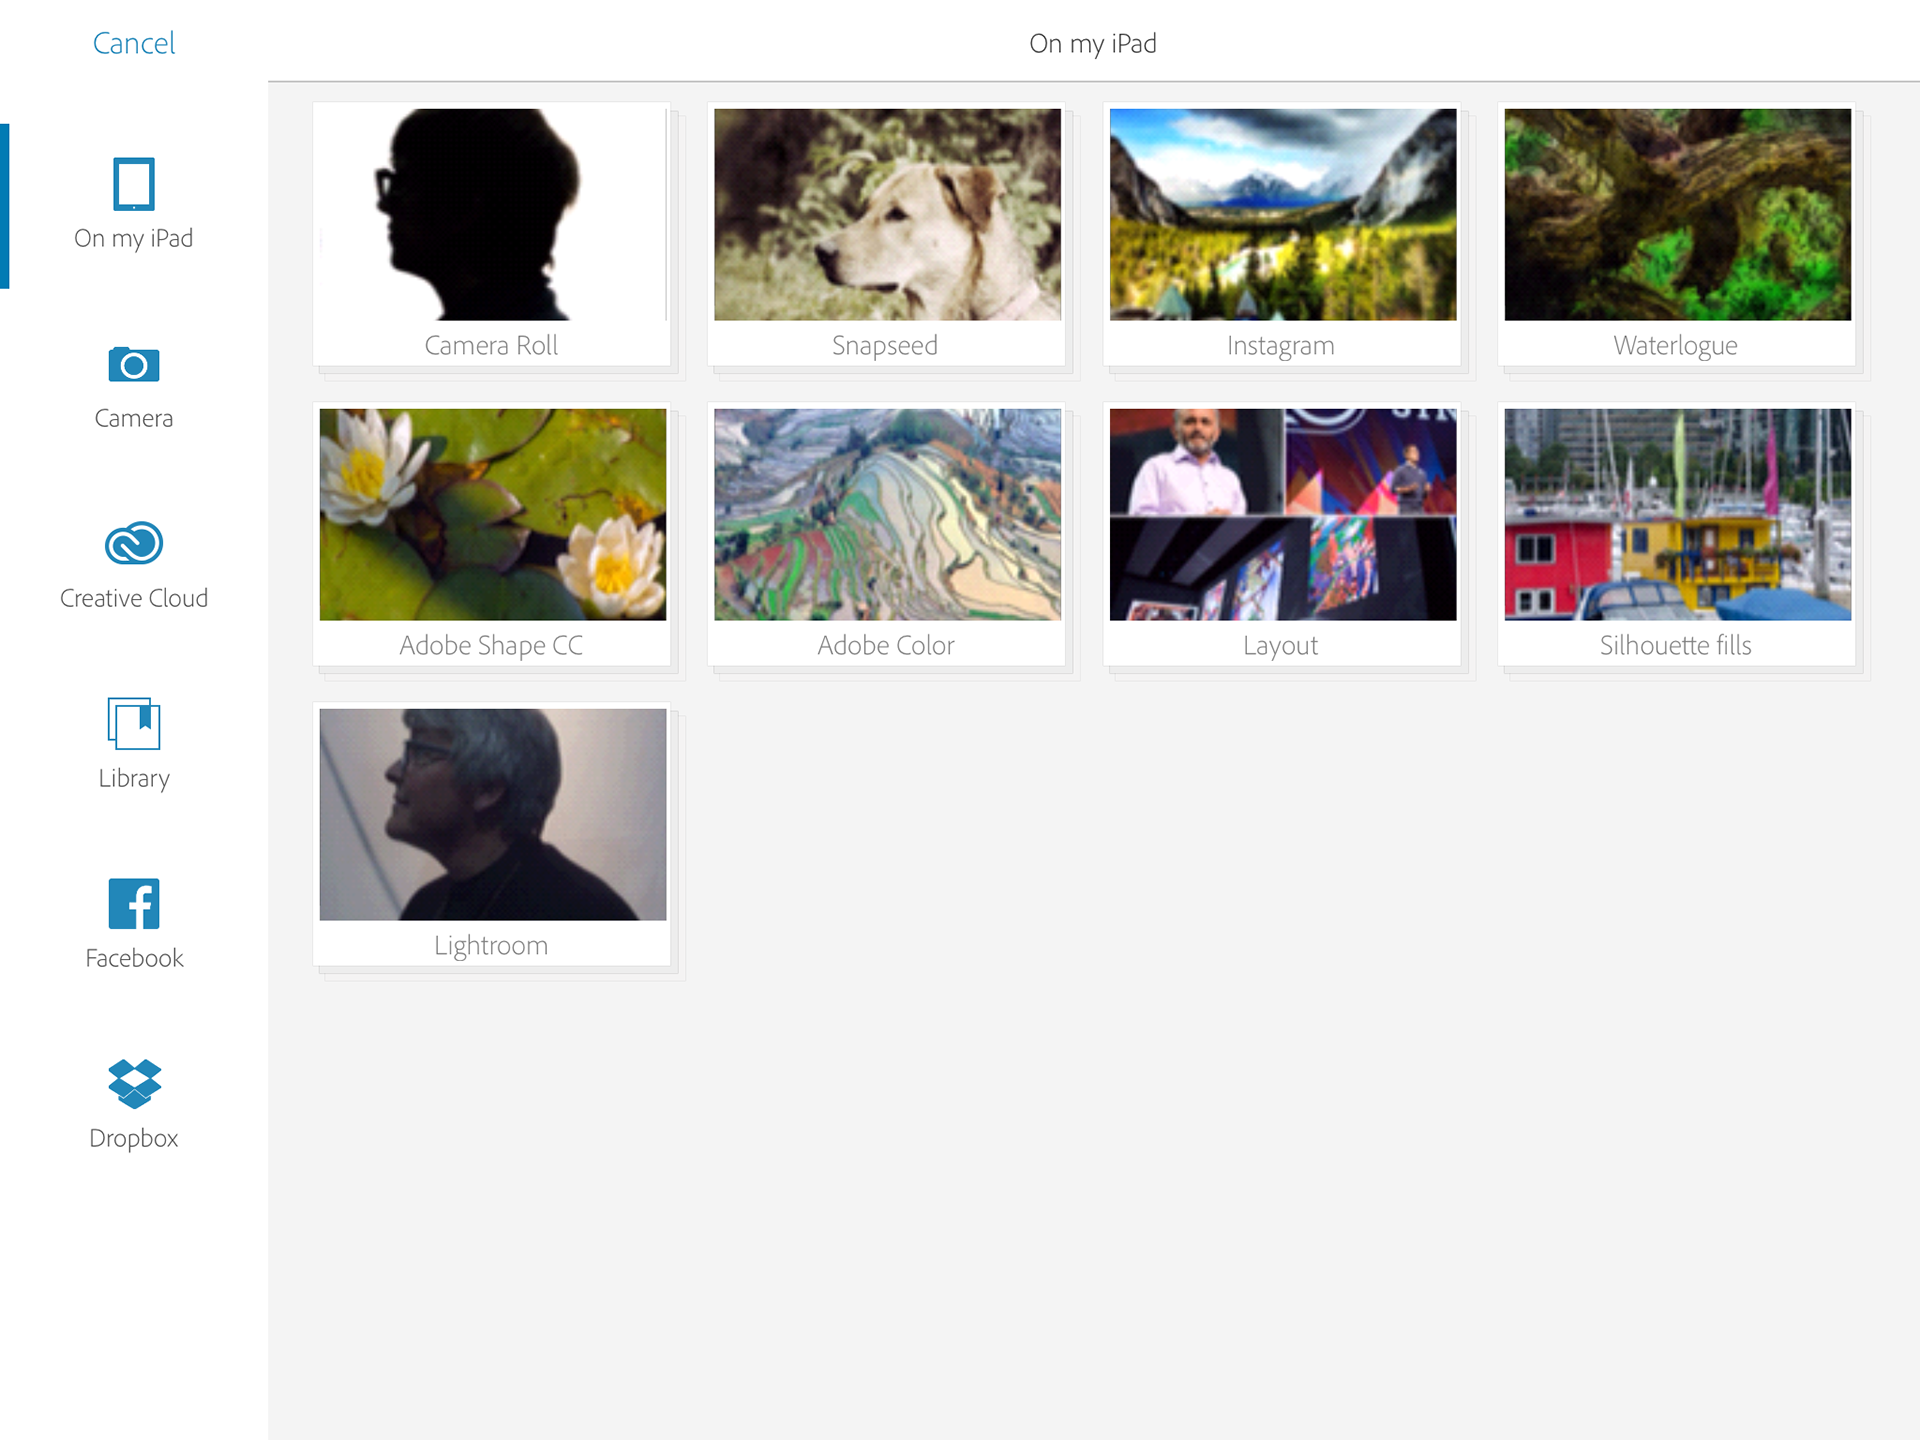
You might be wondering why we just didn't pick the obivious Lightroom folder and that would be a good question. The reason is the the Lightroom folder only shows original images captured by the Lightroom camera, not any of our edited (even in Lightroom) images.
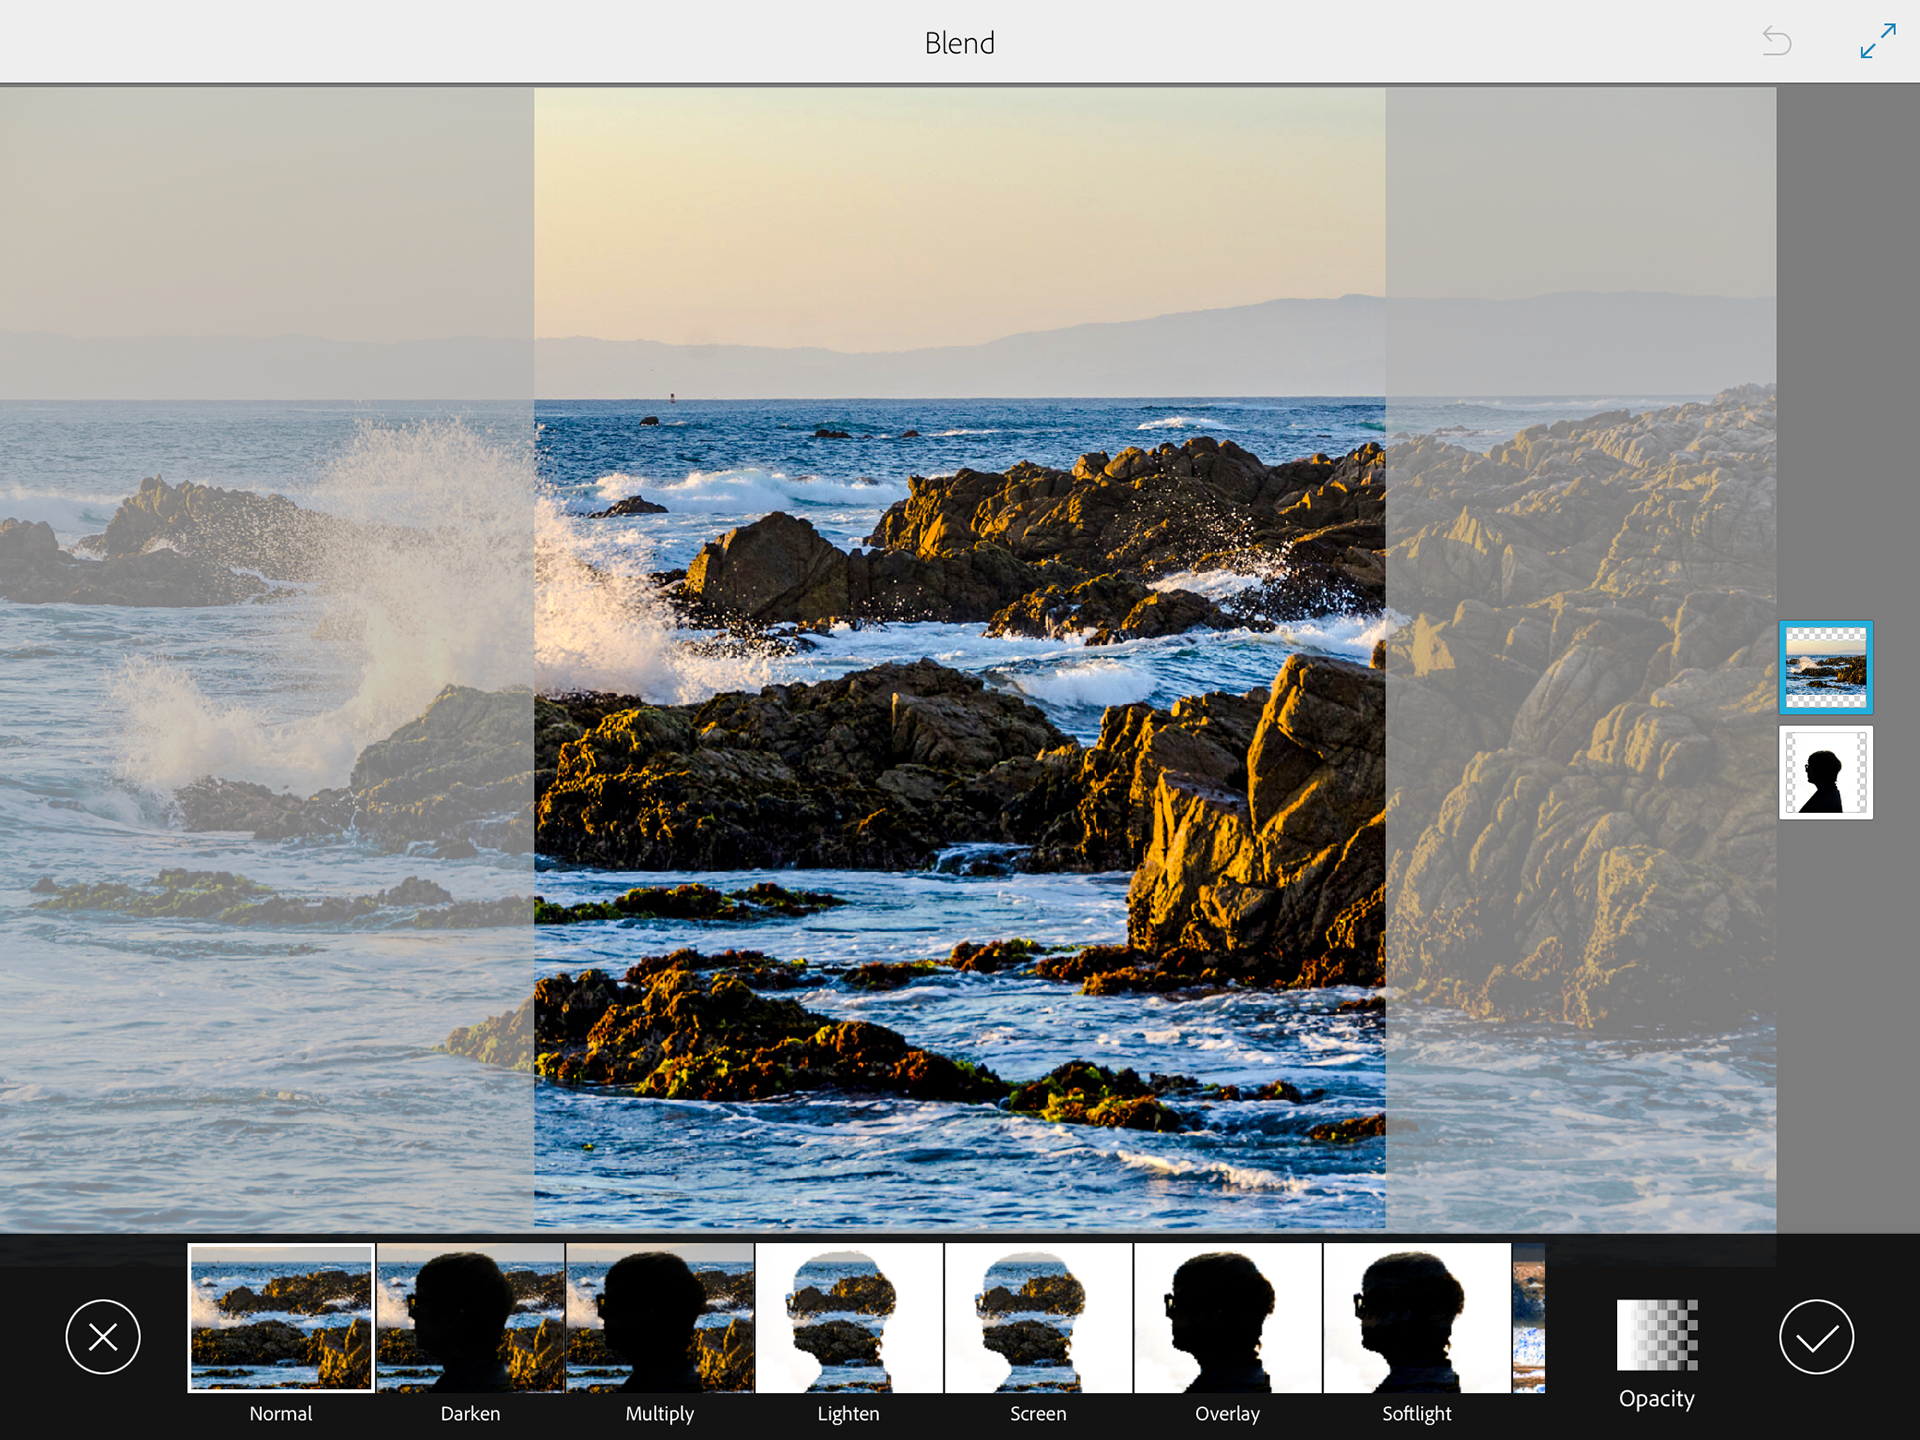
Once selected, the new image was dropped into its own layer, dead center in the project. Laura used her fingers in a pinching motion to scale and repostion the image to her liking. It was important that the fill image covered the silhouette shape entirely.
Once scaled and roughly positioned, Laura tapped the Blend tool and selected the Lighten Mode. She tapped the Check Mark icon at the right to commit to the change, and then took a few moments to position the new fill image to her liking.
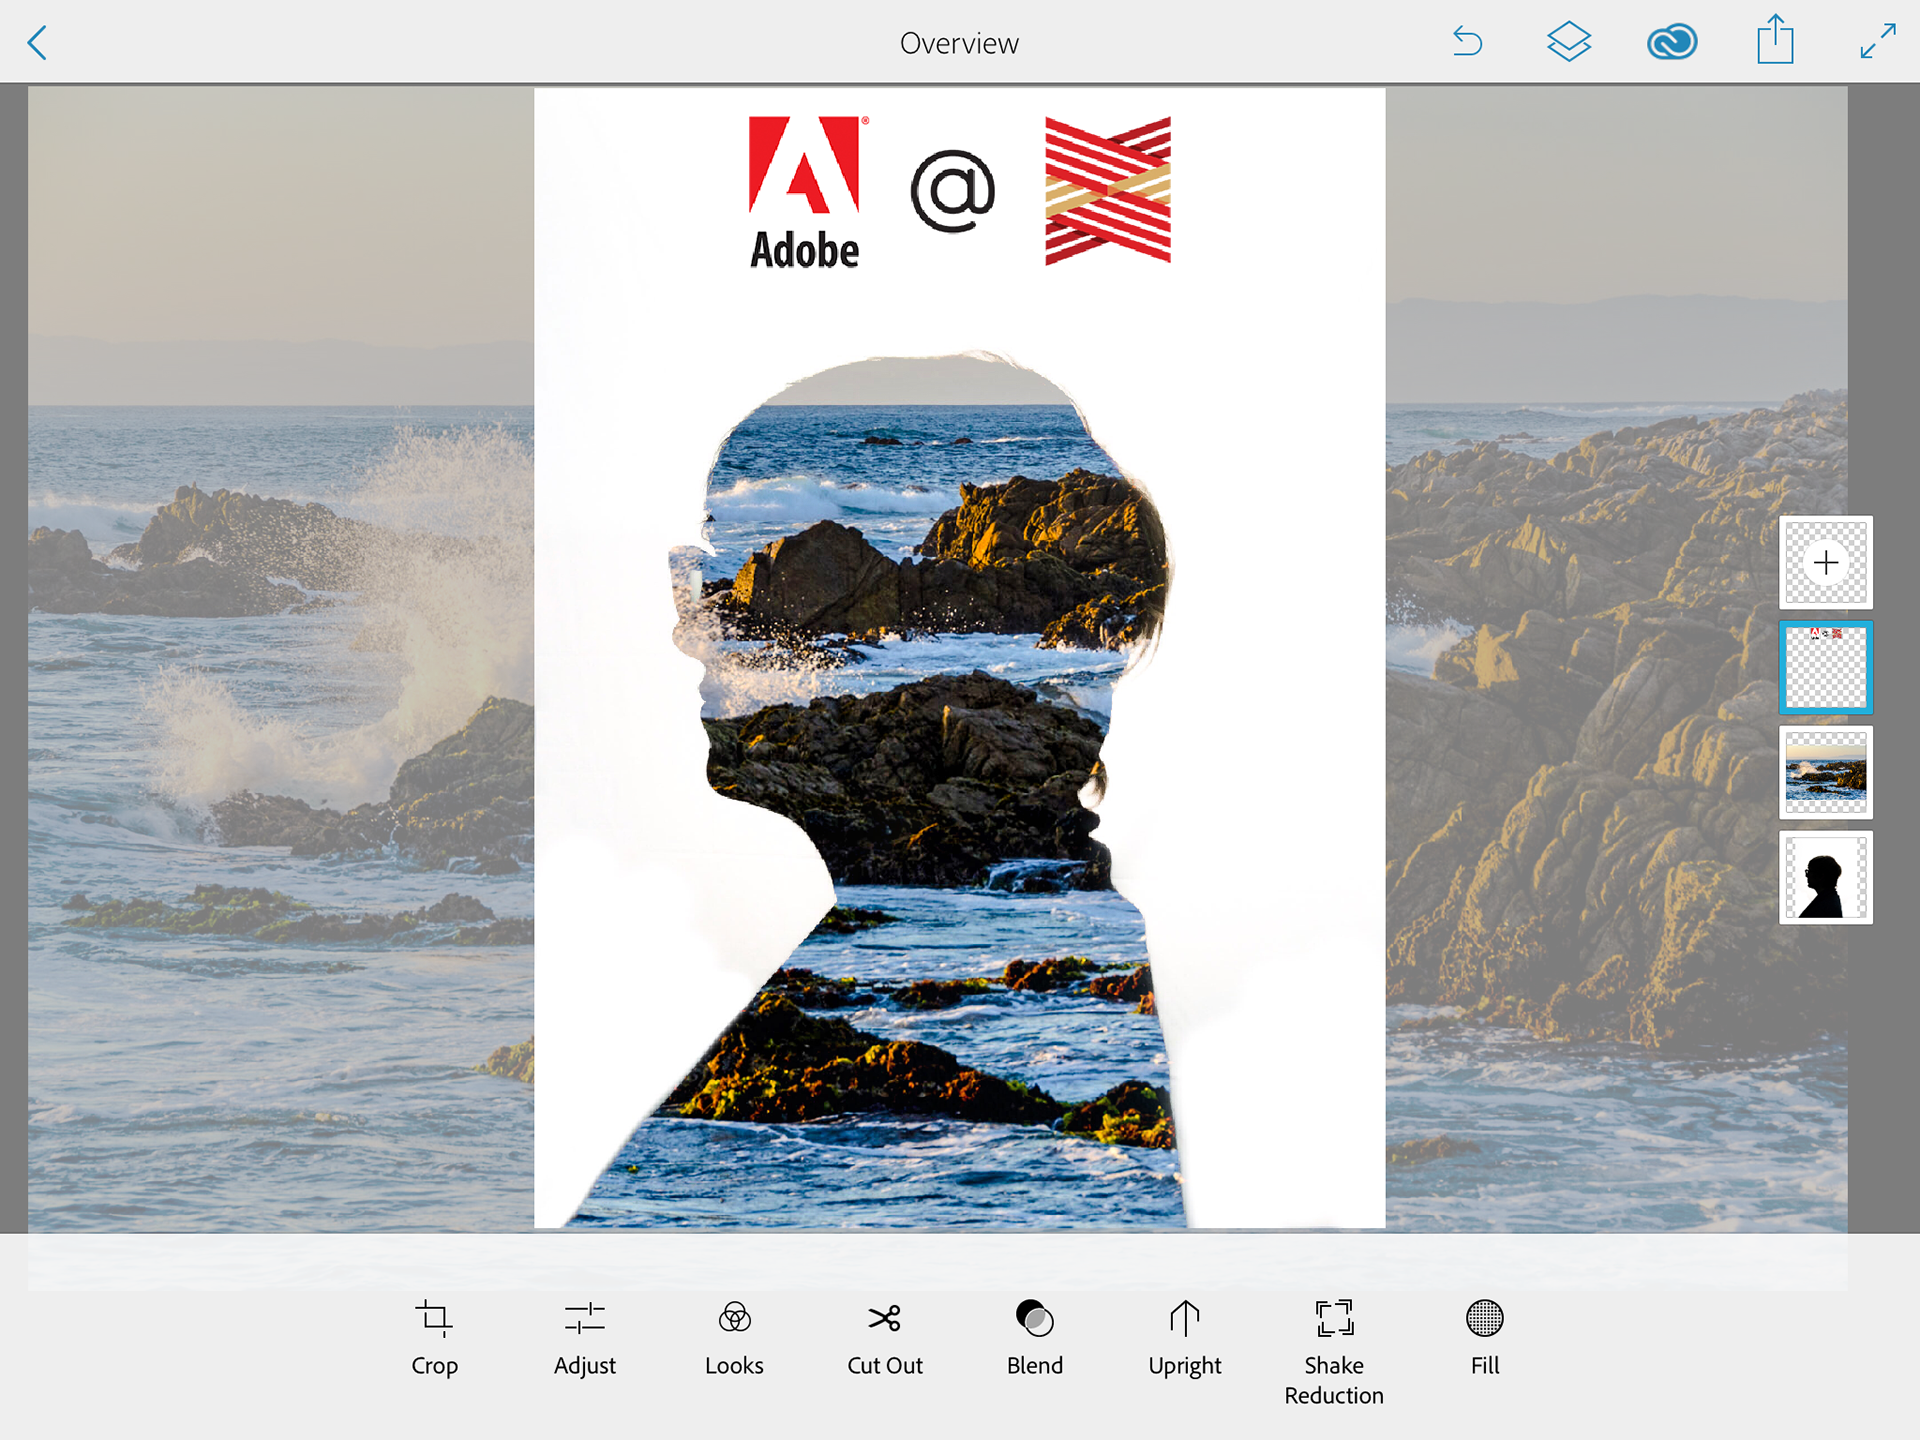
The last step for the image itself was to add the banner. Laura tapped the New Layer icon once again, and this time browsed to my Creative Cloud folder to select the Layered Photoshop file I had created earlier.
Yes! PS Mix can read layered Photoshop files, supports layer transparency and even lets you choose which layers you want to apply.
Yes! PS Mix can read layered Photoshop files, supports layer transparency and even lets you choose which layers you want to apply.
The final step was to save the image back to the Camera Roll and then using Gmail, Laura sent the final image to herself. If you are fine with just using what email client/account you have on your device, you can skip the saving step and choose the Mail icon after tapping Share...
Wrap Up
Well, that was the overall workflow that I created, to do this really cool, engaging activity on site. In hindsight, while I only helped a couple dozen people make their social silhouettes, based on my limited resources, that was probably a good thing. The last thing I wanted was a long line up of people dying to get their photo taken. If you plan to do something like this at a PR event, plan on bringing along 3 or more iPads and have enough staff to man them at all times. And of course, make sure no one leaves the devices unattended.
I hope you found this project interesting and I'd love to hear if you try it out yourself, even if only on a personal level.